VOSGES - The Donon - Bunkers and Trenches
Year of visit: 2011
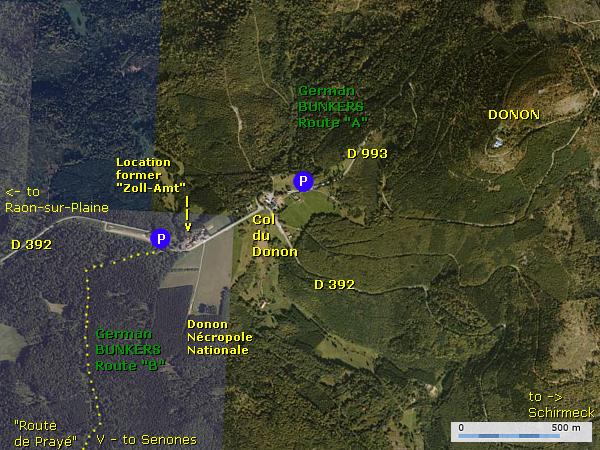
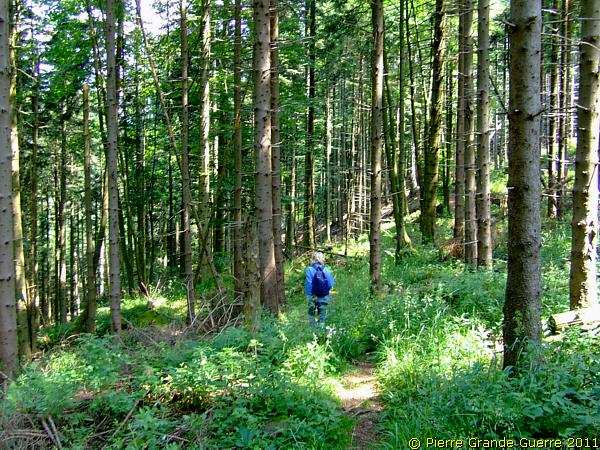
We return from Wisches to the Col du Donon. In June 2011 we spent two warm days walking two routes at the foot of the Donon mountain to explore the former German defensive lines along the 1871-1918 Franco-German border. This photo impression will show you many traces of German trenches and bunkers hidden in the beautiful woods at the foot of the Donon. In three frames you will find some background information about the strategic importance of these lines, about the “inhabitants” of these dug-outs, and a concise “Bunkerology”-chapter, an introduction to the evolution of German concrete shelter bunkers. Both Donon walks, Route “A” and Route “B” , will be introduced separately in more detail below.

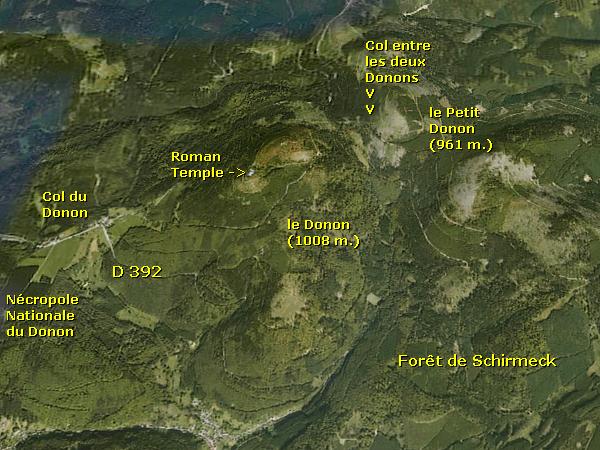
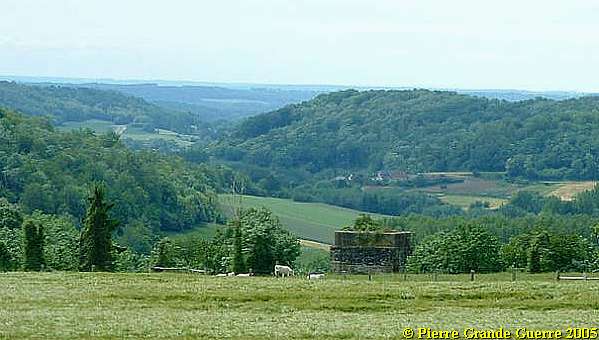
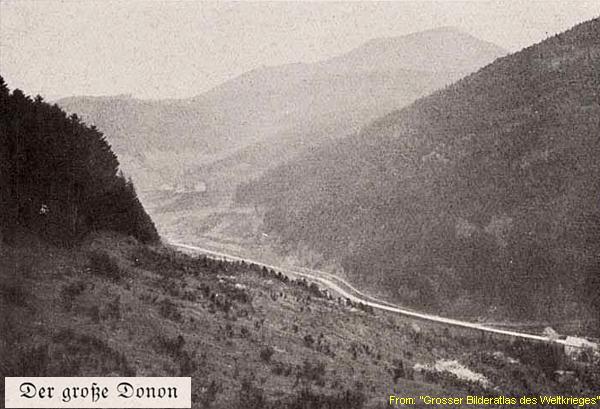
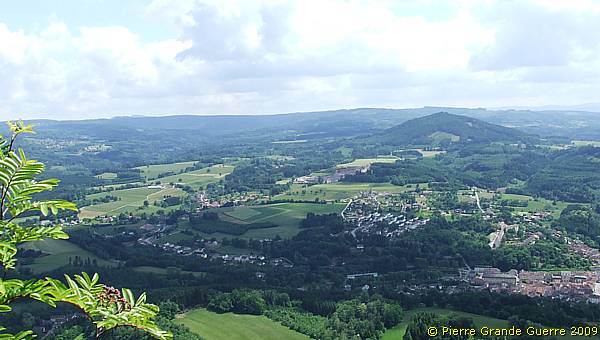
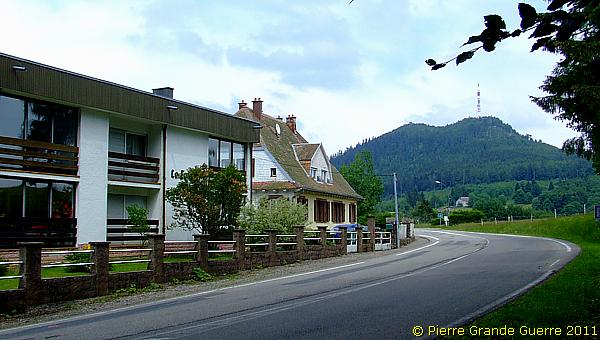
For our orientation let us begin with a view eastward to the Donon mountain. Left is the D 392. Before us and behind the agriculture tank is the path upward to the Donon Nécropole Nationale .
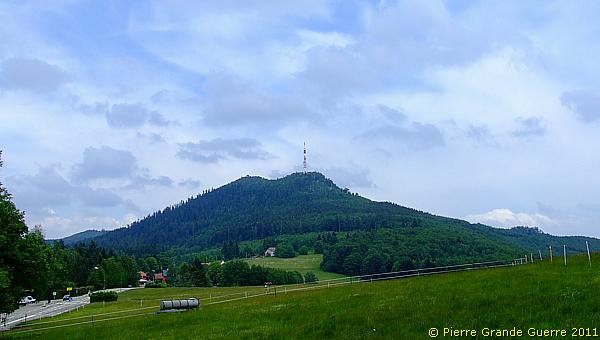
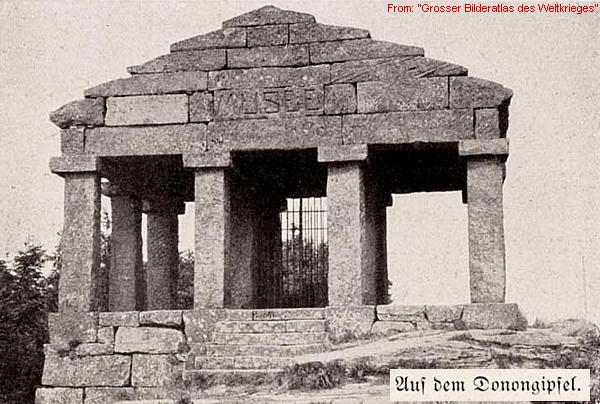
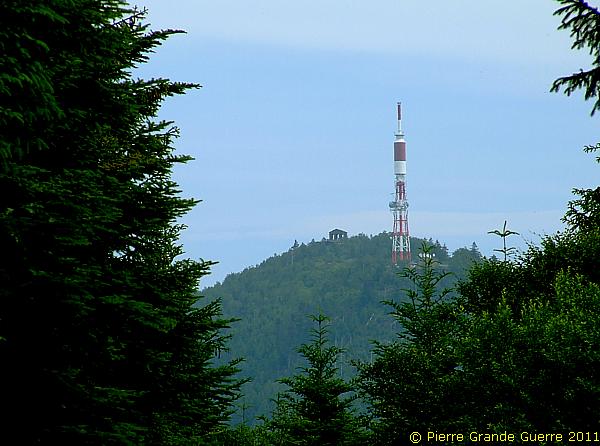
Teleview of the summit of the Donon. The view of the original Roman Temple (!) on the left ...
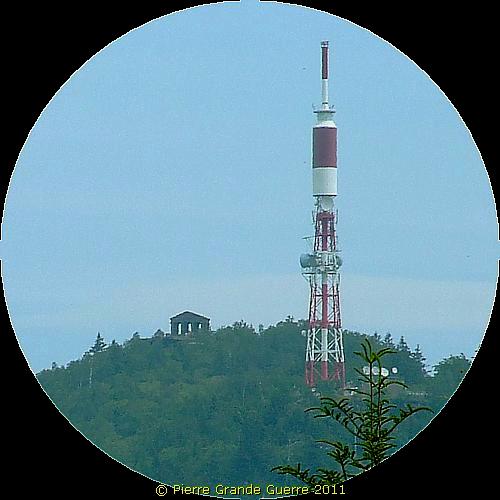
... has been spoiled by this ugly modern communications tower.
Walks - Route "A" and Route "B"
Allthough we will depart for
Route "B" later on this page from Senones
, both walks, Route
"A"
and Route "B"
, start at the Col du
Donon at two different points about 1 km. away from each other.
In less warm weather and with a healthier condition than mine, some of
you might be able to combine these walks into a visit of one day.
Although Route "B", which stays on the same ground level, is
a rather easy walk, on the other hand Route "A" can be
difficult, because it is ascending along a steep western slope of the
Donon to the Col Entre les Deux Donons.
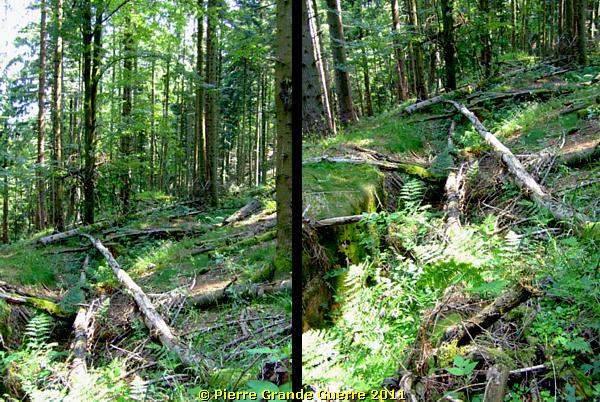
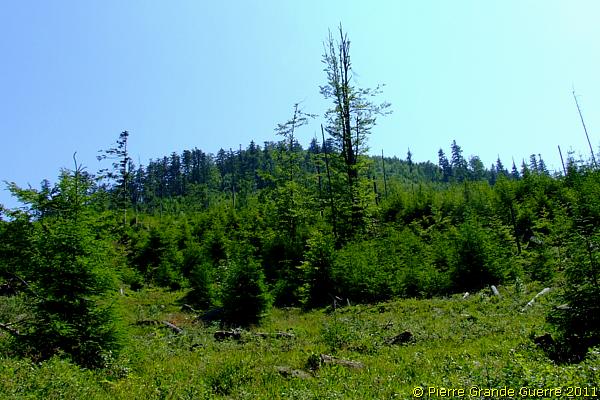
There are more traces of trenches and bunkers than we can show here, or than we were able to locate. We may have missed some interesting locations. This photo impression is not a complete survey of these lines, but - as always - an impression.
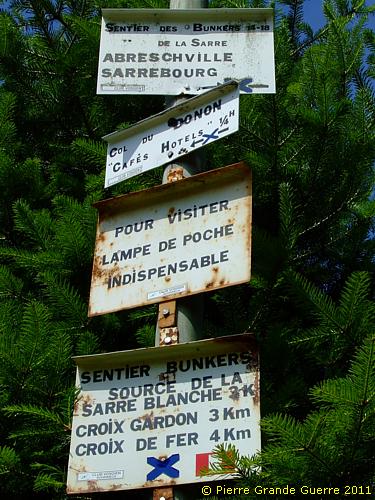
Water, suitable shoes, head protection, torches
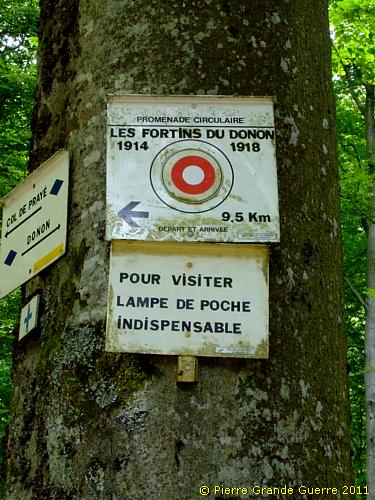
As the French signs on the start locations tell you, for both routes you will really need torches, as the routes will lead you directly through pitch-dark tunnel systems, sometimes without any other option to pass it outside.
Ceilings in these dark dug-outs can be lower than you expect. Generally speaking from my own experience, for exploring dug-outs I would advise always to wear some head protection. A helmet is perhaps not necessary, as even my felt hat gives a timely warning before there is a nasty collision with a low ceiling.
So, the minimum requirements for these walks are drinking water, suitable shoes, a torch or flashlight and some head protection !
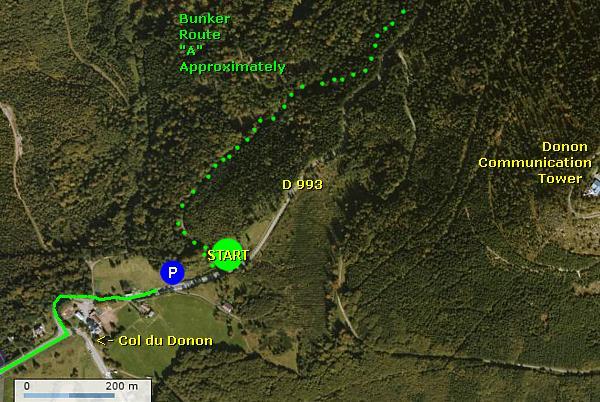
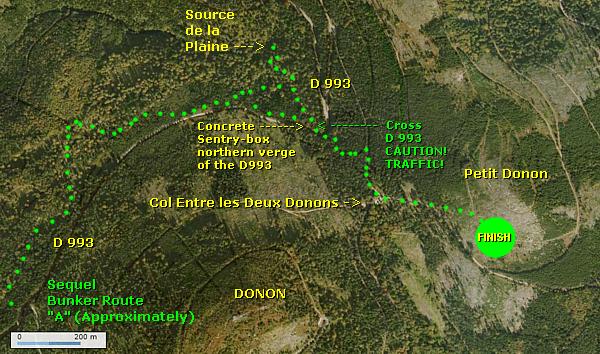
Route “A”
Our Route “A” starts at the
beginning of the D 993, north of the buildings at the Col, where you
will find along the road ample parking space. From there you walk some
150 m. northward to enter the wood west of the road at the location of
the information signs.
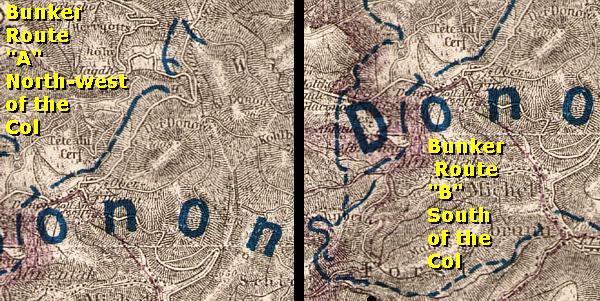
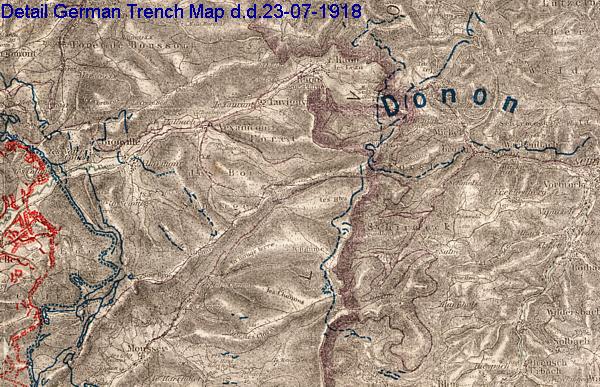
Our route continues northward, following roughly the blue line on the trench map detail, and
parallel and sometimes even close to the D 993. During the second half
of our walk we will descend into the valley to enjoy the landscape
around the source of the Plaine river, before we climb the slope,
crossing the D 993, continuing upward and eastward to finish at the Col
Entre les Deux Donons with a view at the summits of both Donons.
Warning: Weekend motor noise!
Because the D 993 and the Col are very popular in the weekends with a majority of German motor bikers, I would advise you not to do this walk then, because of the loud noise, which could disturb your peace in this fine natural setting! So, be warned!

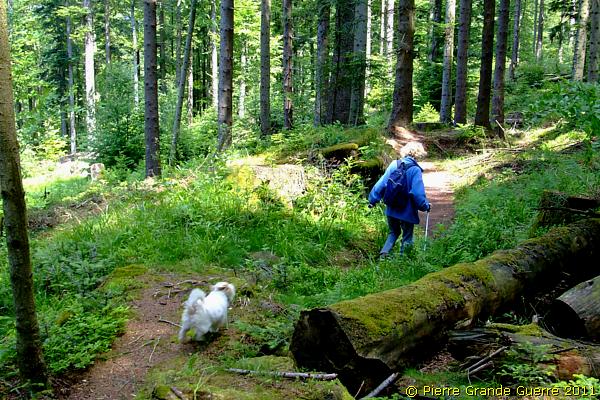
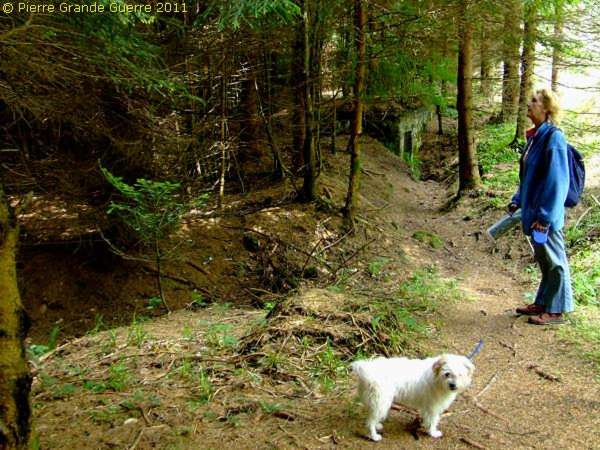
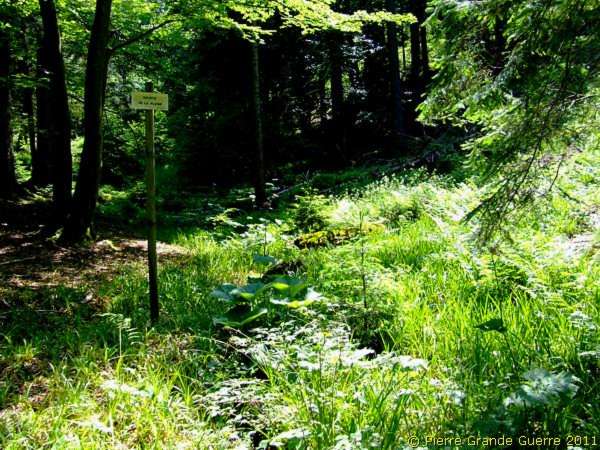
After having parked your car at the Col du Donon, you will easily find these signs.

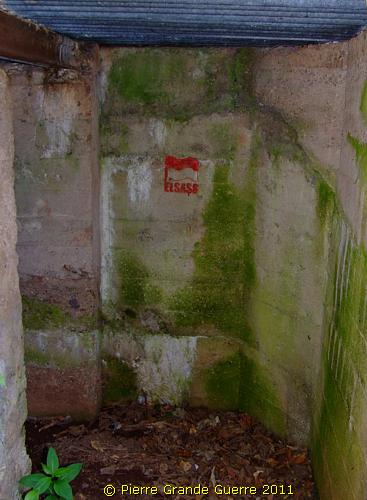
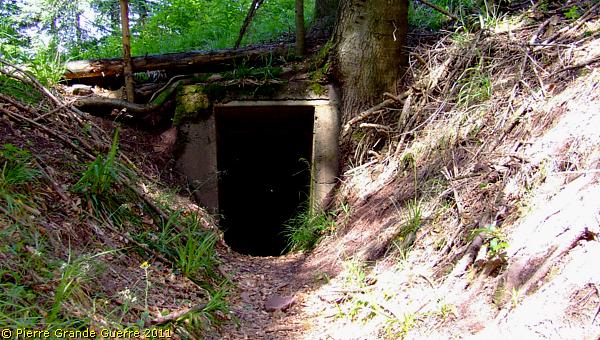
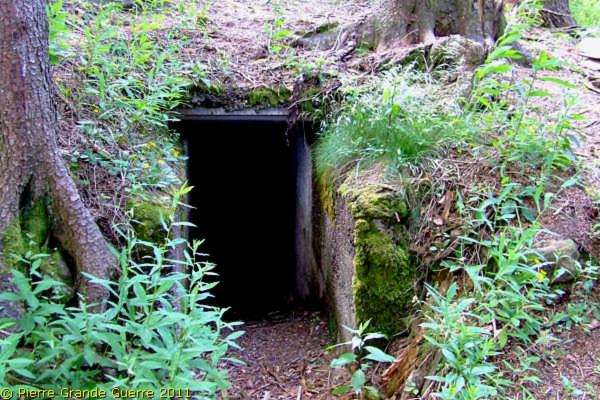
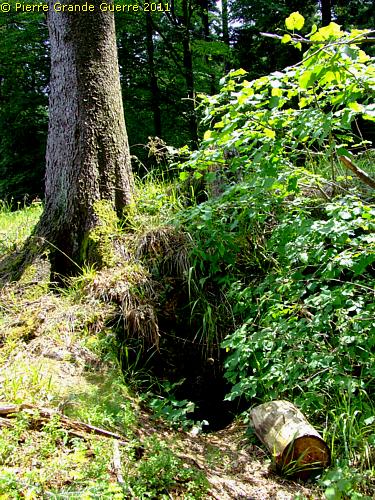
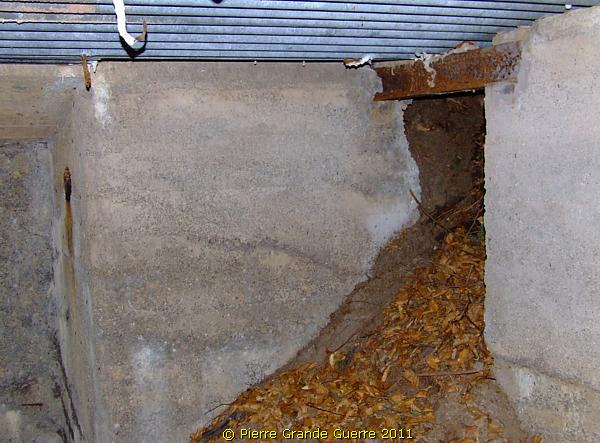
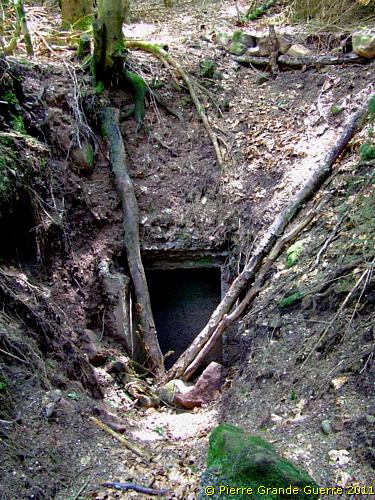
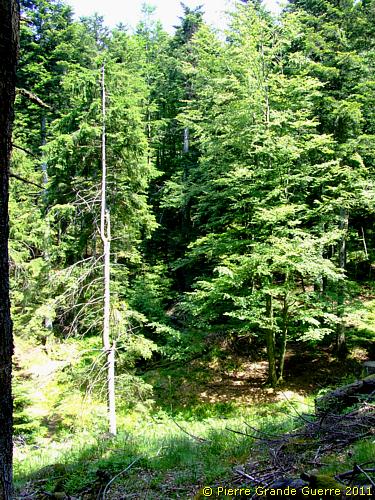
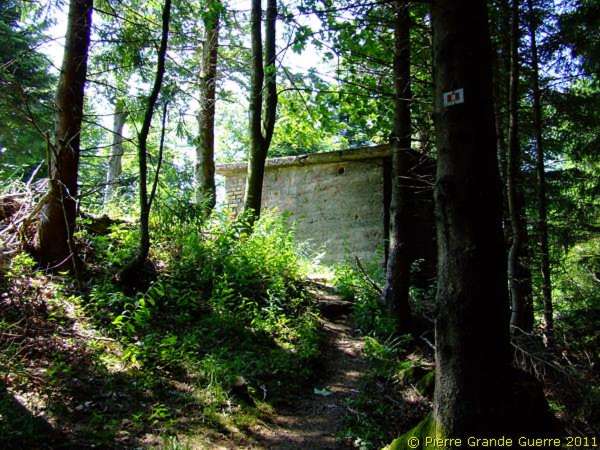
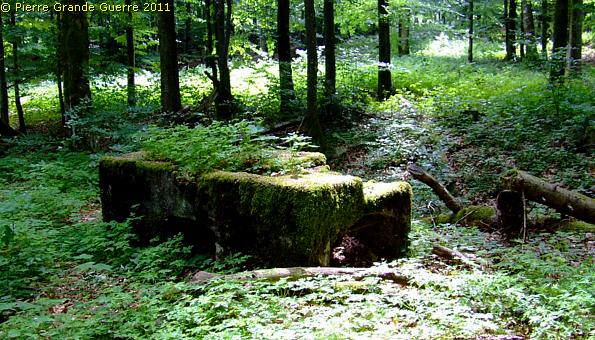
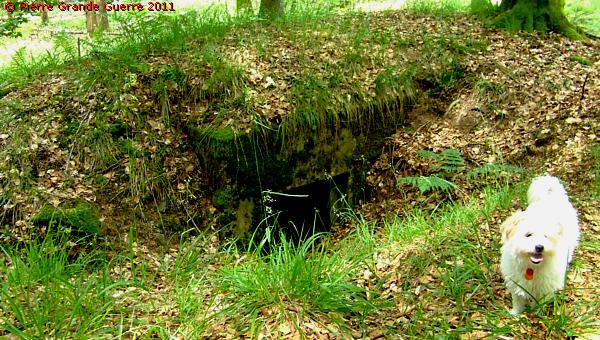
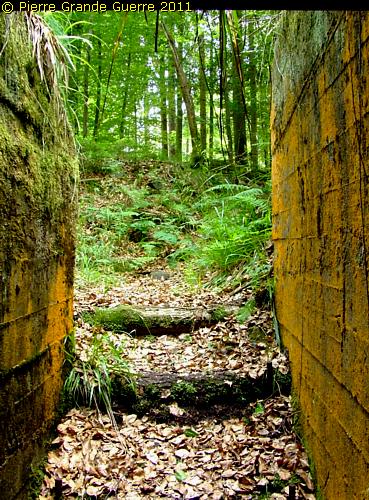
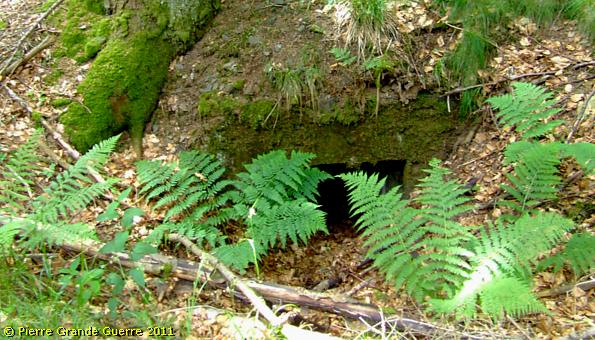
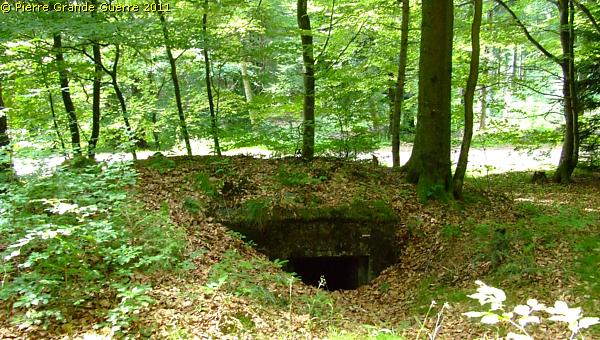
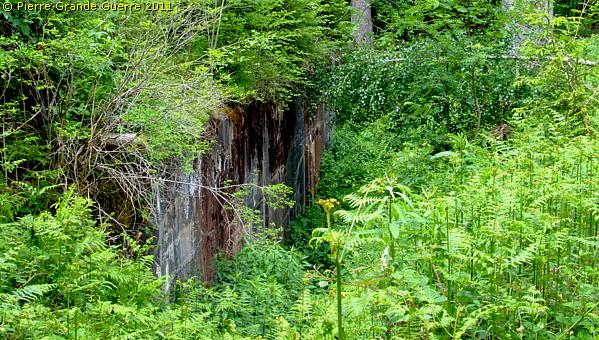
Just as we enter the wood, ...

... we find hidden under the trees and under the vegetation ...
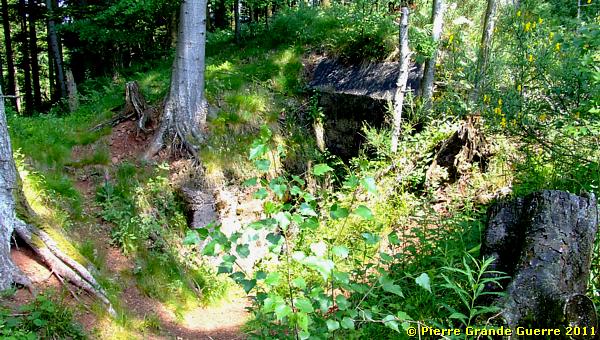
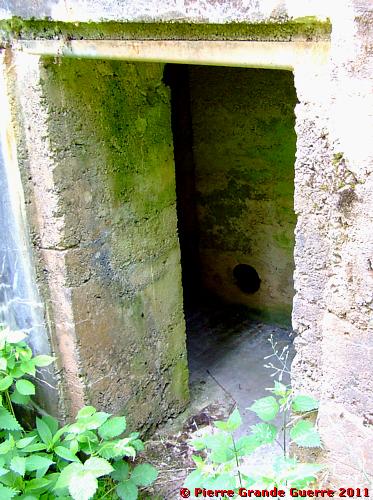
... our first entrance to a German dug-out.
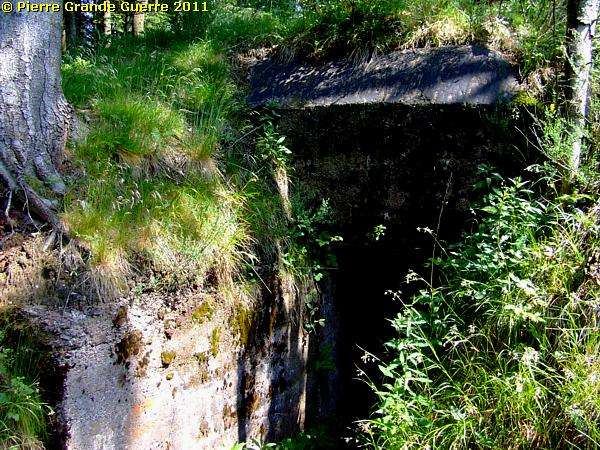
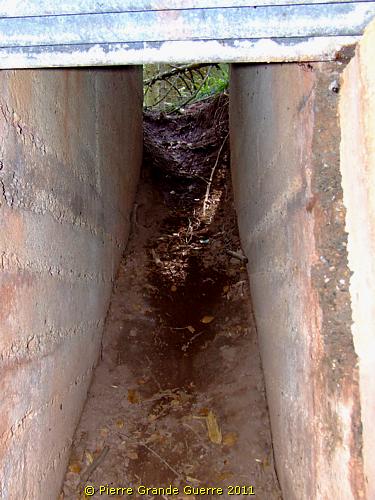
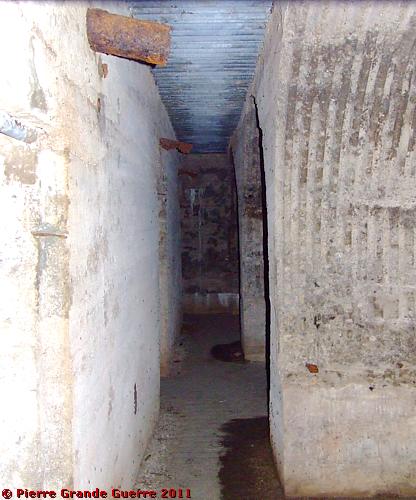
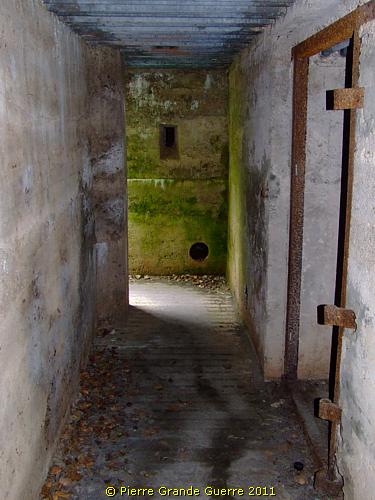
As the route is running through this dug-out, we turn on our torches. At the end of the tunnel we go left.
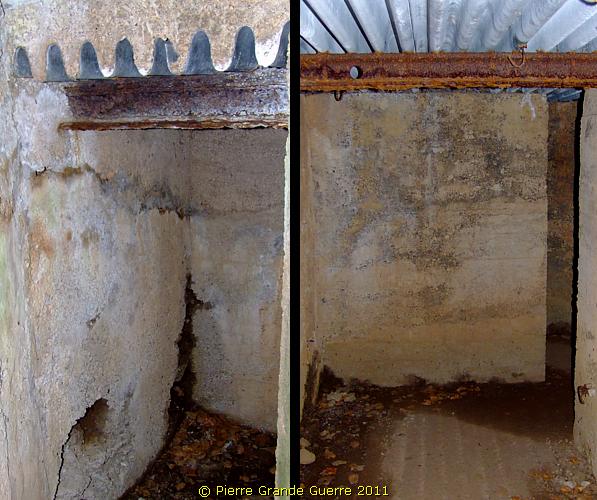
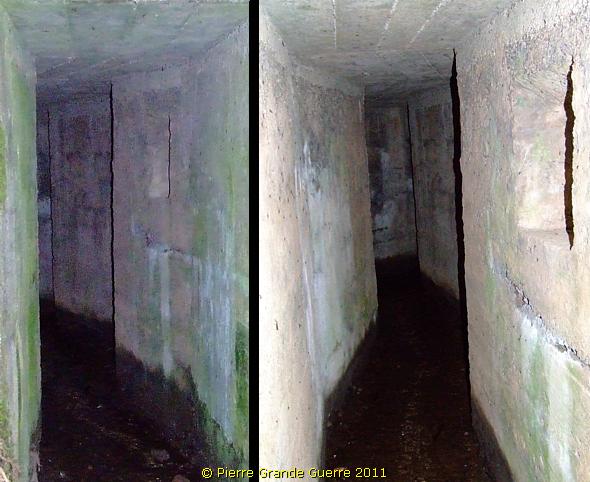
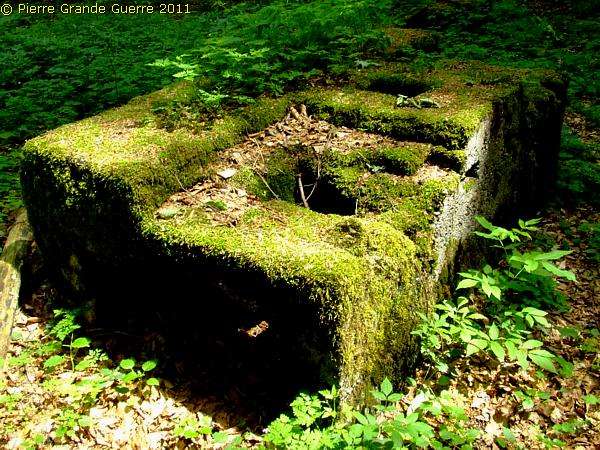
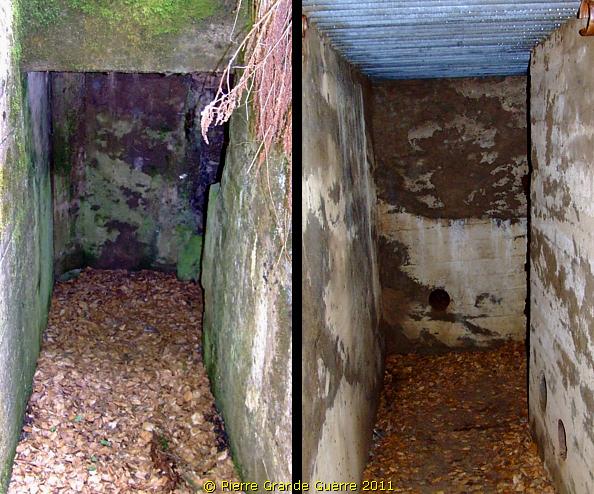
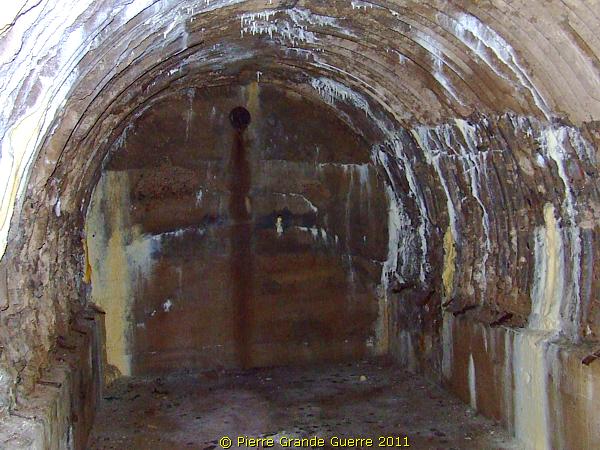
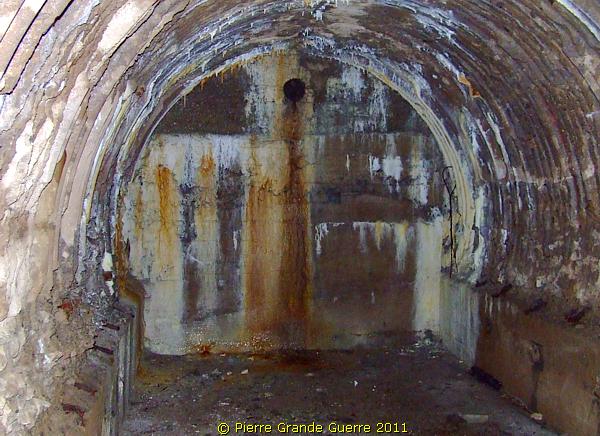
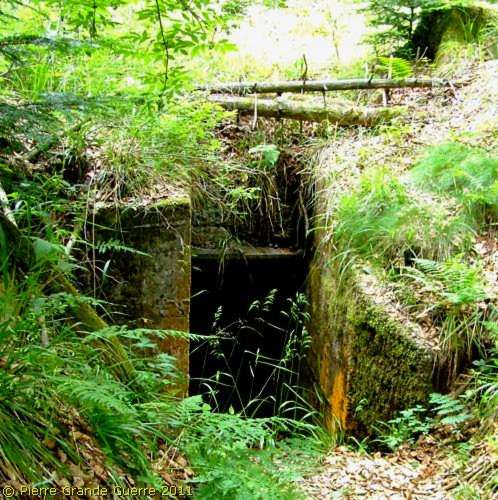
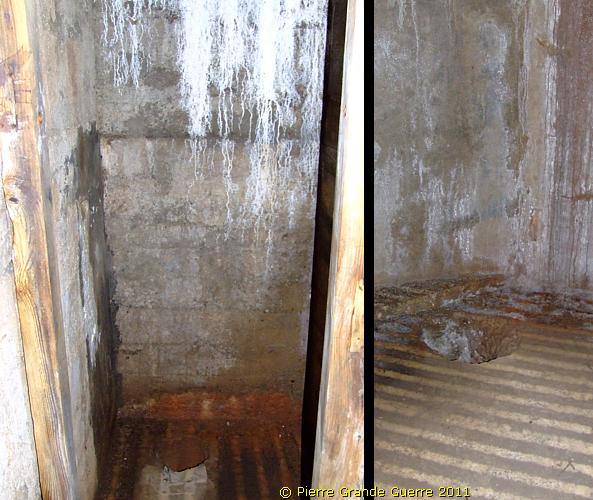
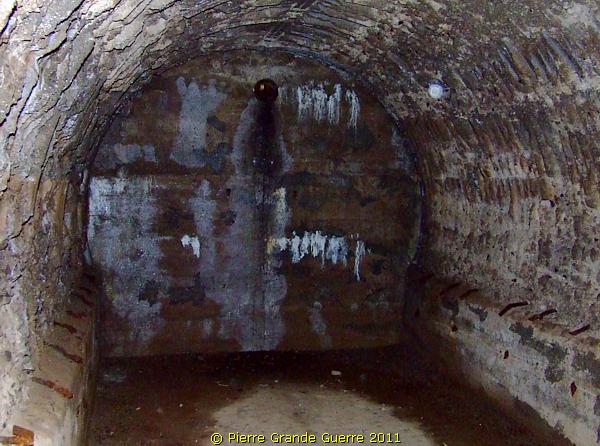
I try to offer you here a "step-by-step" impression of this dug-out.
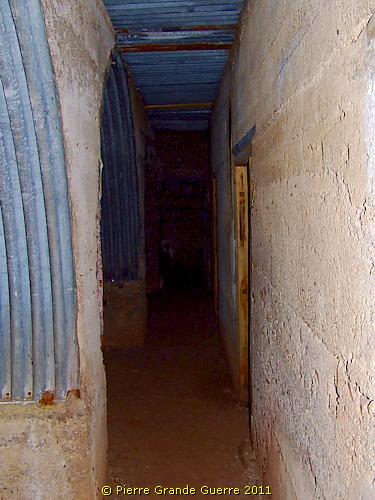
For your convenience and to show you better the details of the interior I have exaggerated the lighting.
In fact it is pitch-dark in these bunkers!
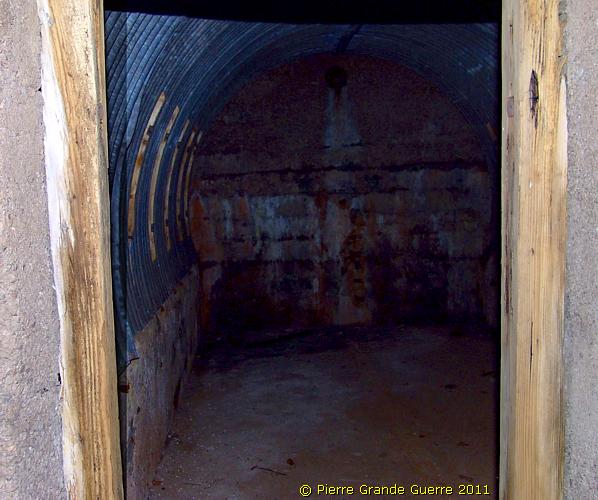
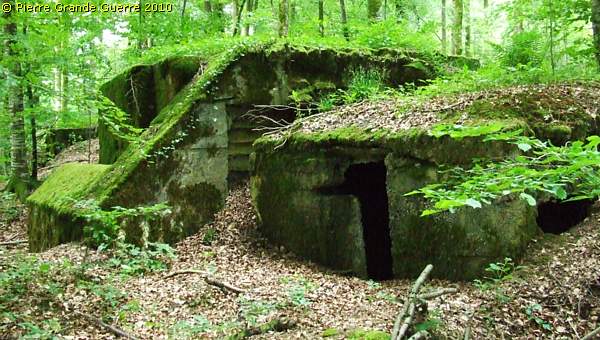
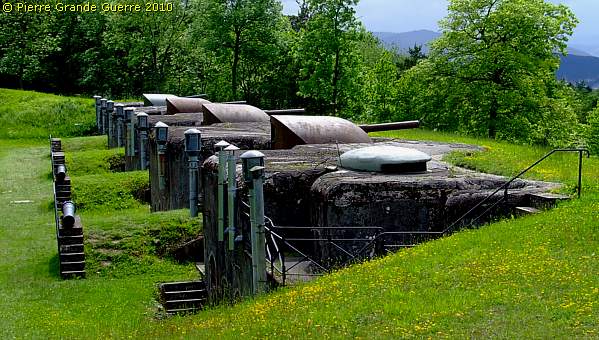
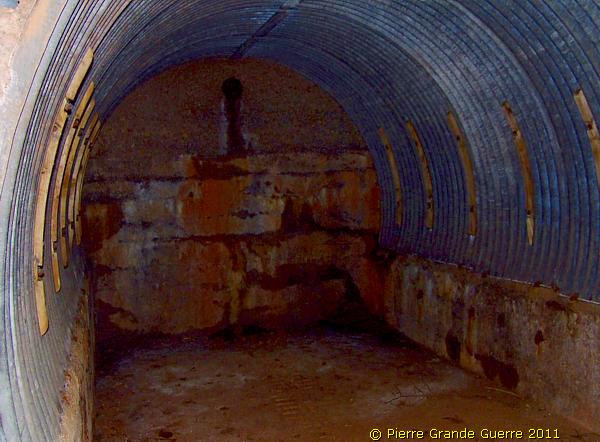
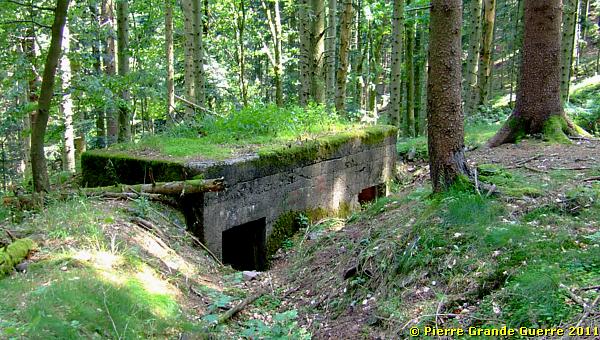
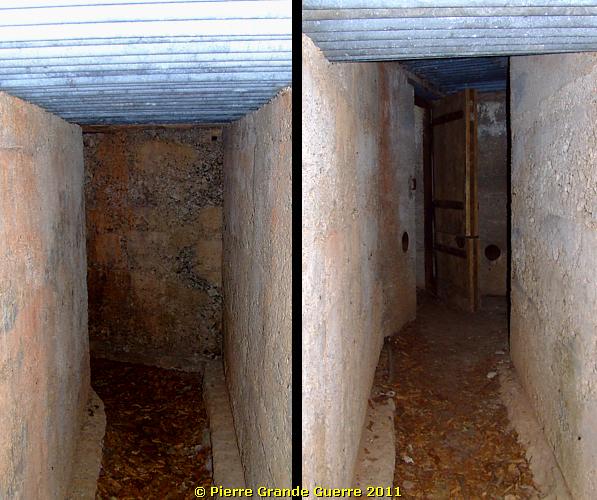
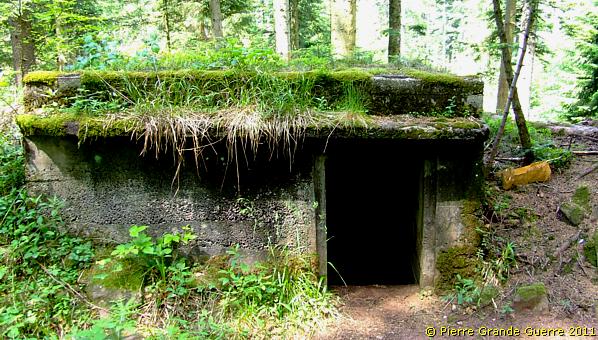
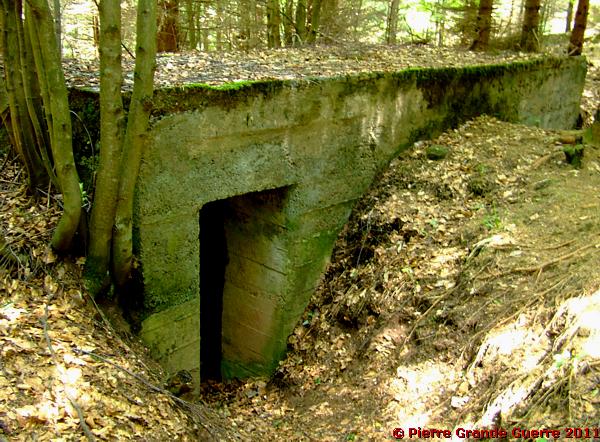
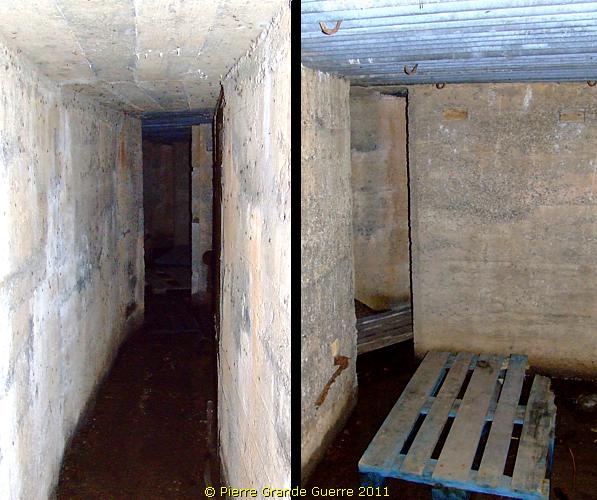
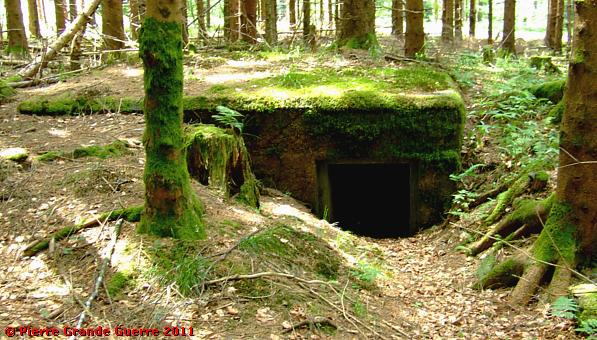
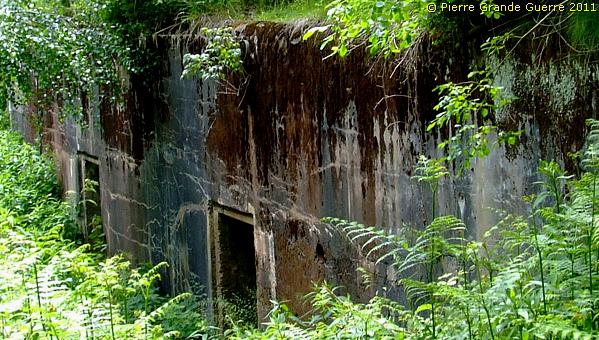
This bunker was meant to house some 40 men ...
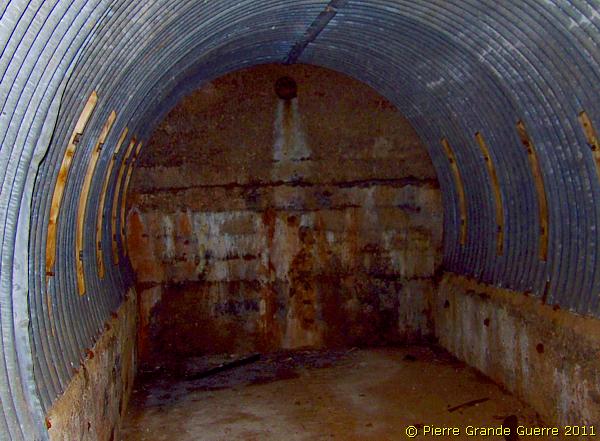
... in three large arched rooms.

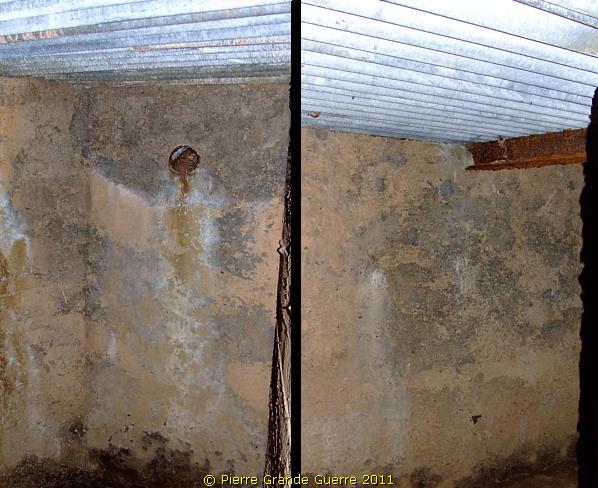
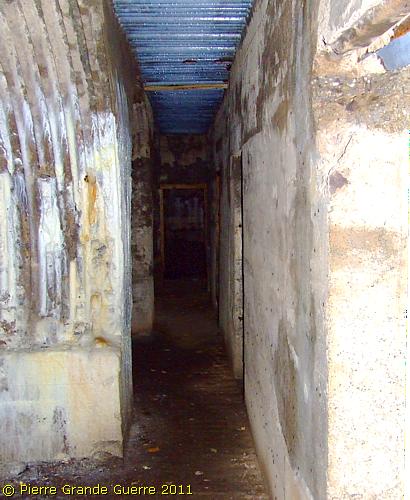
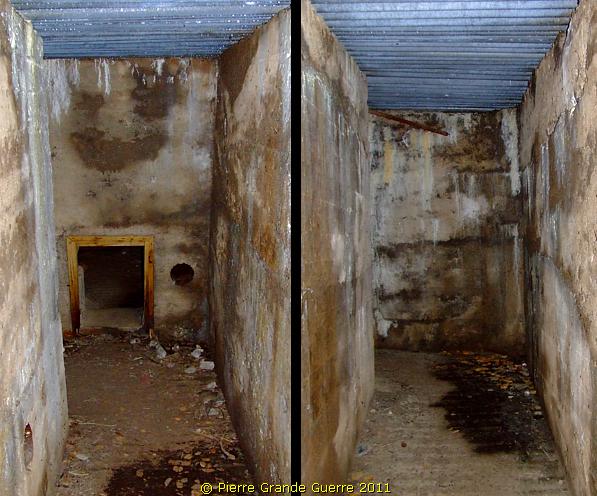
On the other side of the corridor, we find three smaller, rectangular rooms.
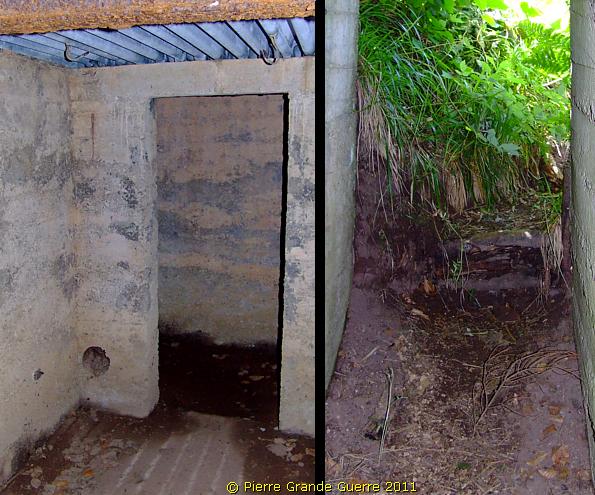
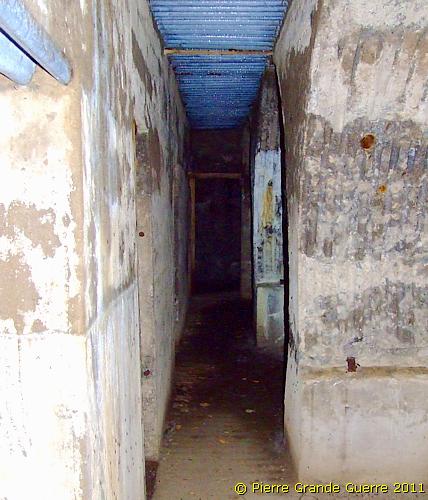
A second tunnel leads us with a turn to the right to the northern exit.
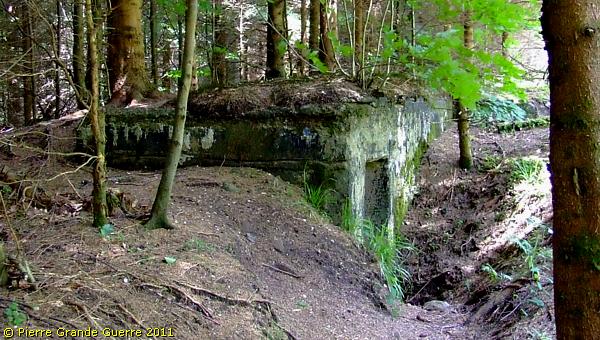
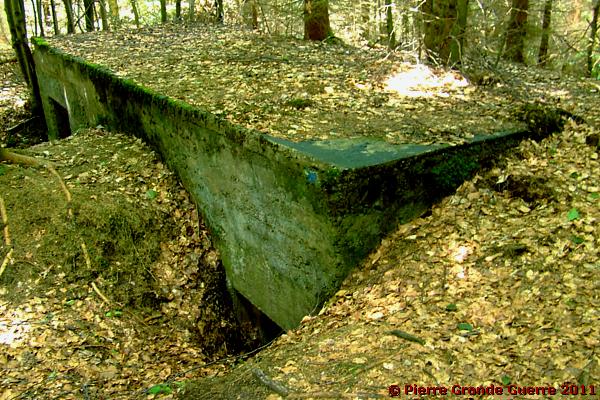
When we climb out of the exit, we see the roof of this pill box.
Before we continue our exploration in this splendid wood, I offer you some concise information about the Donon lines.
The strategic importance of the German lines at the foot of the Donon
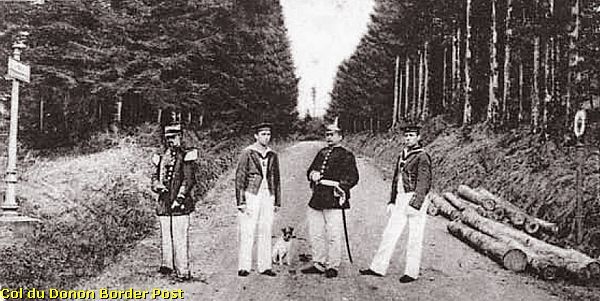
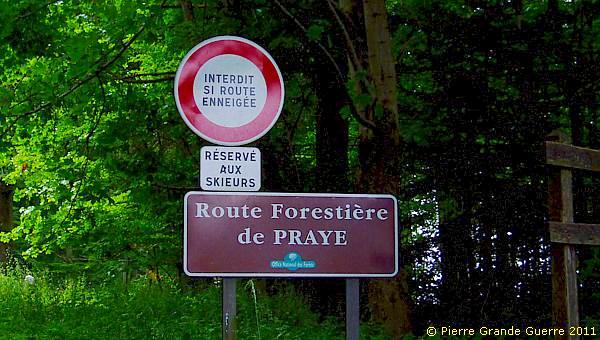
At the Col du Donon, to be more precise, at the junction with the Route de Praye to Senones, used to be a Franco-German 1871-1918 border post.
The Donon mountain formed a part of the German “Breusch Stellung”, the positions along the Bruche-river, defending the belt around Strasbourg (“Straszburg") , which, as the crow flies, is some 42 km. to the east.
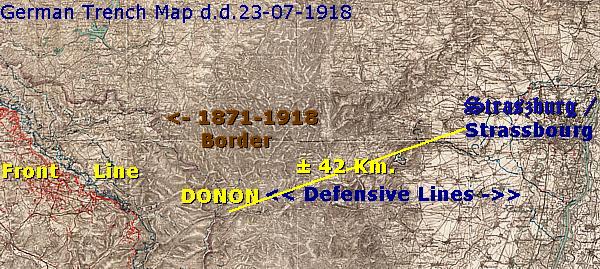
Along with the fortified belt of Strasbourg and the " Feste Kaiser Wilhelm II ", the Fortress of Mutzig, in the east, the Donon barred the way to the Alsatian plain between Strasbourg and the Vosges Mountains, hindering French troops advancing from the west and south to Strasbourg and Metz.

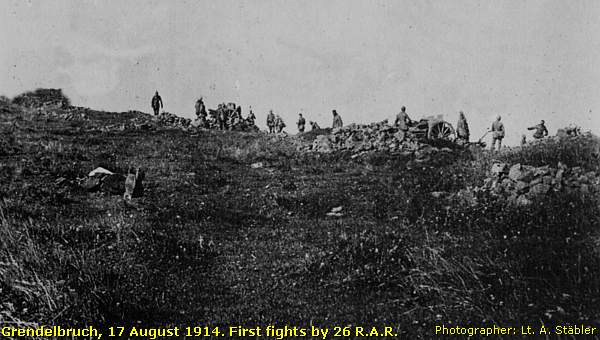
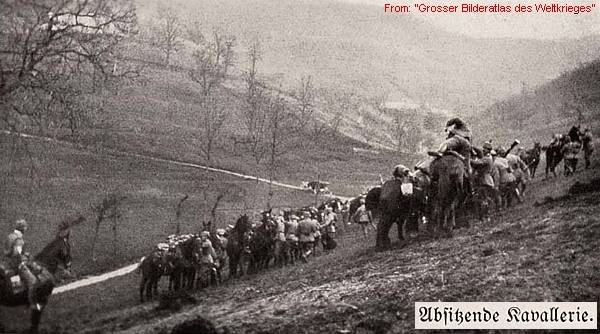
During the weeks of 7 -17 August 1914, however, French units of the 41st Infantry Division ( 41e D.I. ) crossed the 1871-1918 border and succeeded in marching beyond the Donon obstacle to Schirmeck.
Before being forced to withdraw by German artillery fire, the French troops even reached on 17 August 1914 more to the east Urmatt near the Grendelbruch, some 8 km south-west of the Fort de Mutzig, and some 34 km. east from the Franco-German border near the Donon.
After the German withdrawal of 11-13 September 1914 after the Battle of the Meurthe-Mortagne the front line consolidated. The front line ran some 13 km. west of the Donon, from Montreux in the north southward to the Chapelotte via the valley of the Plaine at les Les Collins; over the summits, which are the Tête du Gros Colas, the Tête de Cocquin, the Pain de Sucre, and the Pierre Piquée, to Senones in the south.

In face of the stubborn eagerness of the French to win back their lost territories from Germany and the French rupture of the Breusch Stellung in August 1914, the Germans reinforced not only their positions at the front line on the Chapelotte near Allarmont and the other summits, but also their positions at the foot of the Donon, which had become an even more important second defensive line to protect Strasbourg.
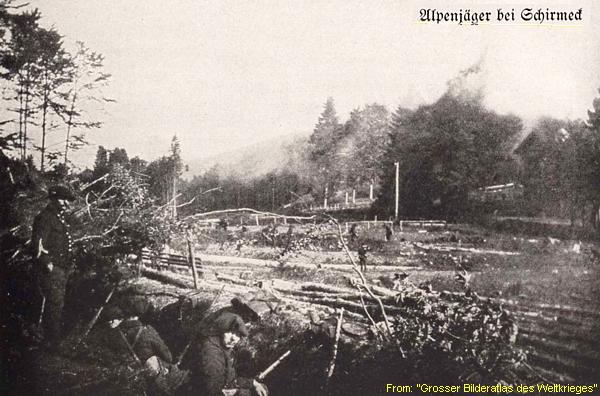
The nearby village of Schirmeck and the Donon formed also an important transit location for transports of supplies and ammunitions to the front line, west of Allarmont .
As I describe here the distances only as the crow flies, ...
... in reality, the Vosges mountain landscape and the war conditions made the distances for supply transports to the Donon front sector over the meandering roads much longer, both in distance and time.
The Germans introduced concrete in April 1915 to construct their fortifications on the Western Front. This offered their soldiers “bomb-proof” shelters.
As the Donon was still in reach of French artillery fire, the Germans also decided to fortify their positions with concrete constructions along the 1871-1918 border.
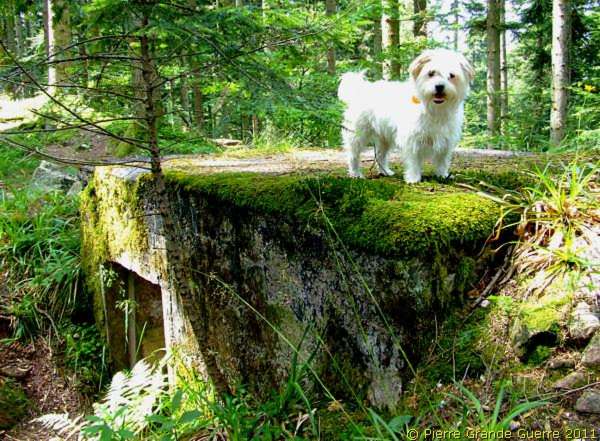
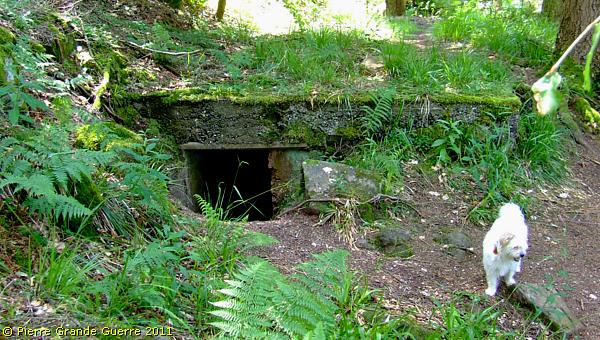
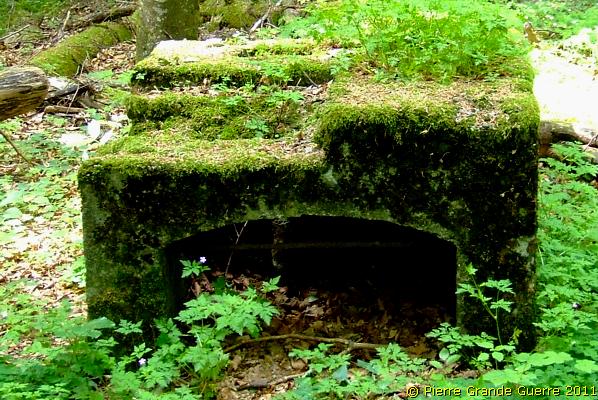
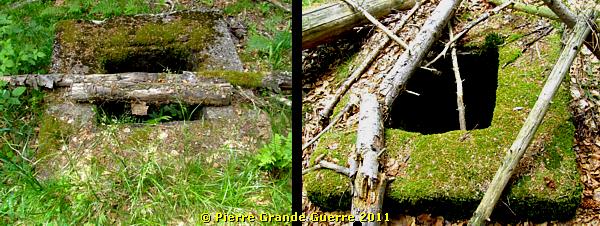
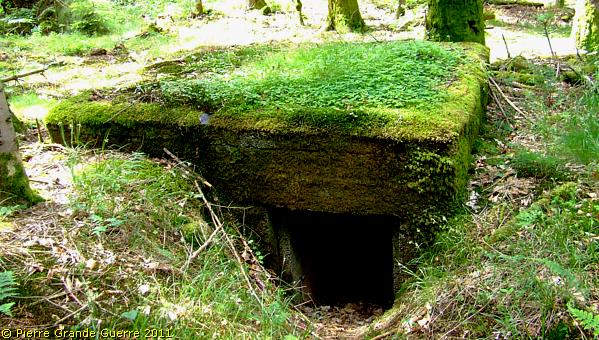
After this intermezzo we continue some 25 m., and Bobby the Trench Dog detects another bunker.
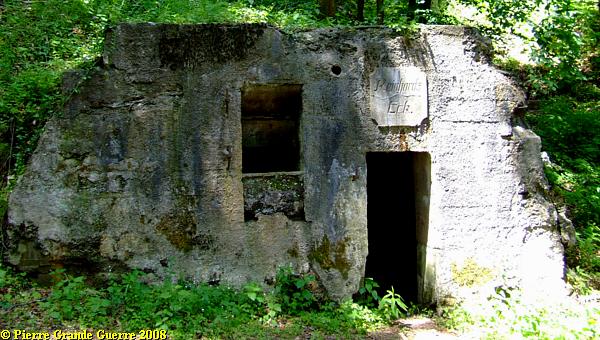
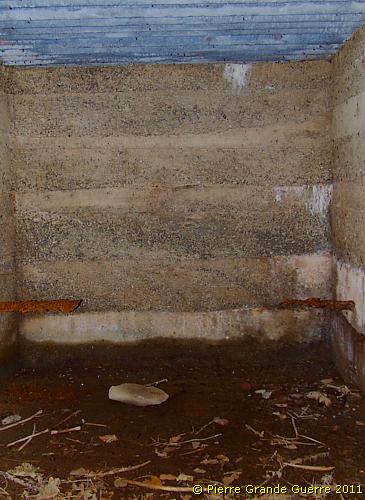
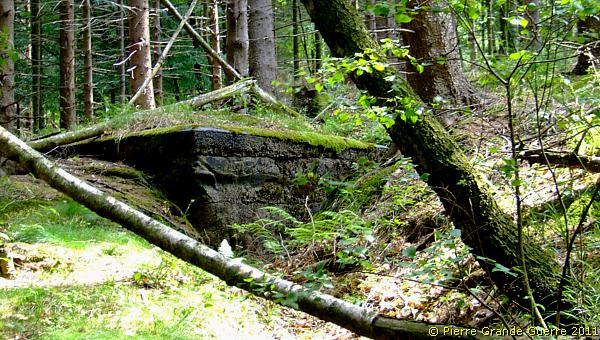
It is a one-room emergency shelter bunker.
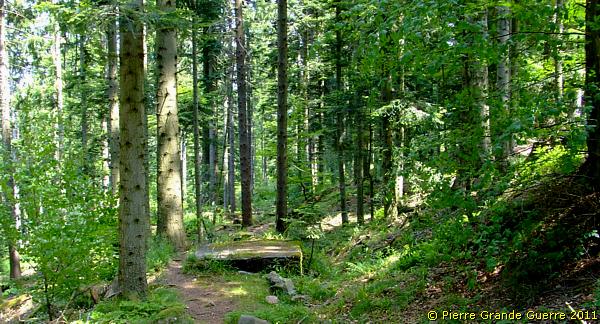
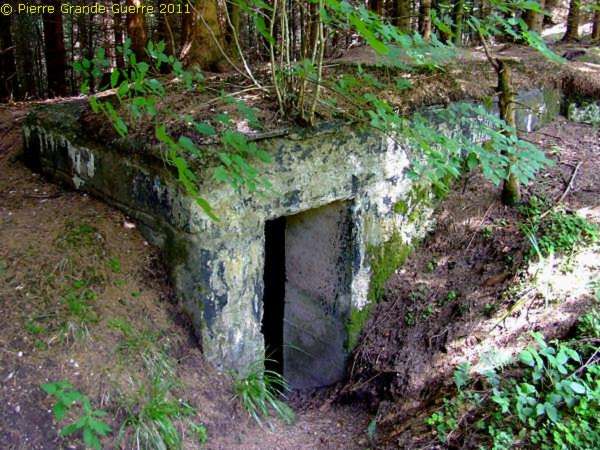
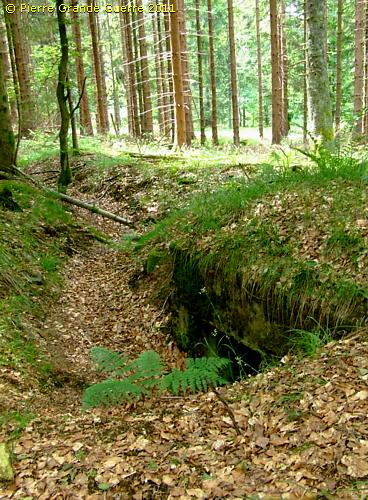
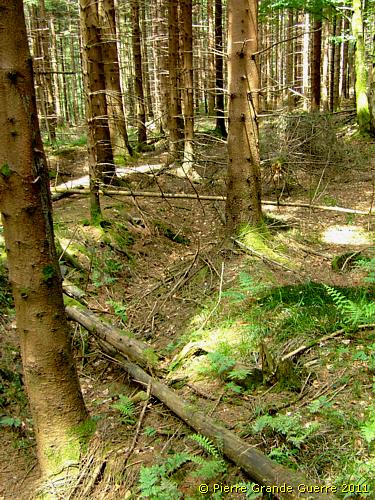
These bunkers are connected by trenches, covered now by vegetation.
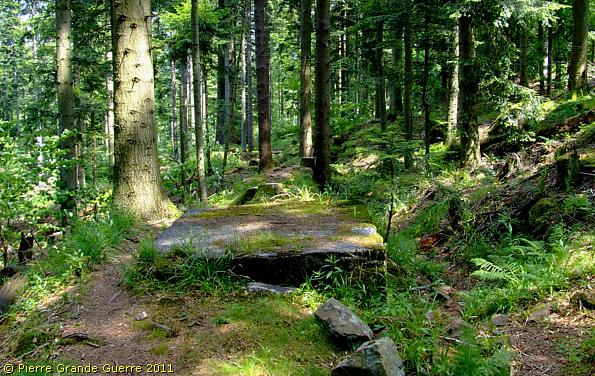
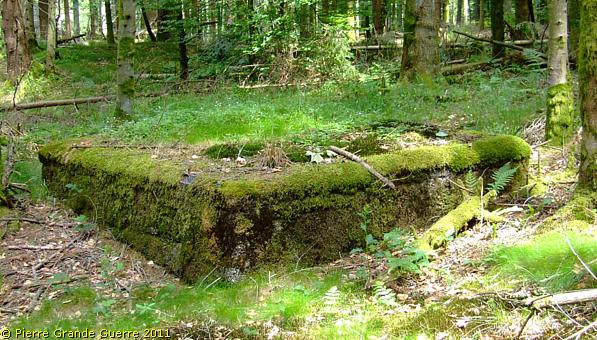
We follow these trenches north-westward to find this fine example of a low two-room emergency bunker.
In the frame below I offer you a concise introduction to German concrete shelter architecture.
Some “Bunkerology” – A concise introduction to German shelter architecture
This two-room emergency shelter bunker offers me a fine opportunity to digress shortly, at the request of some of my loyal visitors, on the architectonical aspects of the evolution of concrete shelter bunkers.
Everywhere on the 750 km. long Western Front German concrete bunkers and dug-outs come in all sizes, depths and varieties; command posts, dressing stations, observation posts, machine-gun bunkers and of course the majority, shelters. On the Western Front these bunkers were often constructed, while the construction troops were under fire.
The early rectangular "concrete block" bunkers
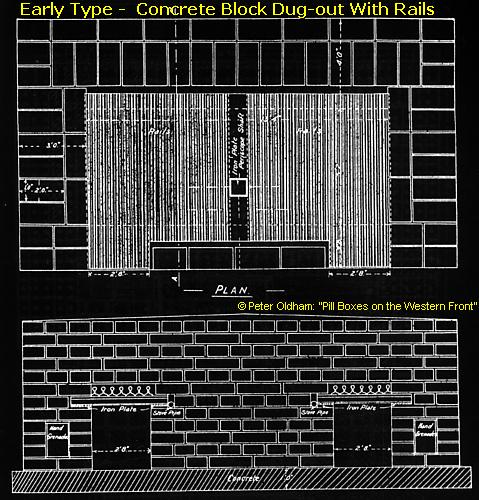
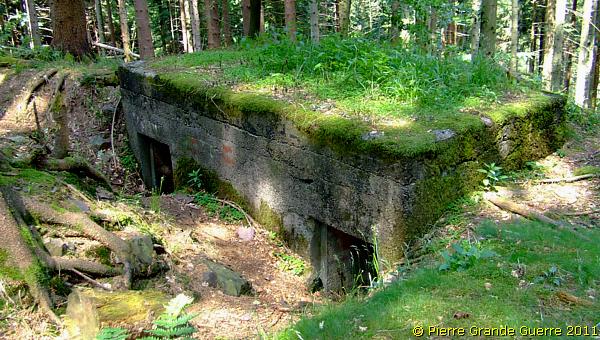
During our walks here around the Donon we will see with some exceptions only shelter bunkers of three varieties: the one-room emergency shelter, the two-room emergency shelter, and the larger 6-room “Kaserne” bunker, meant to house some 40 men.
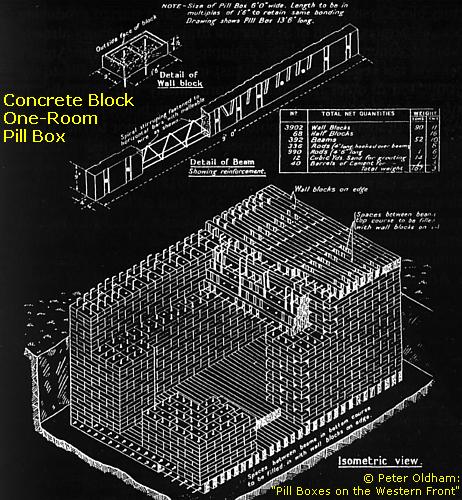
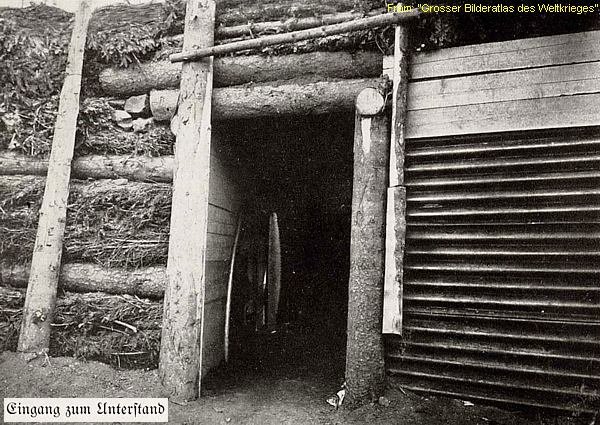
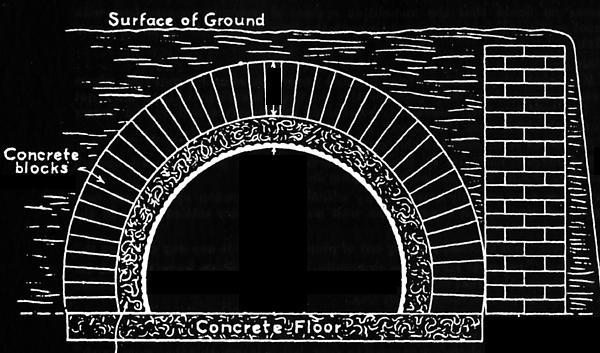
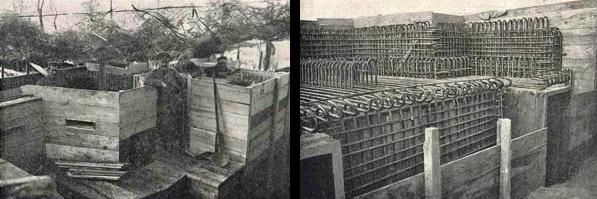
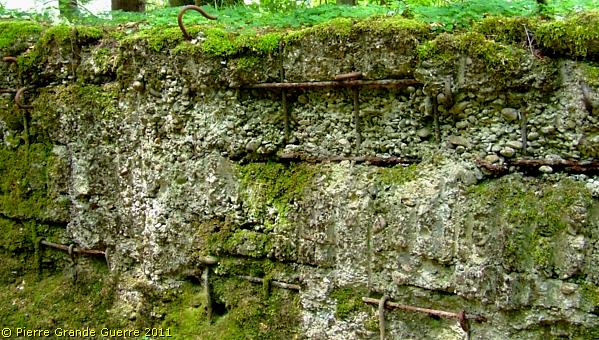
In the beginning, from April 1915, these simple one- and two-room shelters had a rectangular shape and were constructed with steel H beams, or rails, and masonry of prepared concrete bricks or blocks.
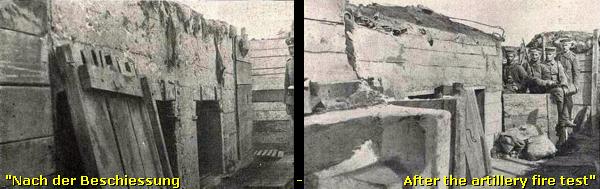
The soldiers seeking cover could close the shelter with a steel door. The one- and two-room bunkers were meant to give cover in emergency situations; against French artillery fire. These small shelters were dug just below the surface and the top construction was some 0.75 - 1.50 m. above the surface. These emergency shelters were hardly bomb proof, but they offered at least cover against light artillery and shrapnel shells.
Masonry of natural rocks

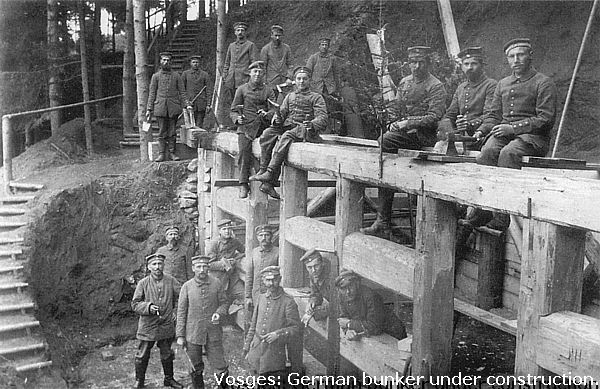
Here in the Vosges the German military construction workers of 1915 often used the readily available natural rocks to construct dug-outs of masonry of rocks on wooden frames. (See for instance my future photo impression about the Hochfirst - Haute de Faite .)
Arched bunkers
The first bunker, which we entered some moments ago during our walk and which we will meet again, was of the larger “Kaserne” type.
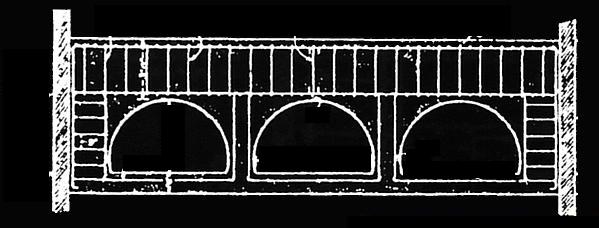
On each side of this type of dug-out you will find two tunnels, one man wide, which lead to a main corridor with three large arched rooms on one side and at the other side of the corridor three smaller rectangular shaped rooms .
Not always, but most often, one or two rooms on the corners were used as sentry rooms or for storage of extra ammunition. The room in the middle was used for the latrines. The function of these smaller rooms can switch location. This is only a basic concept, which could be enlarged by duplicating the ground plan or be adapted in some other way, depending for instance on the geological situation.
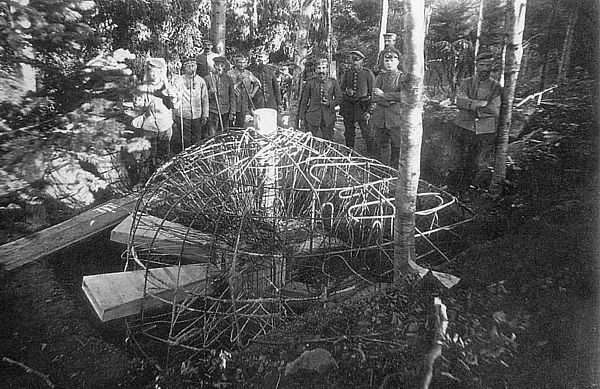
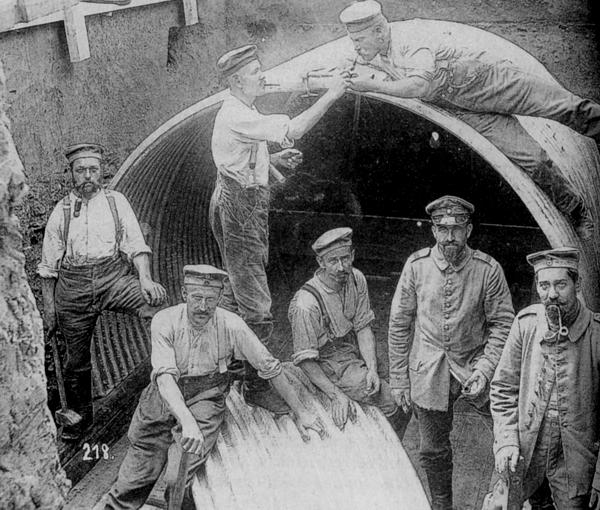
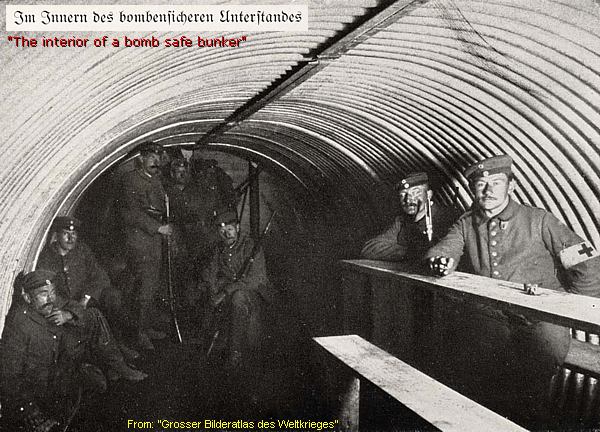
The shape of an arch offers the construction more strength than in a rectangular concept. The arch divides equally the pressure of the top construction sideways and downwards, and thus bears the heavy weight of concrete, sand and earth. The early arched bunkers were built almost in an Ancient Roman style, by raising a series of elephant shelters, arched corrugated iron boards shaped in the form of an elephants saddle. These were covered with a layer of cement, next an arch of special shaped concrete bricks, and finally a thick layer of sand and earth.
On other pages on this website you will find examples of bunkers with one or two arched rooms and of course of the smaller variety, and in fact the basic variety, of one shelter some 3 m. wide.
Reinforced concrete
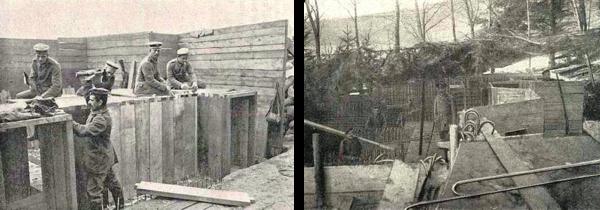
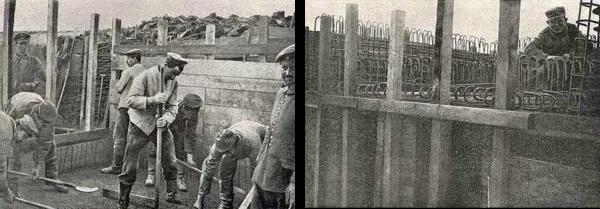
In 1916 the German architects introduced also the construction technique of filling liquid concrete in wooden moulds with steel networks: reinforced concrete.

Besides carriers of the raw materials, sand, basalt, gravel, cement, and water, and the concrete mixers there were special "Pioniere" units, whose task it was to bend the necessary steel components, the so-called "Eisenflechttrupp".
During our walks here around the Donon, we will find at least one example of such a reinforced concrete bunker. Elsewhere on this website, you will find many examples of reinforced concrete bunkers of all varieties, also command posts, dressing stations, etc.
The constructors of the Donon sector: Pioniere-Bataillon 15 and the Neuber Brigade
Four companies of Pioniere-Bataillon 15 and infantry soldiers and artillerymen of the Neuber Brigade worked on these constructions in the Donon front sector .
Raw materials via the Netherlands
To finish this concise introduction another remarkable fact: The essential raw materials for the German concrete on the Western Front, sand, basalt and gravel, were mainly supplied from Germany via "neutral" Holland and from Holland itself to occupied territories by Dutch ships and businessmen.
( Sources a.o. : the recommended book of Peter Oldham; "Pill Boxes on the Western Front")
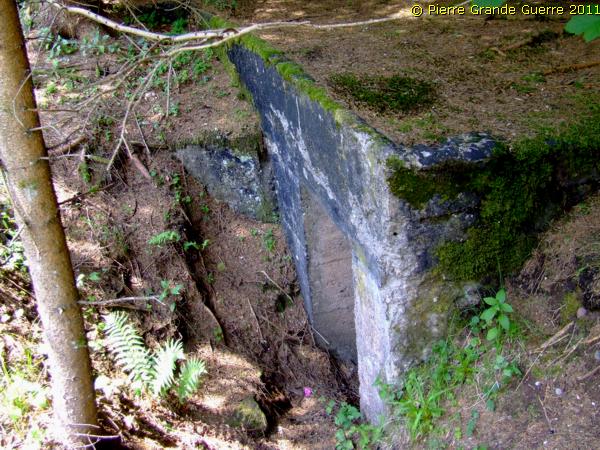
After this short intermezzo we leave this two-rooms pill box.
We continue northward.
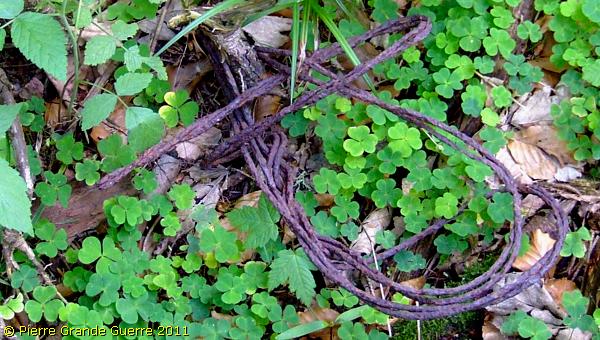
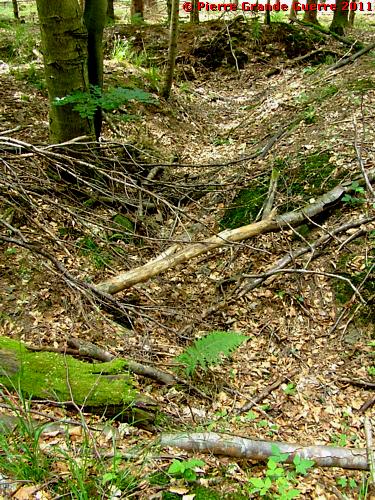
Here and there we see on the ground some rusted electrical wire.
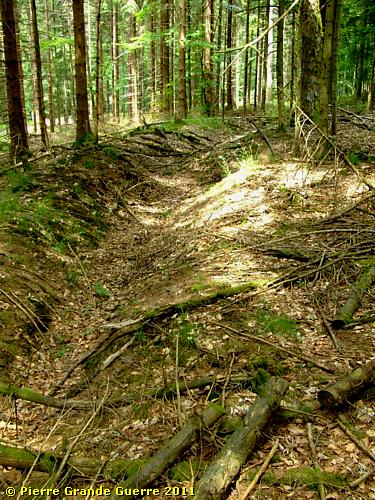
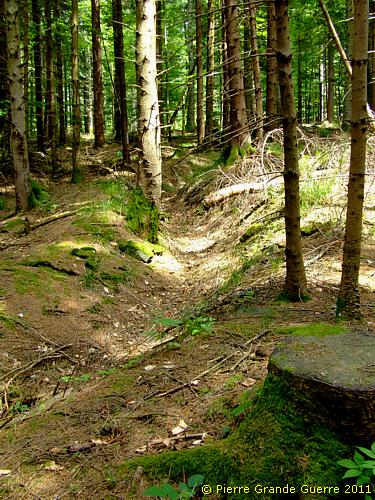
We are still following the shallow trace of a trench ...
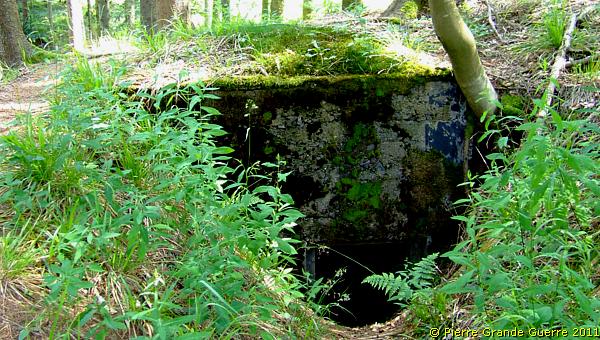
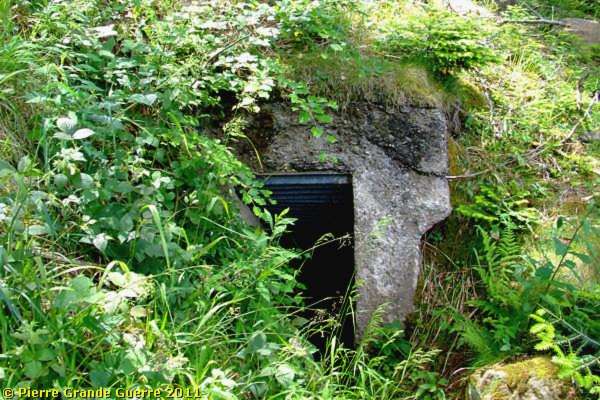
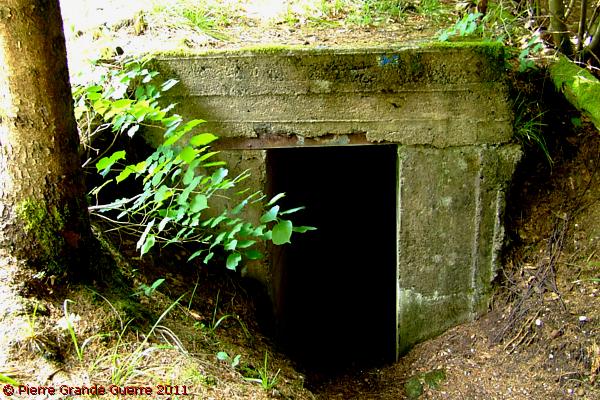
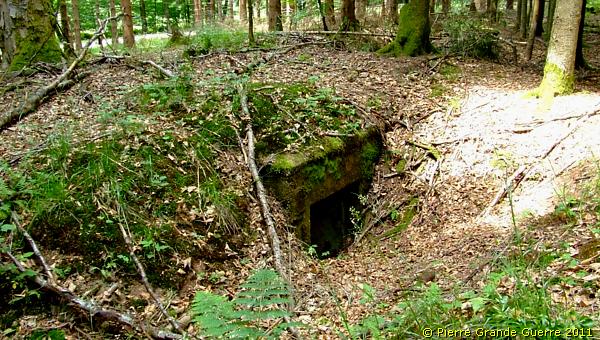
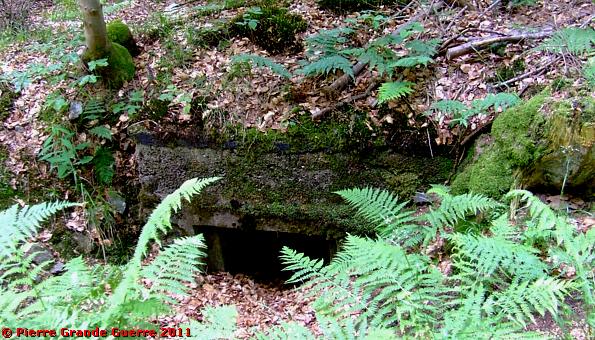
... to find another one-room emergency shelter.

The interior.
While we continue, ...

... I will tell you more about the "inhabitants" of these dug-outs.
Armee-Abteilung Falkenhausen and the Bavarian "Donon Brigade"
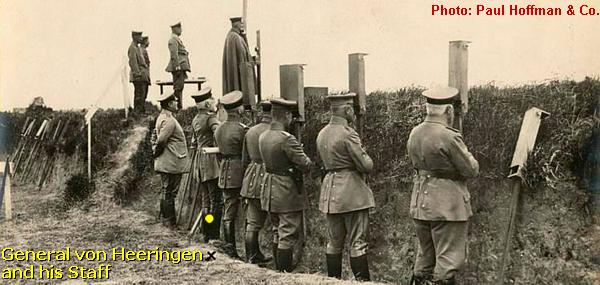
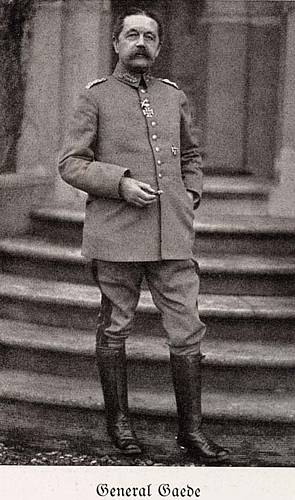
The supreme commander of the 7th Army, General von Heeringen, trusted in the south to guard the German front line in the Alsace Sundgau and in the Central Vosges of Alsace to the Armee-Abteilung of General Gaede .
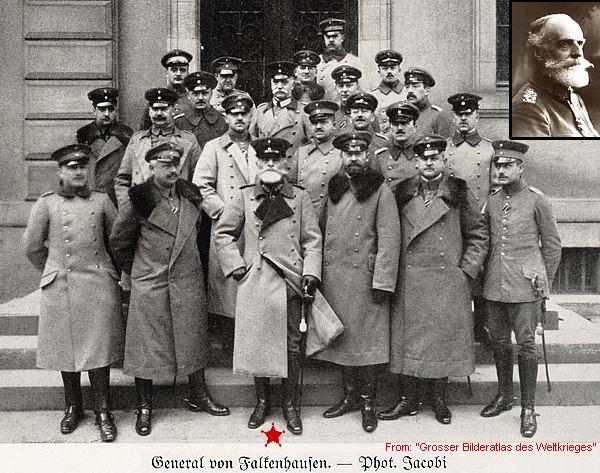
In the north, in Northern Vosges and the southern part of Lorraine, von Heeringen trusted the Armee-Abteilung of General Ludwig von Falkenhausen (1844-1936) to defend the front line.
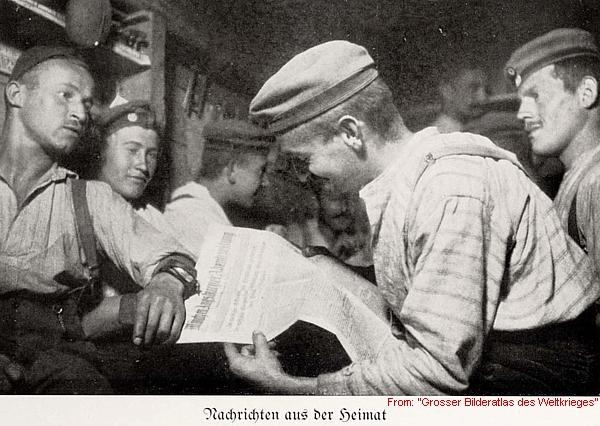
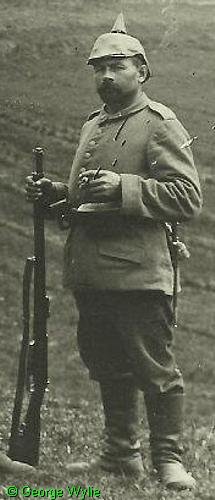
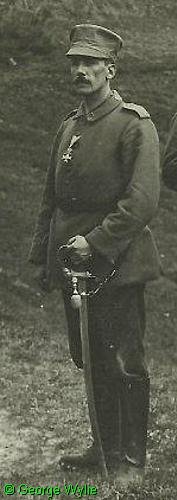
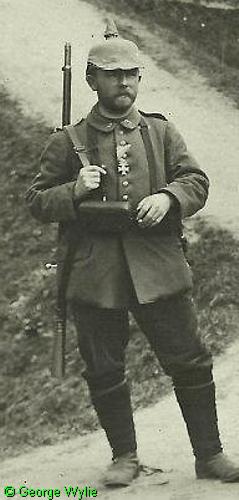
The unit, which was almost permanently stationed in this front sector, west of the Donon and here around the Donon itself, was the Bavarian "Donon" Brigade.
The Bavarian "Donon Brigade"
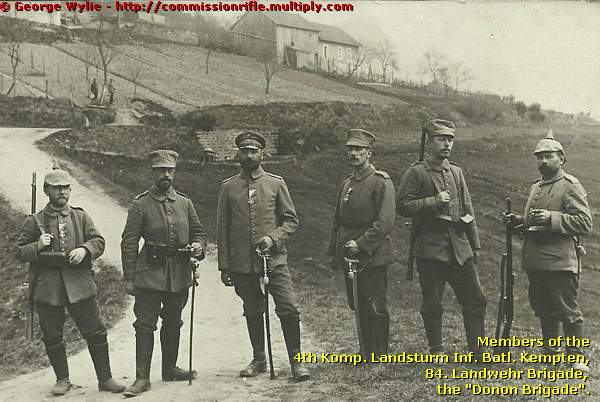
The 84. Landwehr Brigade was deployed in Alsace. The brigade was originally the 'acting' 84. Infantrie Brigade, renamed Brigade Neuber September 1914, and again renamed 84. Landwehr Infantrie Brigade on January 1915 in the Donon (Vosges) sector. Again it was then re-designated Donon Brigade until April 1915, and re-designated Sector Plaine 1915-18. It was last re-designated Sector Mailly from April 1918.
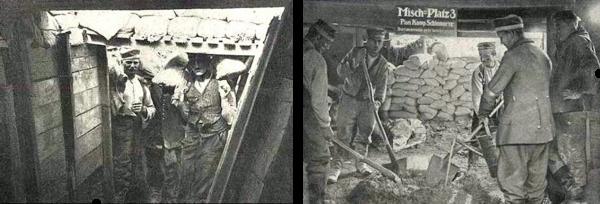
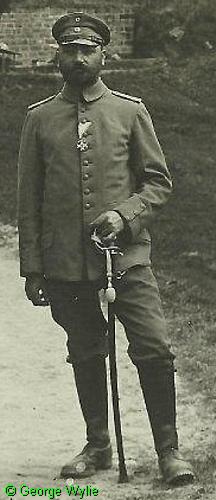
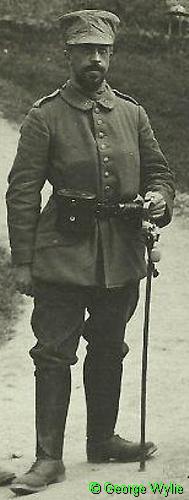
The men in the period photo are Bavarian Landsturm members of the 4th Komp. Landsturm Inf. Batl. Kempten, 84. Landwehr Brigade, photographed on 13 Mai 1915. The event appears to be a commemoration of awards received.
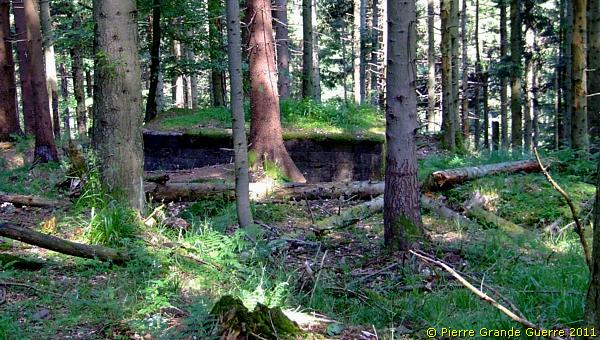
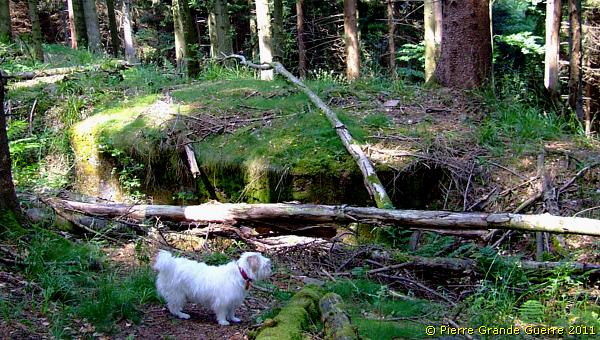
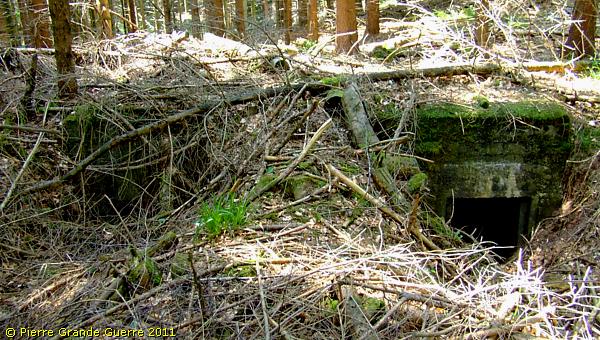
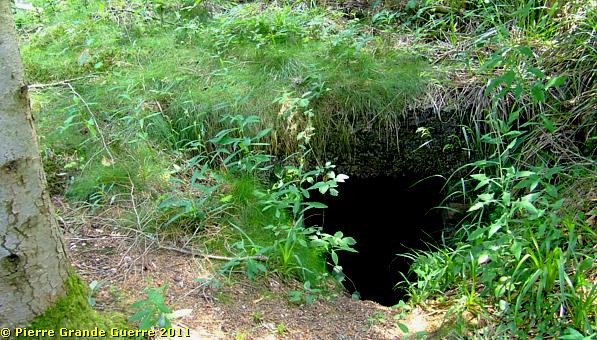
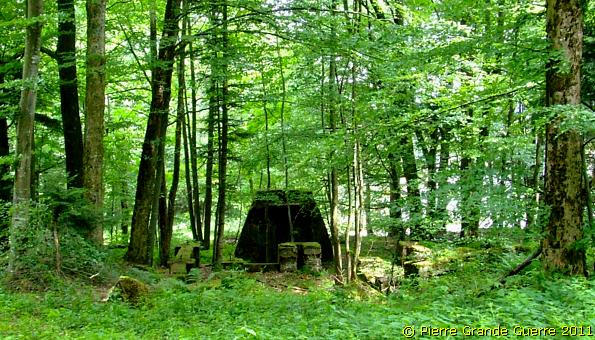
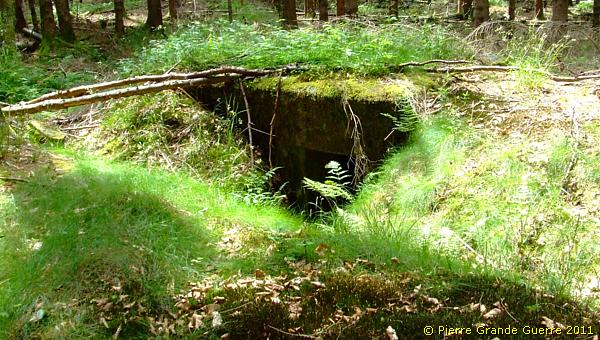
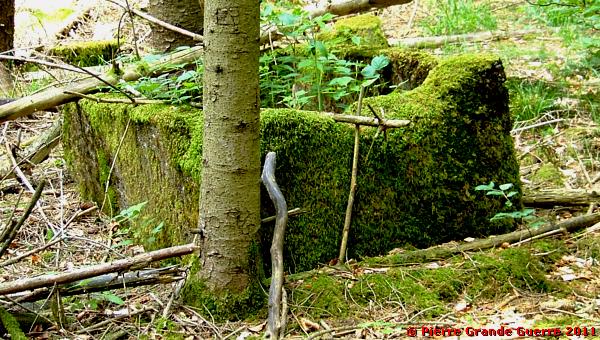
Nature filled in the entrances to most of these pill boxes, ...
... like this two-room emergency shelter ...
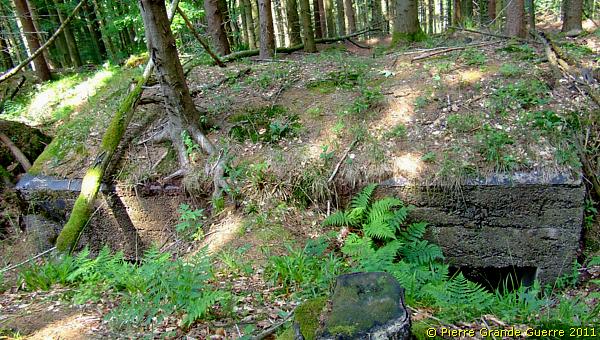
... conquered by nature.
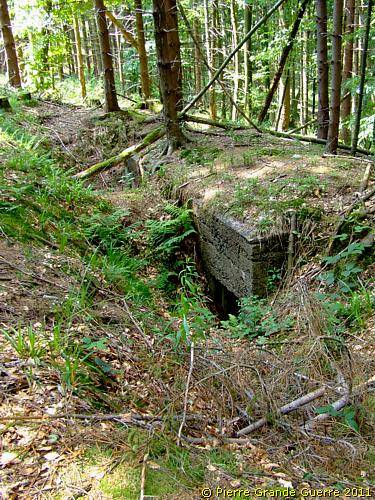
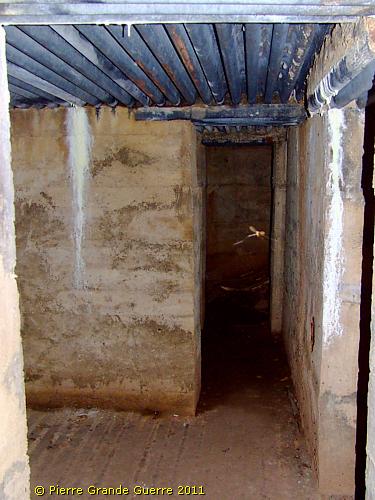
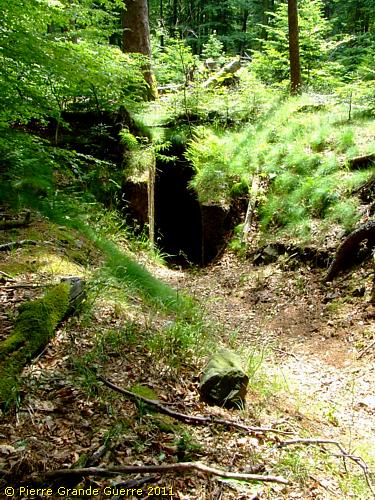
The next accessible dug-out we encounter, is lying on a spot where the slope is steeper.
The tunnel turns right ...

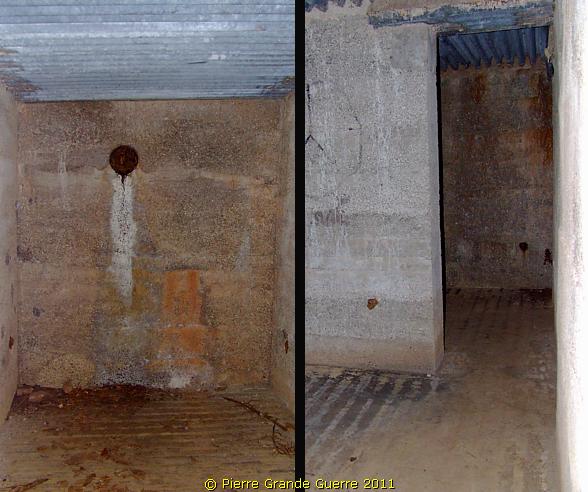
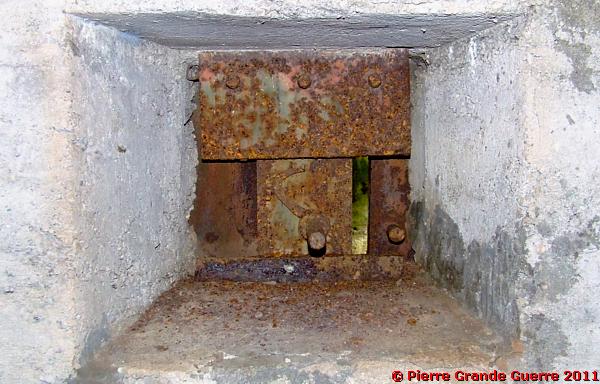
... and leads us into a rectangular shaped room with a peephole on the west side.
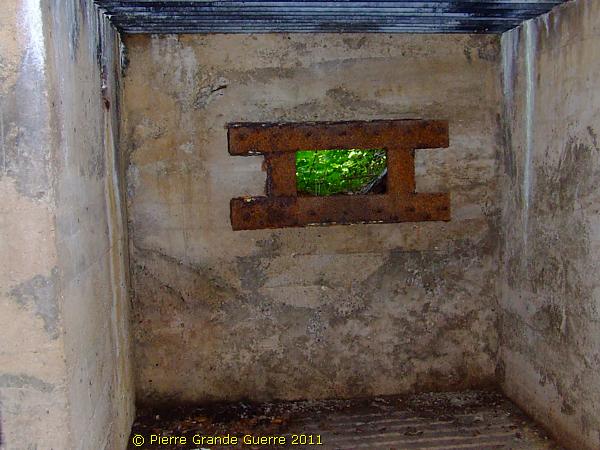
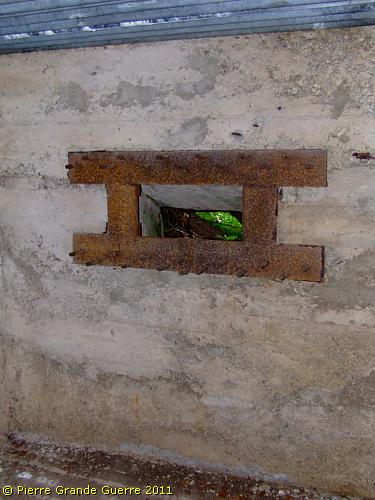
The adjacent room is identical ....
... but this photo shows us better the purpose of this window: to observe the slope below and, if necessary, for throwing some hand grenades down on the enemy.
A second tunnel leads us upward to the northern exit.
Walking northward we find more filled in entrances to dug-outs.


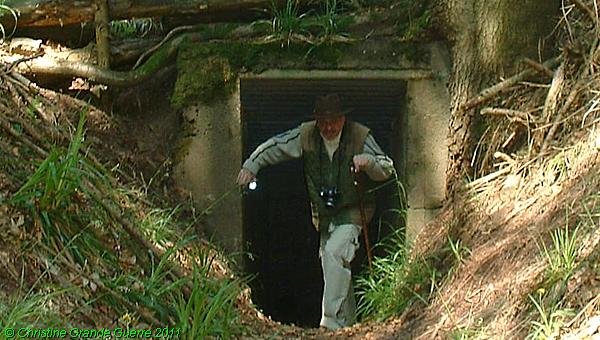
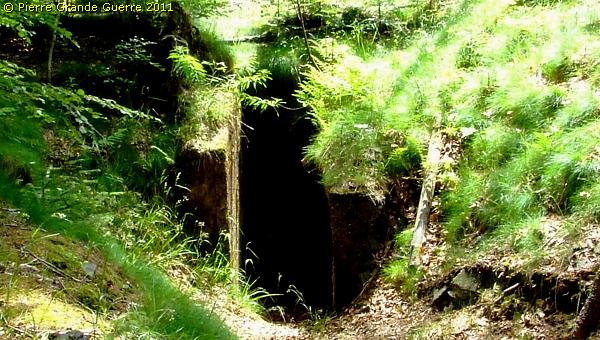
After a while Bobby detects another accessible dug-out.

If it is possible, I always have to enter it.
This tunnel turning left leads to ...
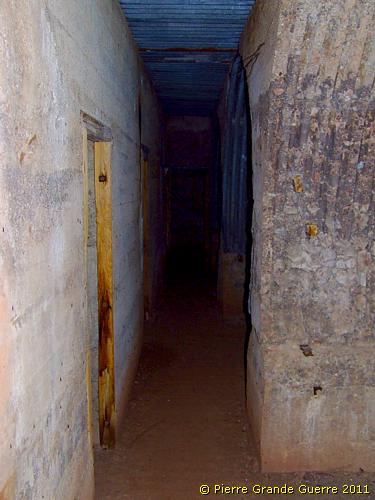
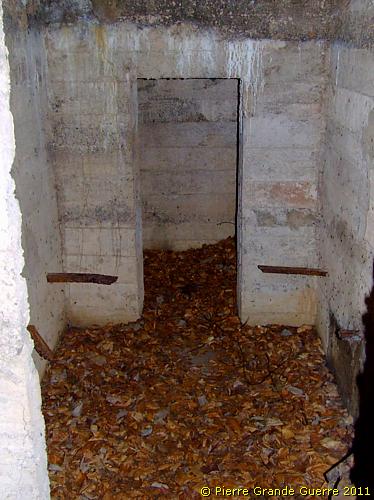
... a well preserved thick wooden door. Because the door is trapped, it cannot open wider and offer more than this narrow passage.
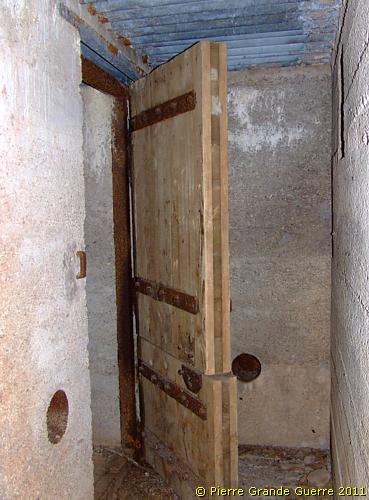
The 2 rooms behind the door are rather disappointing, so small.
With the ceiling of about 2 m. high, I estimate ( based on my memory ) a surface of 2 x 3 m. or less.

Another curving tunnel leads us out.
This time I had the smart idea to photograph also the second entrance or exit of the dug-out.
We continue the path marked with a blue X.
I am sure that you will recognise the type of this bunker now.
Anyway, our Bobby knows!
We are now about 150 m. west of the D 993.
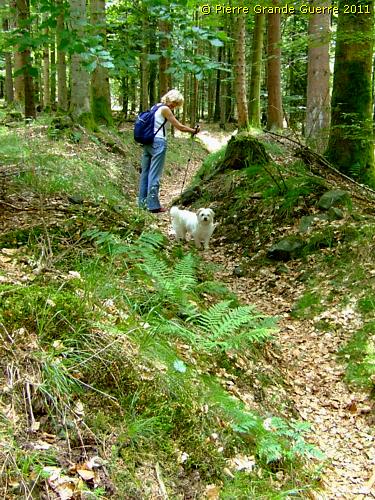
We find more shelters and entrances to dug-outs.

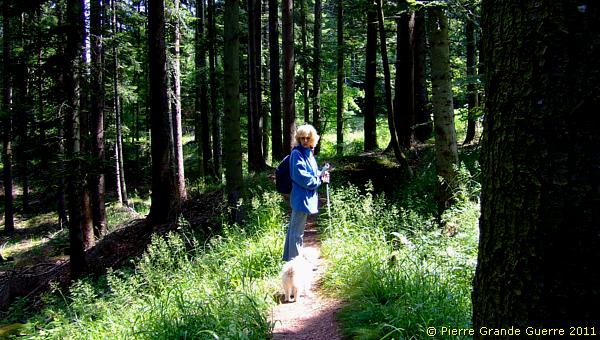
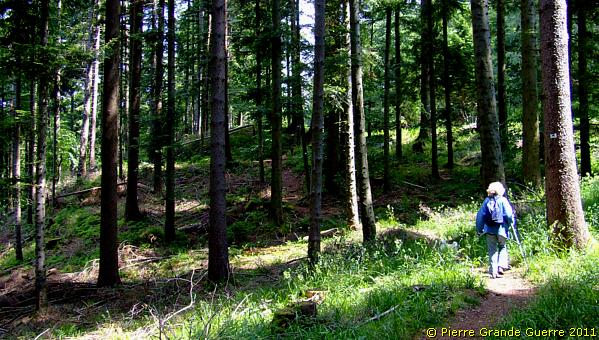
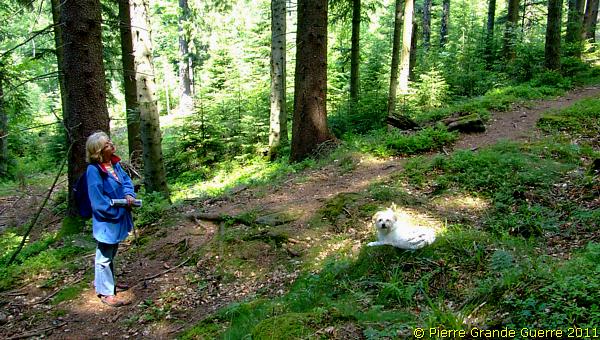
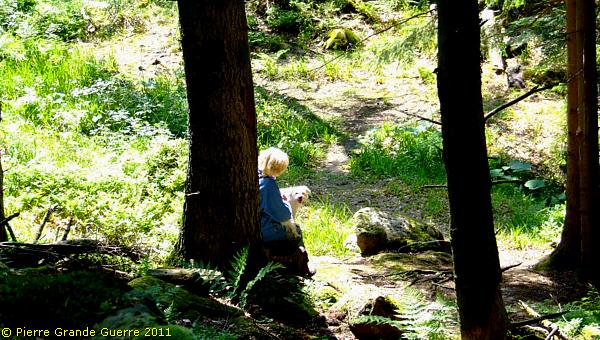
Sometimes we take a rest to drink some water and simply enjoy nature.
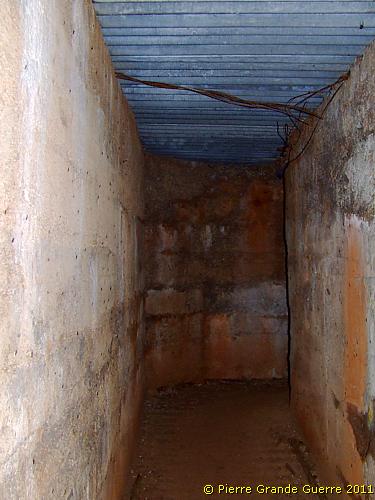
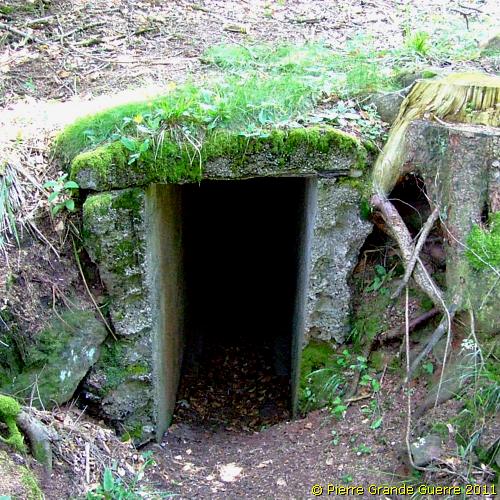
After our break it is not far to this dug-out, which I approach this time from the northern side.
This time the tunnel is short and it leads directly to ...
... two rectangular shaped rooms of about 2 x 3 m. or less each.
A simple staircase is leading to...
... the southern exit.

From this point we go north-eastward, we almost approach the road, and we will continue parallel to it. p you orientate yourself I repeat the satellite view of our walk.
The road is now so close that we take Bobby on a leash.
This is a long two-room shelter.
This is the northern entrance of the two-room shelter.
Sometimes, only one room of a two-room shelter is accessible.
From here we go some 50 m. away from the road down the slope.

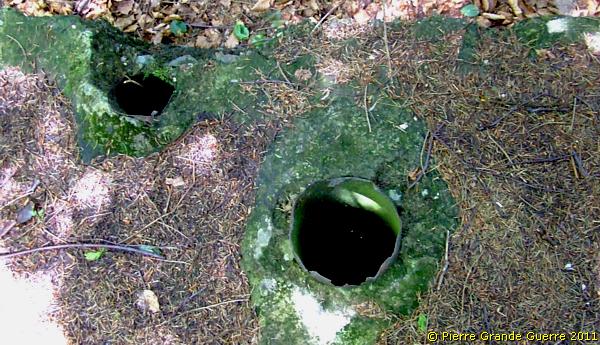
Bobby is barking after locating two ventilation shafts.

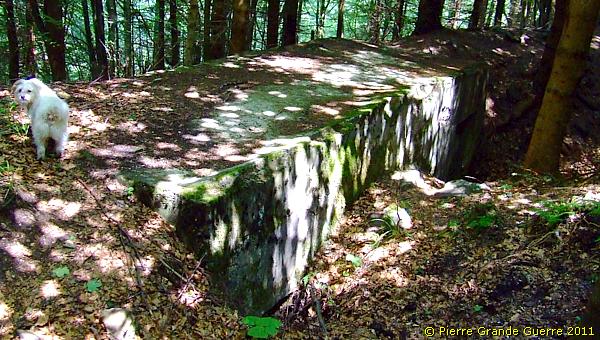
Notice the trees for an idea of the steepness of the slope here.
From here the meandering route leads us upward ...
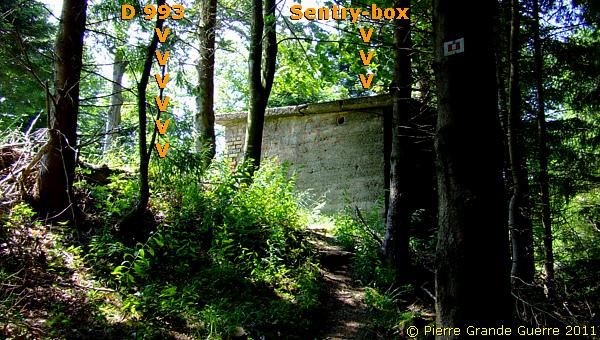
... via this dug-out ...

... to this sentry box at the western verge of the D 993.
Beware, in this general area, of these man-hole sized ventilation shafts hidden in the ground!
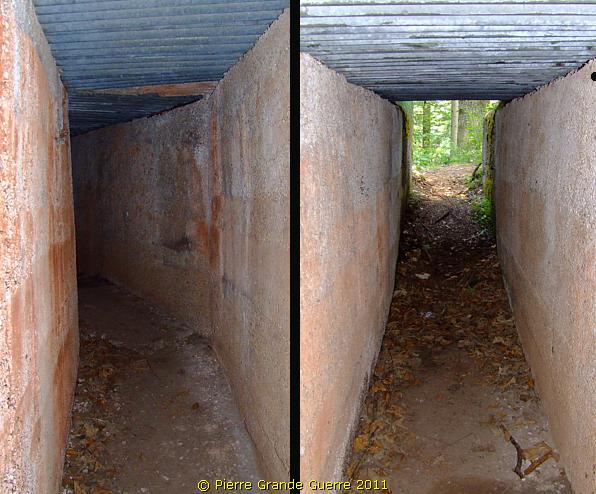
From here we go directly westward into the direction of the source of the Plaine. On our way downward we find this entrance to our last dug-out of this walk on Route "A".
There is a little stream of water flowing over the floor ...
... of this meandering tunnel.
It leads to two larger rooms.

The modern wooden pallets help you to keep your shoes dry.
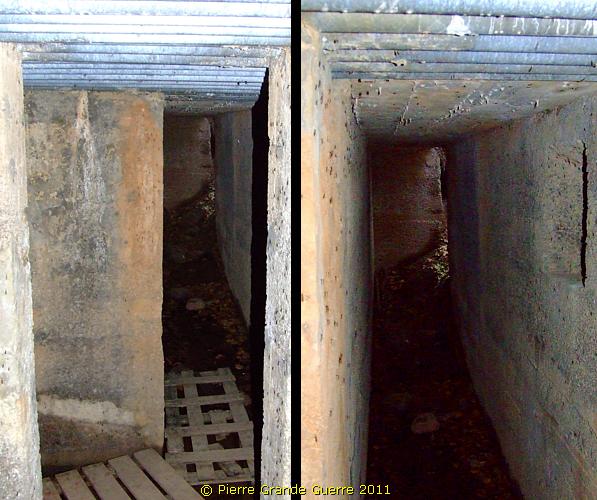
The exit tunnel is blocked by two tree trunks.
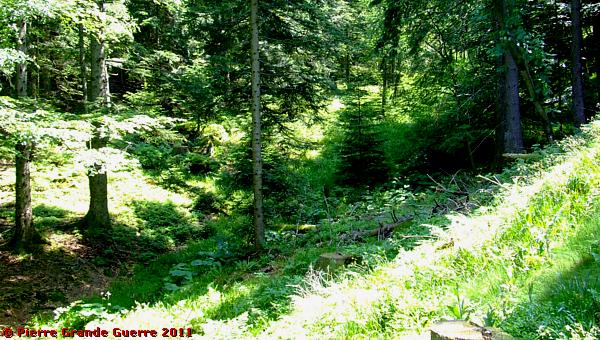
We descend to enjoy nature and ...
... to find the location of the barely visible source of a small stream, which will grow into the Plaine river.
Here we take a rest, preparing ourselves for the long ...
... and tiring climb to the Col Entre les Deux Donons.
At this point of the sentry box, we cross the D 993.
Caution! The D 993 road is meandering here, and high speed motor bike traffic is possible on any day of the week!
This is a westward view to the Donon made from the road. The Col Entre les Deux Donons, the "Pass Between the Two Donons", is on the left.
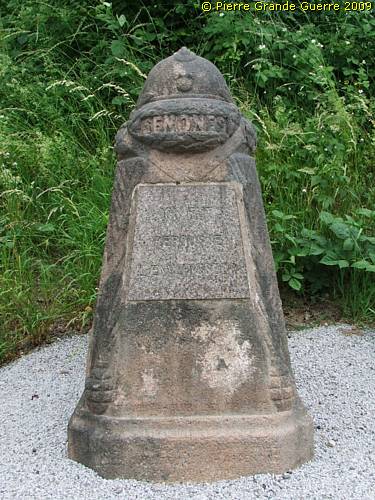
On the Col Entre les Deux Donons, hidden behind a parked car, I detected this small Bavarian memorial with a rather puzzling inscription. It is the war-time tomb stone of a fallen French Infantry officer.
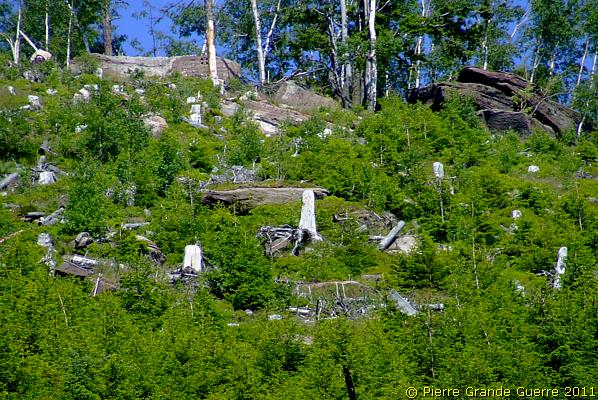
A view from the Col upward to the summit of the Petit Donon, or "Der Kleine Donon".
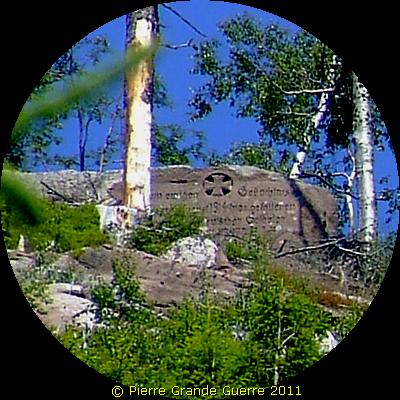
I have no breath left nor the strength to climb this summit. I have to show you a teleview of the summit of the Petit Donon.
My binoculars and my telelens show us the presence at the summit of a German memorial "in memory of the soldiers, fallen during the combats of 1914."
With just enough strength to resist the heat we descend for our walk back to our car at the other pass, the Col du Donon.
A last view of Route "A" from the Col Entre les Deux Donons southward to the Donon.
Bunker Route "B"
Before we start on Route “B” we depart from the Senones Franco-German War Cemetery of la Poterosse . We used this same route on our first unsuccessful explorations into le Merveux Wood. Although our first explorations of the year before were not successful, we were still rewarded with detecting this particular route, which will offer you a beautiful survey of the nature and landscape!
From La Poterosse we drive via the D 424 north-eastward to La Petite Raon. From there we continue north-eastward via the D 49 to Moussey. From there we follow the paved forest road, the Route Forestière de Praye , through the beautiful valley of the Rabodeau stream following the signs to the Col du Donon. At the end of the road, just before the junction to the Col du Donon, we park our car to start walking our Route “B”. More detailed information on Route “B” follows later on this page.
We depart from the town of Senones .
To be more exact: from the Senones Franco-German War Cemetery of La Poterosse, ...
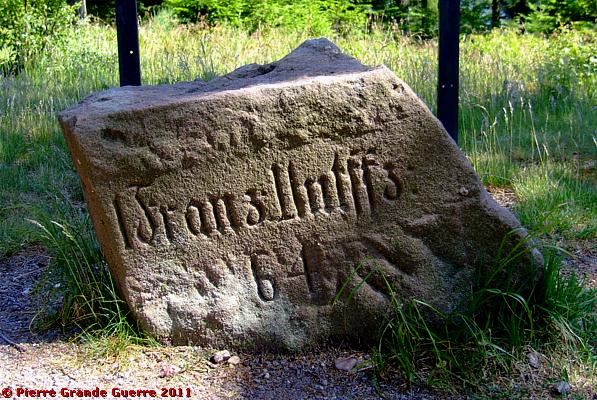
.... passing this post-war demarcation stone, before we leave the town to la Petite Raon.
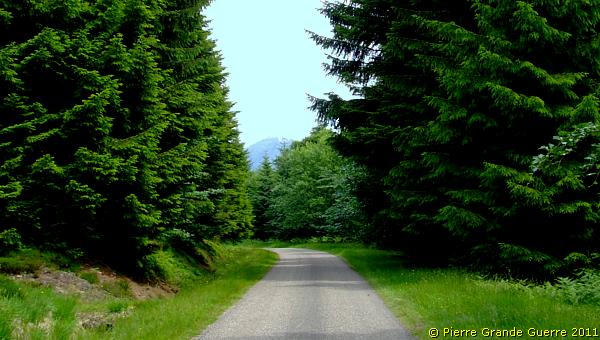
After Moussey we follow the Route Forestière de Praye through the valley of the Rabodeau north-eastward.
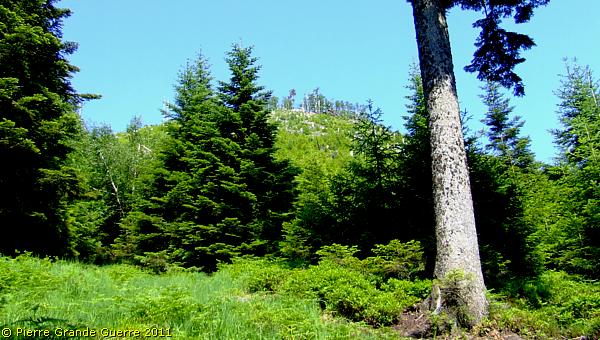
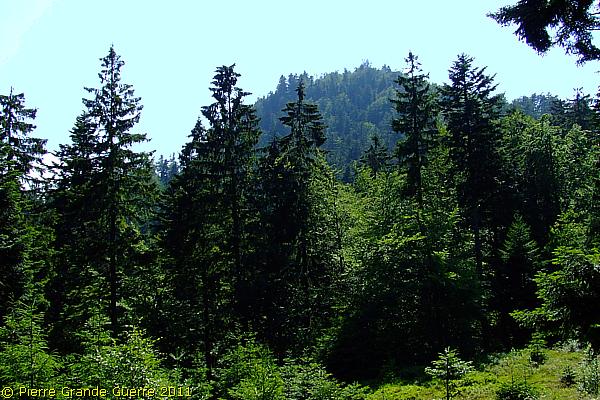
Surrounded by le Merveux Wood a view from the Route Forestière de Praye to the Donon.
A teleview, which you will recognise.
Christine drives at walking pace to offer me the time to spot the presence of German concrete. This second time our stubbornness helped; we are succesful! Now we only have to find a suitable starting point.
Just before the cluster of houses on the southern side of the Col, ...
... but still along the Route Forestière de Praye, we find on the northern side of the forest road a picnic site to park our car.
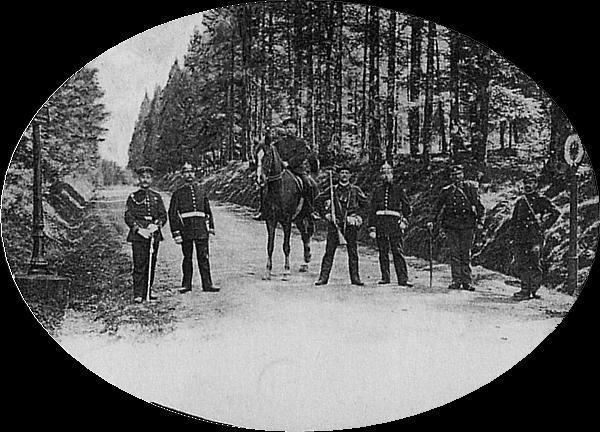
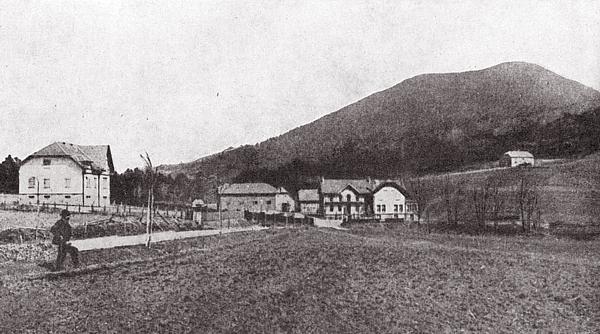
| The Germans on this period photo are guarding on this spot the road, D 392, to Raon-sur-Plaine. |
Bunker Route "B" in more detail
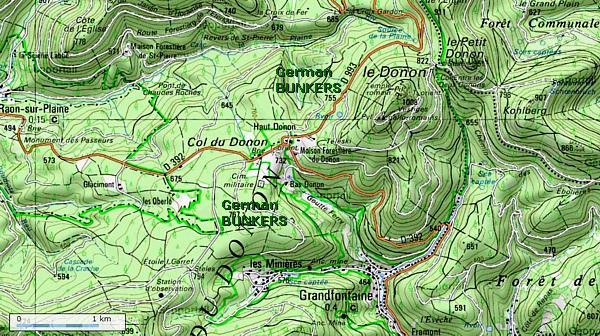
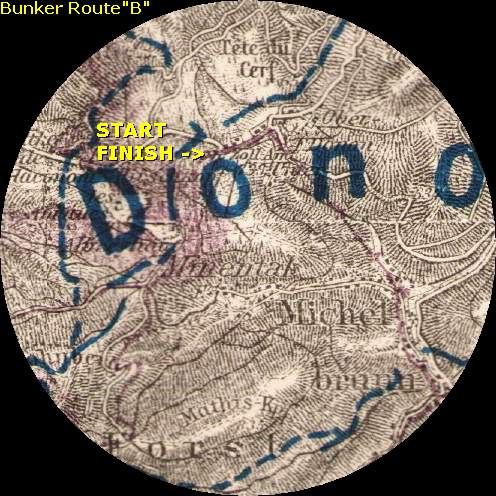
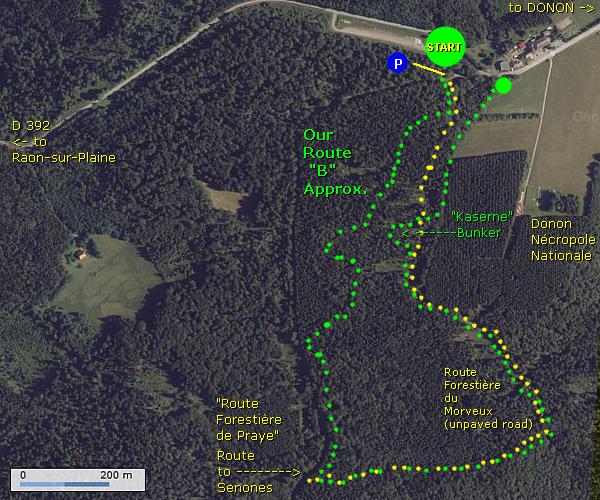
Our Route “B” is much shorter than the 9,5 Km, as shown by the marked signs with a red circle for the “Route des Fortins”. As you can see on the German trench map, my survey is not complete, but perhaps my impression will inspire the more able amongst us to walk farther than we did?
Our Route “B” is a rather easy walk, because the route is on the same ground level. You still have to pay attention to man-hole sized ventilation shafts hidden under the vegetation. And you will still need your basic outfit; water, suitable shoes, hat and a torch!
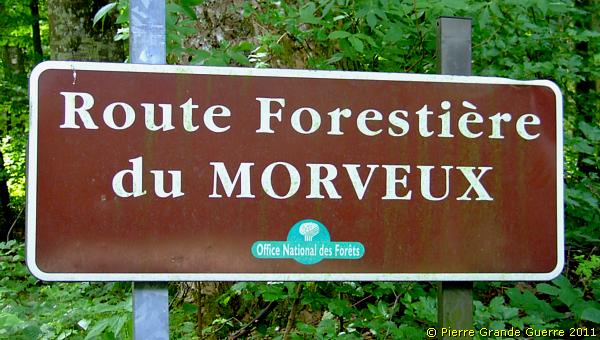
Our route follows roughly the blue line on the trench map detail and it starts following the unpaved Route Forestière du Morveux.
On the verge of the road we will find immediately the ruins of a German cableway station. After a while we follow the traces of trenches to dug-outs closer to the road, as the map of our route shows.
At our most southern point, a damaged bunker on the verge of the road, we go eastward and later northward to look for an interesting “Kaserne” bunker, which also forms the last building we will visit.
After parking you car at the picnic site you cannot miss this sign on the other side of the road.
In the beginning of Route "B" we will follow this forest road.
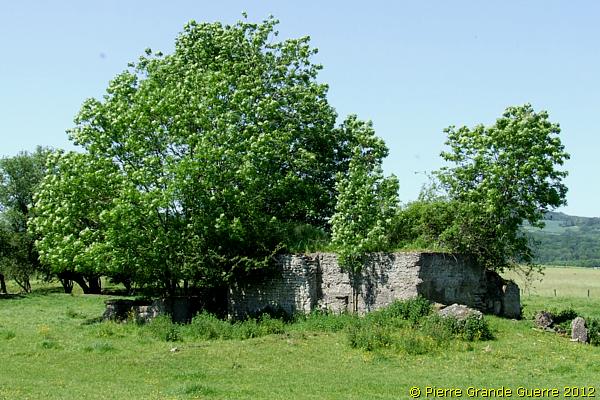
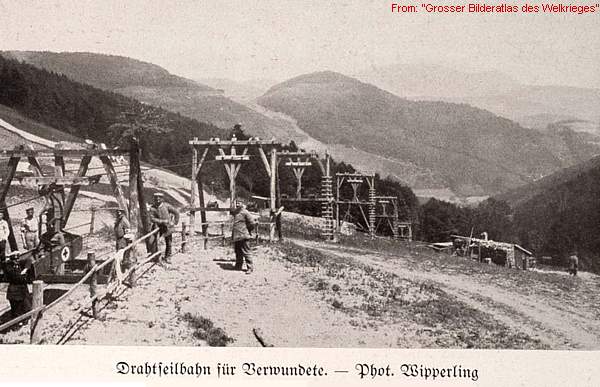
I am pleasantly surprised to find the ruins of a large building; ...
... a "Drahtseilbahn" station, a cableway station!

A cableway supplied equipment and materials from the valley ...
... of Schirmeck to the Donon
and the Col here.
Period photo examples of
"Drahtseilbahn" - stations

To give you an impression of how this building may have looked, I show you two period photographs of other locations of a "Drahtseilbahn" station. The first one, above, is located at a slope of the Petit Ballon , Central Vosges.
The second example, below, was of the "Eberhardt - Drahtseilbahn", located on the Chaume de Lusse , Northern Vosges.
Other fine examples of cableway stations are to be found on the Buchenkopf - Tête de Faux .
These two images here do not mean that the building here at the Col looked exactly the same!
Network of cableways in Vosges front sector
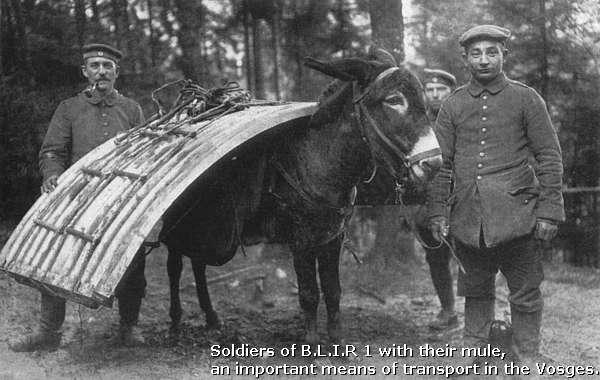
From the Hirtzstein in the south to the Chapelotte in the north the Germans exploited in the Vosges front sector a complete network of cableways for transporting supplies from the relatively safe valleys behind the front line upward to their positions at the Vosges summits.
This means of cableway transport was of course much faster and more efficient than the other widespread means of transport in the Vosges, the use of mules over meandering paths and in winter over icy mountain roads.
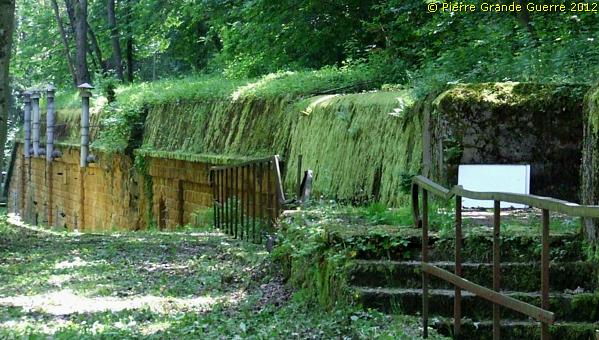
We continue our exploration of the ruins of this large complex.
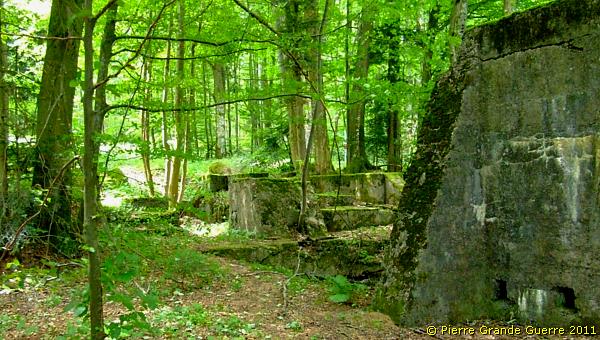

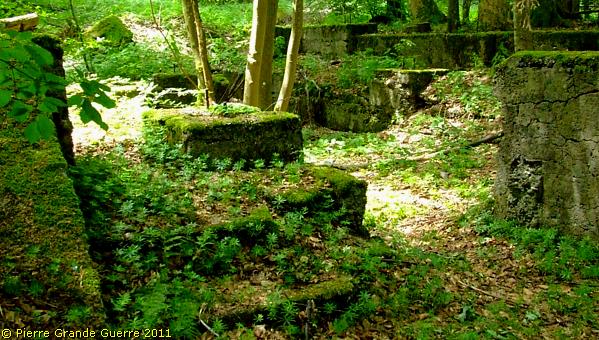

A concrete staircase leads us back to the forest road.
On the other side of the forest road, opposite the station, we find this construction.
It is not a bunker. I suppose this construction was in some way connected to the cableway station.
Perhaps the base of a set of wheels or pulleys?
A view from this concrete base to the station opposite.
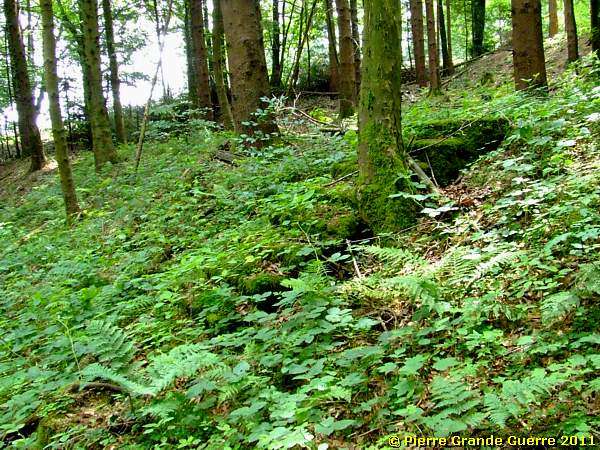
We continue some 100 m. southward to leave the forest road, ...
... and from there we follow a path south-westward into the wood.
The path is meandering.
Sometimes the forest road de Praye is visible.
But now and then traces of trenches ...
... lead us away from the road into the wood.
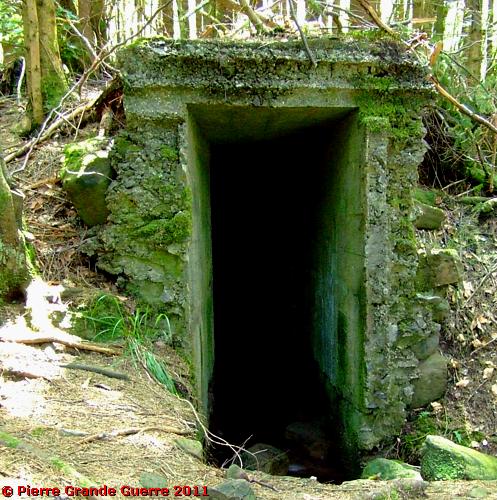
Some 150 m. east of the paved road ...
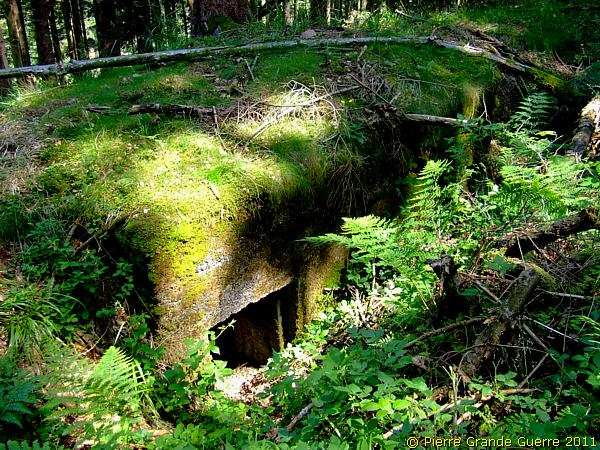
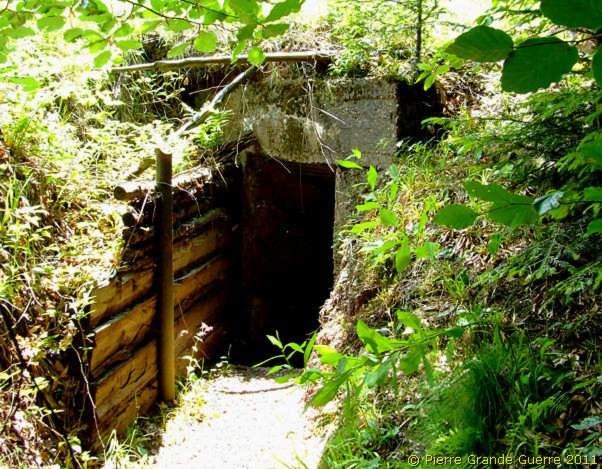
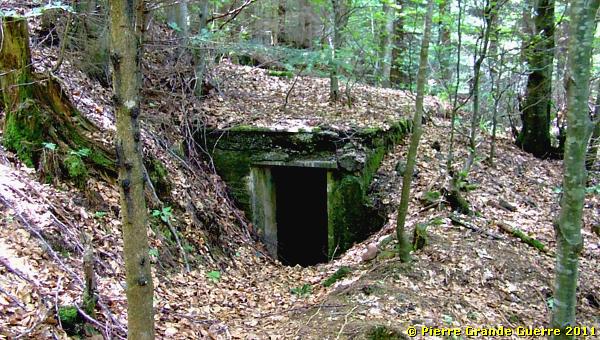
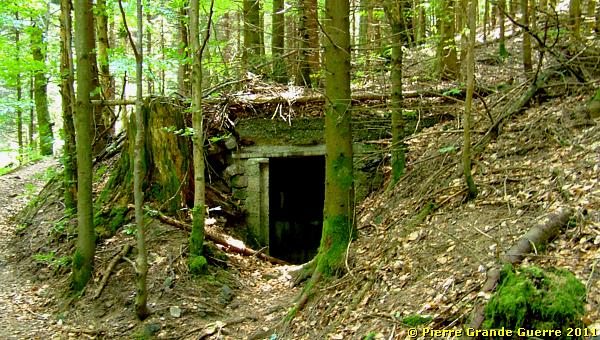
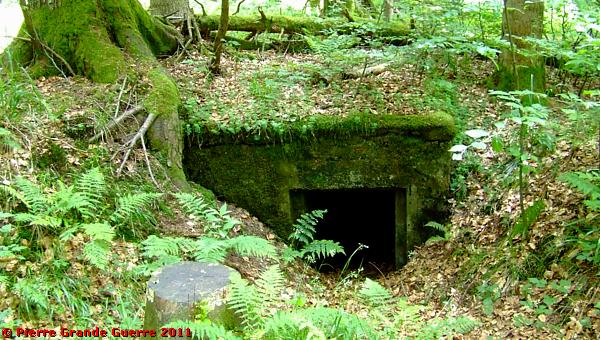
...we find the northern entrance to an interesting dug-out.
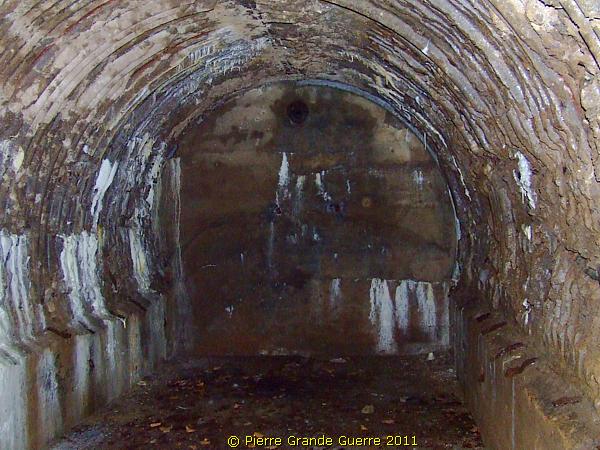
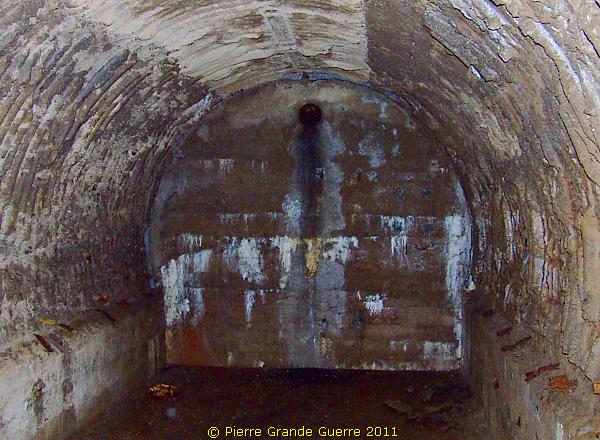
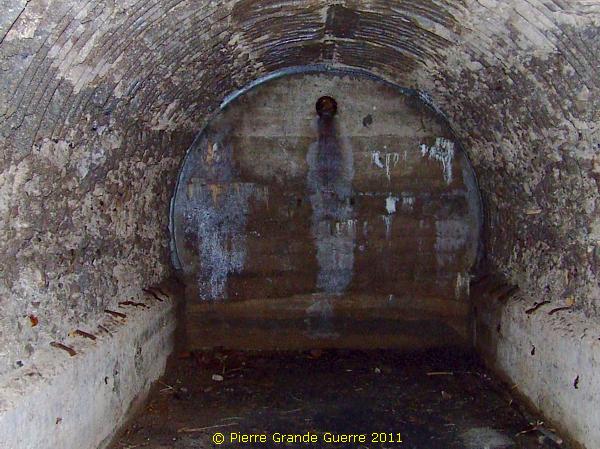
A fine example of an arched bunker with two angled tunnels leading into it.
Again, an almost "step-by-step" impression of the interior.
The three arched rooms were meant to house some 40 men.
The second room.
The third room.
The corridor again.
We leave the dug-out via the southern exit tunnel.
The southern entrance on the outside.
The vegetation on the top construction looks like forest soil. But again, beware of these ventilation shafts!
Bobby gets impatient and he urges me to go on.
We continue meandering southward into the direction of the paved road ...

... and back again into the wood.
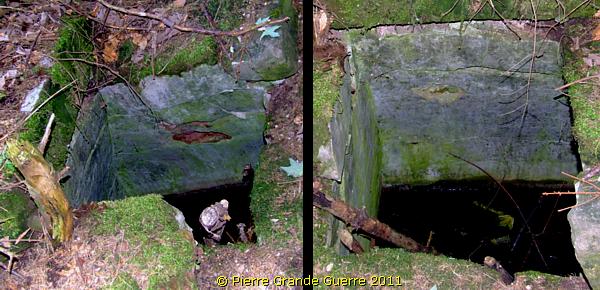
Although his concrete cistern looks not as impressive as a bunker, for the troops a sufficient water supply was vital.
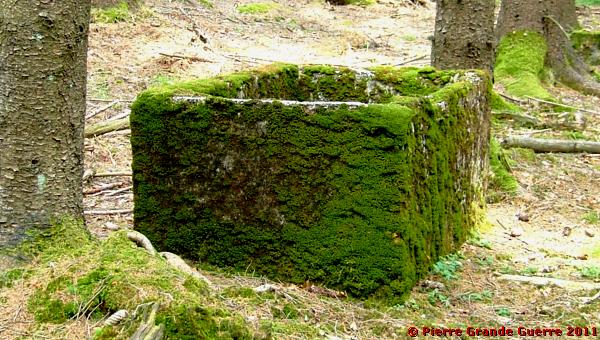
During the Great War many a battle or a siege was lost by sheer lack of water for the troops.
Still going southward we will visit now some bunkers close to the Praye forest road.


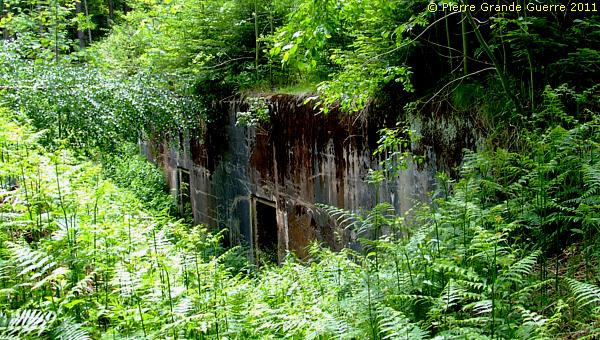
Before we go eastward into the wood, we find on the verge of the road the ruins of a heavily damaged bunker.

The damage offers us a view of a fine example of German reinforced concrete.
From its location along the road and its ground surface, this might have been a machine-gun bunker.

From here we go eastward, on our way to our last location.
After passing another concrete cistern ...
... and a short break, we follow for a while the Merveux forest road northward.
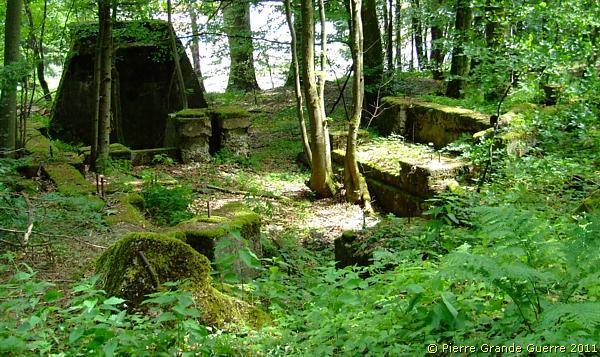
After some 350 m. we go left into the wood. Hidden under tall vegetation, below us lies this large construction, which will be also the last we will visit.
The two entrances look welcoming, ...
... if I succeed to descend the steep slope.
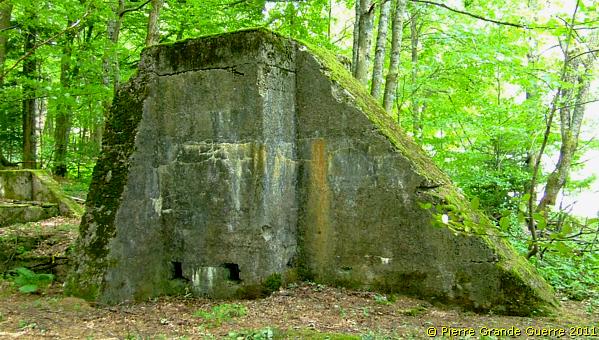
On entering the interior I see traces of concrete block masonry.
As I expected, it is an arched three-room bunker covered with concrete.
The two small rooms on the extremes seem to be meant as latrines.
In the middle there is a sentry room with an interesting detail: ...

... a steel hatch, protecting a peep hole.
As the second entrance is blocked, I turn round, and I show you first the most northern arched room.

The second room.
The third room.
We return to the southern entrance.
This is a last view of the exterior of this impressive bunker.
We continue our walk northward along the edge of the wood, ...
... where we get this beautiful view of the Donon.
Our route stops at the same cluster of houses near the starting point, ...
... from where we have to walk some 100 m. westward, back to our car at the picnic site to finish our Route "B".
Continue to the Central Vosges: " Col du Bonhomme - Col de Mandray "