ARTOIS - Fromelles 1916
Year of visit: 2005, 2006, 2010, 2014
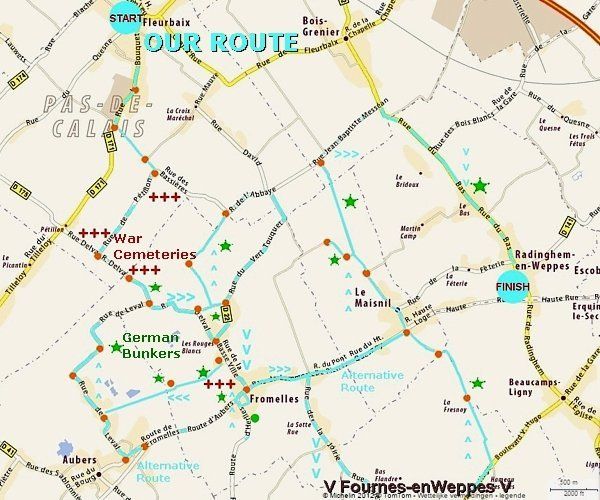
A visit to: Rue Pétillon Cemetery - Le Trou Aid Post Cemetery - VC Corner Cemetery -Australian Cobbers War Memorial - Capt. Kennedy Memorial - Pheasant Wood - Pheasant Wood Cemetery - Sugar Loaf Bunkers - Fournes-en-Weppes - Le Maisnil Bunkers - Radinghem-en-Weppes Bunkers.

From Auberswe continue our explorations of the Aubers Ridge Battlefield around the neighbouring village of Fromelles: a route in two stages. During the war Fromelles always shared the fate of Aubers.
In the first part of this photo impression our route will focus on the battlefield of Fromelles and the fate of the Australian 5th Division during the Battle of Fromelles of 19-20 July 1916. We start at Fleurbaix with a visit to two British military cemeteries, Rue Pétillon and Le Trou Aid Post, the Layes brook, the Australian VC Corner Cemetery, the Cobbers Memorial, Pheasant Wood and the Fromelles Pheasant Wood Military Cemetery. In between I will explain briefly in three frames the background of these sites during the Battle of Fromelles. In the second part of this photo impression our route focuses on the German concrete relics of the sites of action of the Fromelles battlefield. We will visit bunkers in the Sugar Loaf Salient and in the front sectors of les Rouges Bancs, Delangré Farm and la Boutillerie. We will make a short detour to Fournes-en-Weppes to continue our bunker route via le Maisnil and we will finish in the Rue du Bas, north of Radinghem-en-Weppes.
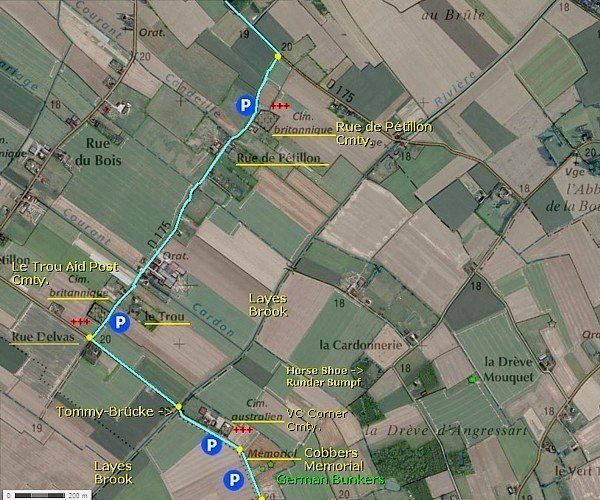
We start our route in the community of Fleurbaix with a visit to the Rue Pétillon Military Cemetery along the D 175.

In May 1915 and July 1916 the Rue de Pétillon was one of the jump-off sites of the British and Australian forces on the line from Fauquissart to Fleurbaix.
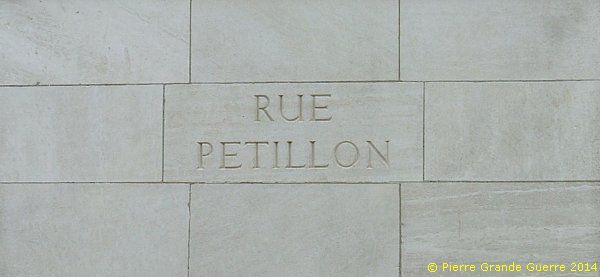
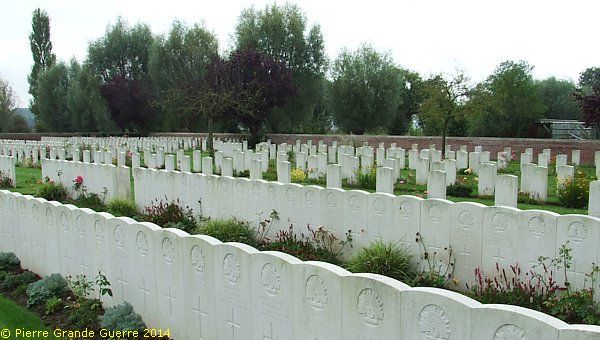
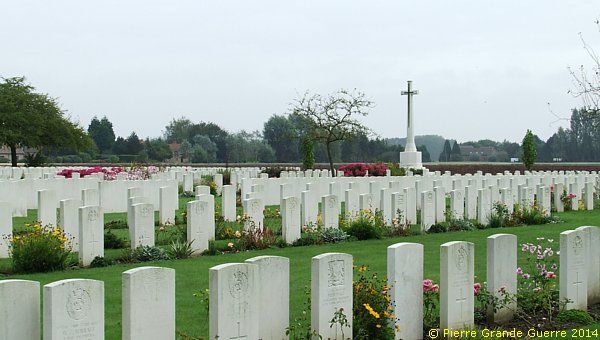
| Rue Pétillon Military Cemetery - British soldiers began burying their fallen comrades at Rue Pétillon in December 1914 and the cemetery was used by fighting units until it fell into German hands during the Spring Offensive of 1918. The Allies recaptured this sector of the front in September 1918 and when the war ended in November the cemetery was the site of twelve Battalion burial grounds. Many of those laid to rest here had died of wounds in a dressing station located in the buildings adjoining the cemetery, which were known as ‘Eaton Hall’ during the war. The cemetery was enlarged in the years after the Armistice when graves were concentrated here from the battlefields around Fleurbaix and a number of smaller burial grounds. A whole range of different Commonwealth units served in this sector during the war and the cemetery contains the graves of British, Irish, Canadian, New Zealand, and Indian soldiers, as well as over 260 men who were killed while serving with the Australian Imperial Force (AIF). Today over 1,500 war dead of the First World War are buried or commemorated here. Source of all data of the war cemeteries mentioned on this page: Commonwealth War Graves Commission. |
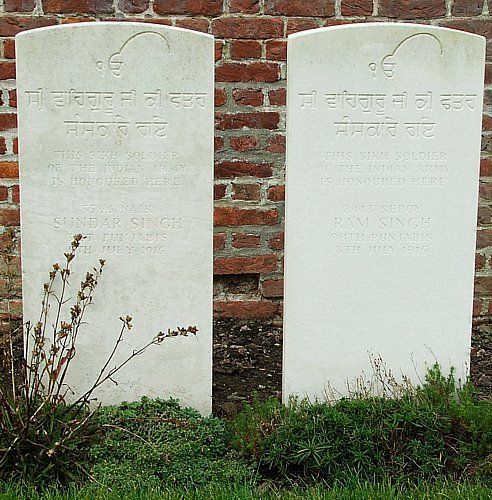
Two graves of victims of the Battle of Aubers Ridge of 1915 of the Indian Corps, a Naik ( Lance Corporal ) and a Sepoy ( Soldier ).
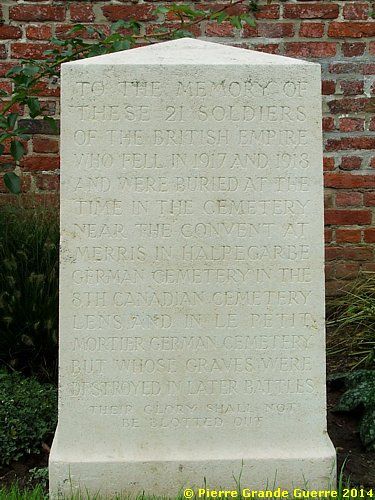
This memorial commemorates 21 soldiers, fallen in 1917 and 1918, originally buried in other cemeteries, but “whose graves were destroyed in later battles”.
There is a particular plot for victims of the 1st, 2nd and 4th Australian Division, the predecessors of the 5th Australian Division, fallen during German trench-raids some weeks before the Battle of Fromelles.
The German Raids of 5 and 30 May 1916
One of the first encounters of the Australian soldiers with the German forces occurred on the evening of 5 May 1916, when units of the 16th Bavarian Reserve Infantry Regiment (B.R.I.R. 16) raided the Australian trenches south west of Fleurbaix around Le Bridoux. After a withering artillery and mortar bombardment that caused dozens of casualties, German soldiers entered the Australian positions and captured a small number of prisoners before retiring to their own lines. For the next few weeks, activity along this sector of the front increased as German and Australian artillery units regularly exchanged fire and German snipers claimed a steady toll of casualties.
30 May
On 30 May, the Germans staged another raid, this time attacking a salient held by the 11th Battalion AIF at Cordonnerie Farm. British and Australian miners had been tunnelling in this part of the line, and the objective of the German raid was to identify the Commonwealth regiments in the area and destroy mine shafts. At 8.15 in the evening, the Germans unleashed a devastating bombardment of artillery shells and heavy trench mortar bombs. This intense fire continued for over an hour and twenty minutes and completely destroyed the flimsy breastworks behind which the Australian troops were sheltering. Despite the noise and thick clouds of shell smoke, the men of the 11th rallied well and began firing Lewis gun rounds toward the German troops who started advancing across no man’s land just after 9.00 pm. The raiders managed to enter the Australian positions and capture a handful of prisoners, but were forced to retreat before they could inflict further damage. The lengthy bombardment that accompanied the raid on 30 May caused over 100 Australian casualties, over 40 of whom were killed. Many of those killed during the raid were buried at Rue Pétillon, which is also the final resting placing of over 100 Australian soldiers killed at the Battle of Fromelles on 19 July 1916.
Source: Commonwealth War Graves Commission.
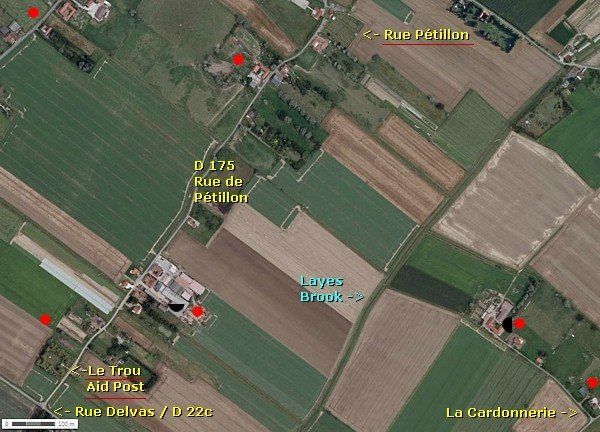
We leave the cemetery to continue south-westward along the Rue de Pétillon to the Le Trou Aid Post Cemetery.
But before we continue our trip, I shall briefly explain in the intermezzo below the composition of the Allied forces on the eve of the Battle of Fromelles of 1916, and in particular the 5th Australian Division.
XI Corps and the 5th Australian Division
Lieutenant General Sir Richard Haking and his XI Corps (61st (2nd South Midland) Division and 5th Australian Division) positioned themselves opposite the German lines on Aubers Ridge.
The 61st Division , under command of Major-General C. J. Mackenzie, had disembarked in France in late May 1916, after delays in training caused by equipment shortages and the supplying of drafts to the 48th Division. The division entered the front line for the first time on 13 June.
The Tommies of the British 61st Division positioned themselves around Fauquissart opposite the Wick Salient of Aubers and occupied 2,750 m. of line.
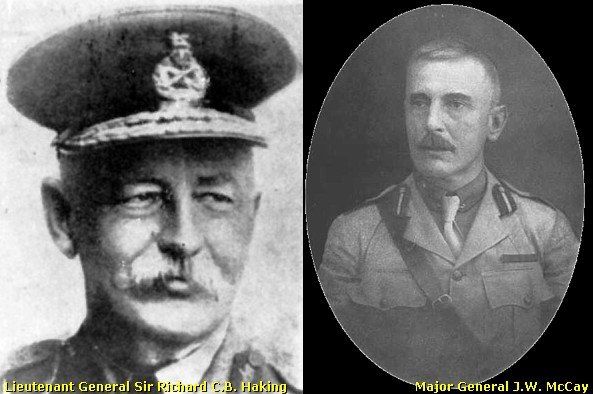
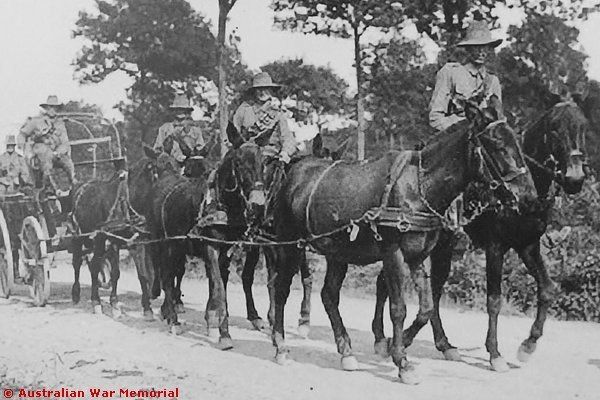
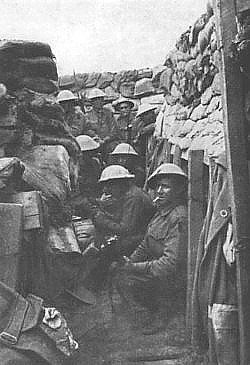
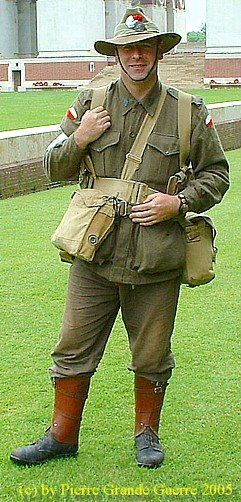
The 5th Australian Division , consisting of 18,000 men, under command of Major General J.W. McCay , had arrived in France only days before the attack and relieved the 4th Australian Division on 12 July 1916 on the right flank of the Second Army. After the defeat of Gallipoli the 5th Australian Division stayed in Egypt, reinforced by draft after draft of fresh recruits. In Egypt the soldiers were trained in trench-digging, road construction, handling hand grenades, firing Lewis and Vickers machine-guns and firing the new 3 inch Stokes mortar.
The Diggers of the Australian 5th Division positioned themselves around Fleurbaix opposite Fromelles and occupied 1,800 m. line.
The majority of McCay's soldiers had no battle experience at all. The artillery of the 5th Division and some of the heavy artillery had no experience with finding their targets in the German zone. In fact neither division, the 61st nor the 5th Division, was well-prepared for the coming attack.
In the meantime we have arrived at Le Trou Aid Post Cemetery , belonging to the Allied lines.
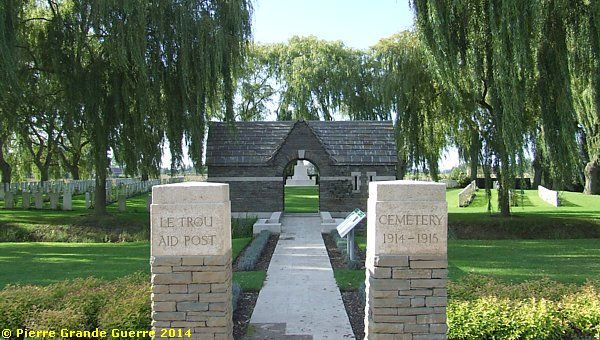
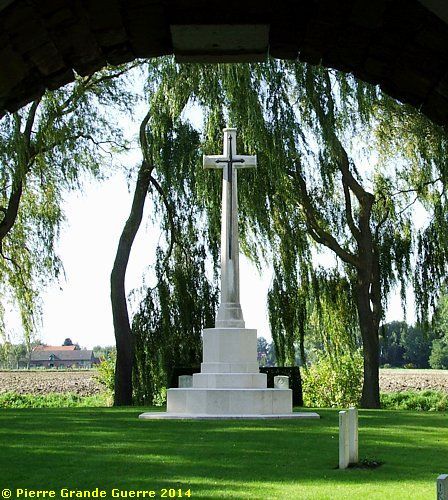
Le Trou Aid Post Cemetery - In October 1914 British soldiers serving in the Fleurbaix sector began burying their fallen comrades beside a regimental aid post and dressing station located not far from the support trenches that led to the front-line. Le Trou Aid Post cemetery was used until July of 1915 and when the war ended contained just 123 burials, all of which are now in Row F. In the years after the Armistice, the cemetery was enlarged when the remains of Commonwealth soldiers were brought here from other burial grounds and battlefields throughout the region. The cemetery is now the final resting place of officers and men killed in heavy fighting at Le Maisnil in October 1914, the Battle of Aubers Ridge (9-10 May 1915), the Battle of Loos (25 September – 14 October 1915), and the Battle of Fromelles (19-20 July 1916).
The unique architectural features and landscaping in the cemetery were designed by Sir Herbert Baker. Today more than 350 Commonwealth soldiers of the First World War are buried at Le Trou Aid Post. Over 200 burials are unidentified, but special memorials commemorate five casualties known or believed to be buried among them. There are also two French war graves.
We leave the cemetery, and we continue our route.

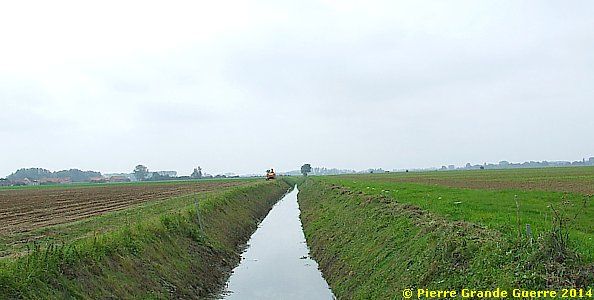
Only after some 100 m. we turn right to the Rue Delvas / D 22c to park our car near a small bridge over the Layes brook .
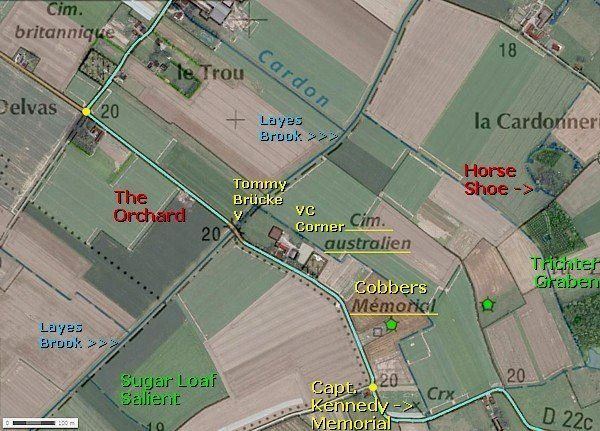
The Germans called this bridge the " Tommy-Brücke ", Tommy Bridge .
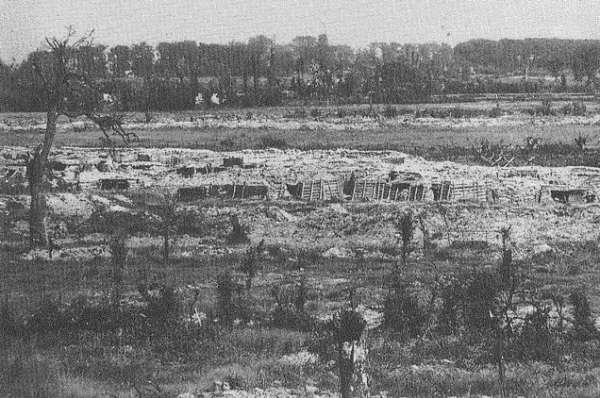
The next views from the bridge might seem dull now, but simultaneously the bridge offers an opportunity to understand the situation of the battlefield. A view over the Layes north-eastward to the site of the former Australian lines.
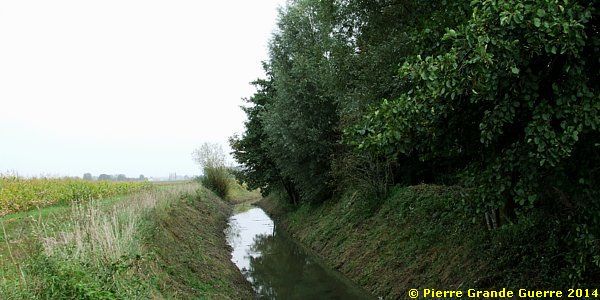
The Layes is an important landmark, running diagonally over the battlefield. This view over the Layes south-westward shows a different situation. The brook was a natural dividing line in No Man's Land between the first breastwork lines of the Australians and the Germans.
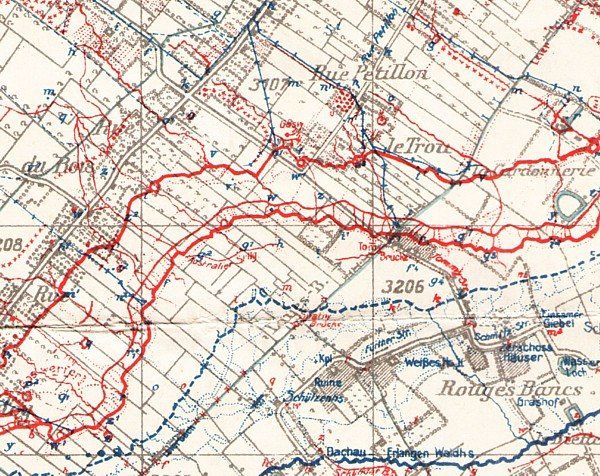
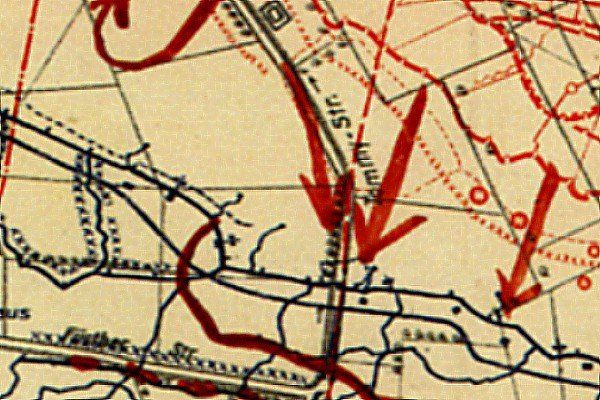
The Orchard and the Sugar Loaf Salient
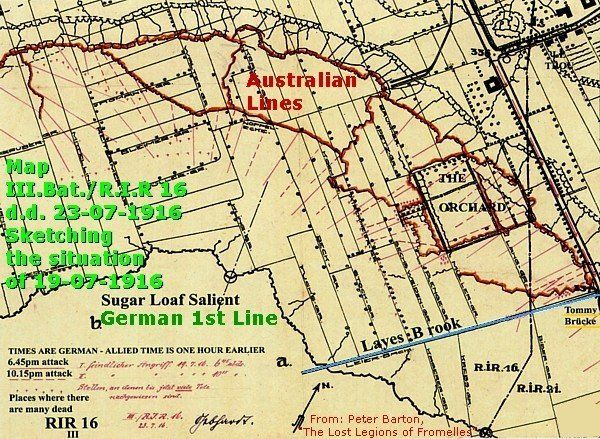
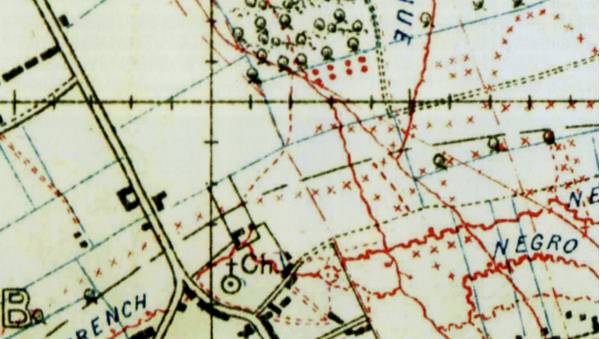
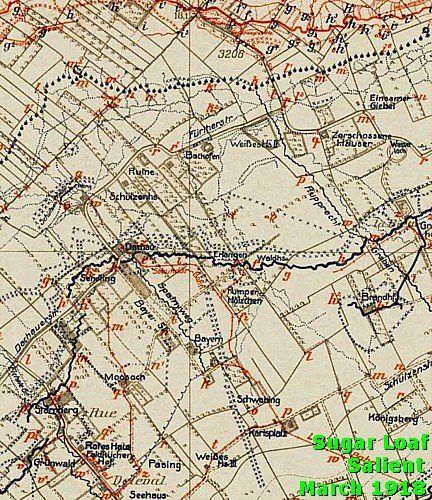
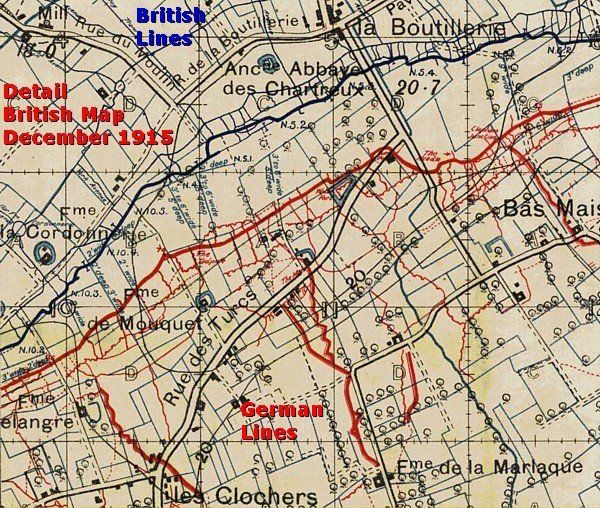
On this German map of 23 July 1916 you will find our position on the “Tommy-Brücke” on the eastern edge of the map. The map shows in red the Australian network of breastworks, called The Orchard. The dark blue line marks the first line of the Bavarian Sugar Loaf Salient.
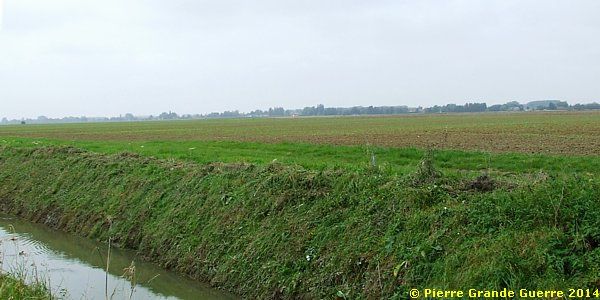
View from the Tommy Bridge
north-westward to The Orchard.
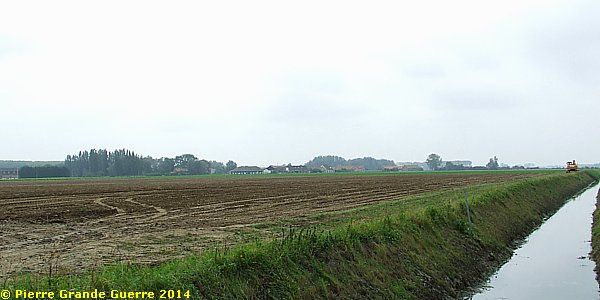
View south-westward to the German Sugar Loaf Salient.
Before we continue southward, I shall briefly explain in the frame below the composition of the Bavarian defenders on the eve of the Battle of Fromelles of 1916.
The German defence
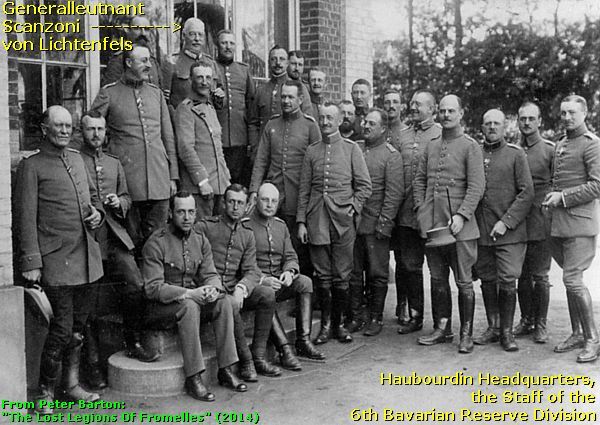
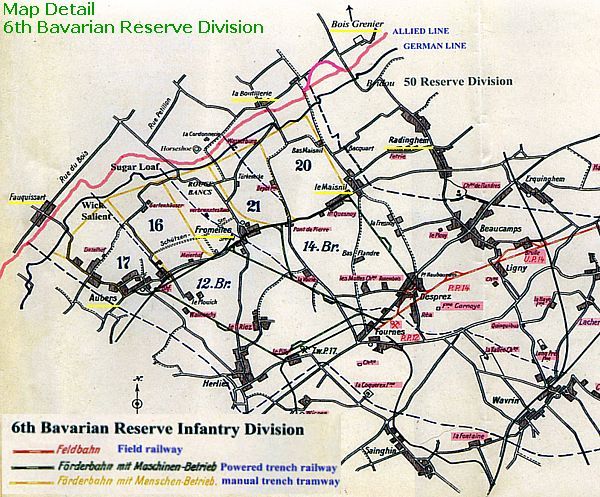
Since 26 December 1914 Generalleutnant Gustav Scanzoni von Lichtenfels commanded the 6th Bavarian Reserve Division, which comprised the 12. Bayerische Reserve Infanterie Brigade (12. B.R.I.B.), (Bayerische Reserve Infanterie Regiment 16 and B.R.I.R. 17), and next the 14. Bayerische Reserve Infanterie Brigade (B.R.I.R. 20 and B.R.I.R. 21).
After their huge victory of the Battle of Aubers Ridge of 9 May 1915 the units of the 6th Bavarian Reserve Division were constantly busy to improve their positions with mined-out dug-outs in the lower parts of the landscape and reinforcing bunkers.
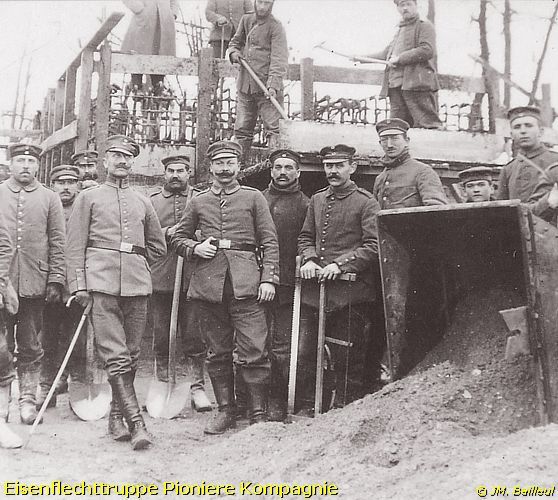
The barbed wire entanglements were renewed, doubled, sometimes tripled. During the autumn and winter the lower agricultural lands around the hills of Aubers and Fromelles used to flood very often in a muddy landscape filled with pools. In the poorly drained terrain the Bavarians extended the first defence line of ground level breastworks. They possessed powered pumps to keep the breastworks dry.
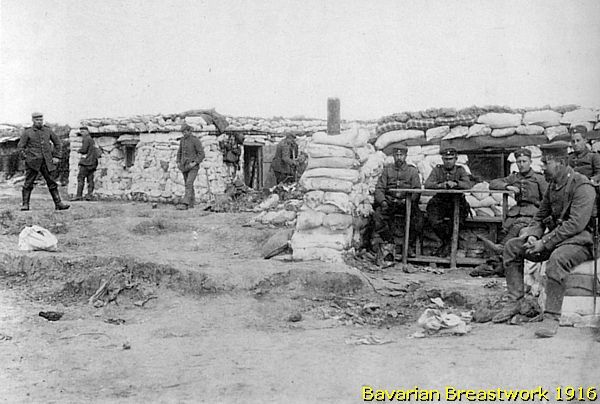
The first defence line, the " 1. Stellung ", formed also the accommodation for the main garrison, which was to move forward during an attack to hold the front line at all costs.
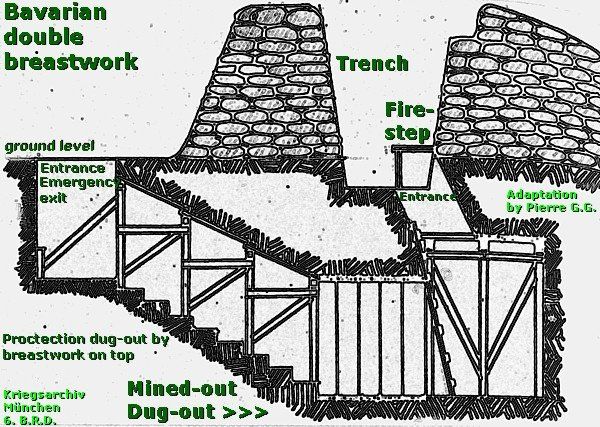
The network of breastworks was extended with traverses and a “parados” (a bank of earth behind the trench to provide rear protection) . At the end of saps, running into No Man's Land some 30 m. beyond the barbed wire entanglements, the Bavarians installed forward listening posts, " Horchposten" .
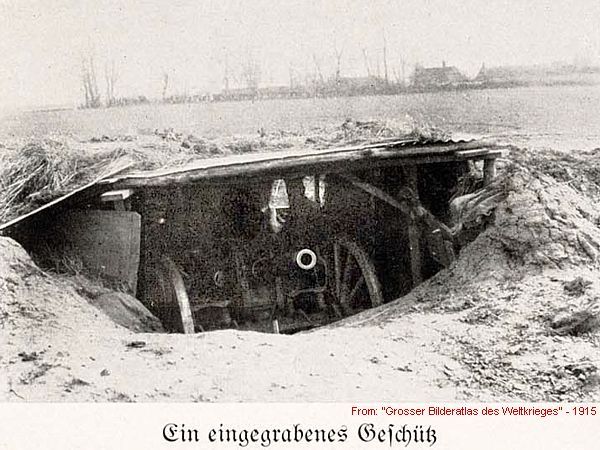
The Bavarians possessed a large range of concealed artillery guns and some dummy batteries to divert their enemy. Among the real guns were a dozen 33 mm. trench cannons.
Continuous monitoring of the Allied positions, accurate registration and mapping of the targets before the battle enabled the Bavarians to target successfully the British and Australian gun batteries. The Bavarian batteries were also able to produce enfilade fire during an infantry attack. They also possessed a large amount of mortars of various calibres (" Granatenwerfer ", " Minenwerfer " and " Ladungswerfer "), marked on the map in blue with "GW" and "MW".
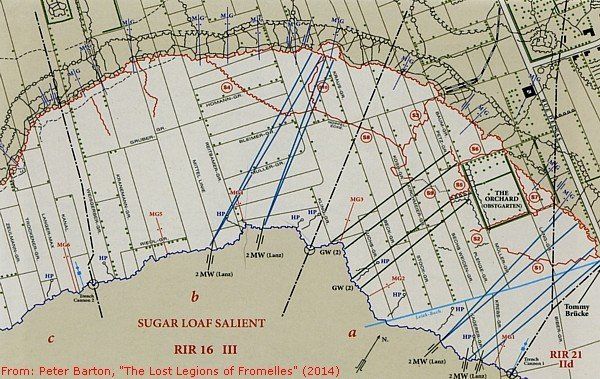
By 1916 each battalion owned 5-7 machine-guns, which were positioned in emplacements at ground level, ready to sweep No Man's Land from flanking positions, marked on the map above in red as "MG".
Below a 1918 post-war sketch of the German defence system around Fromelles and Aubers, showing the machine-gun positions of Aubers Ridge.
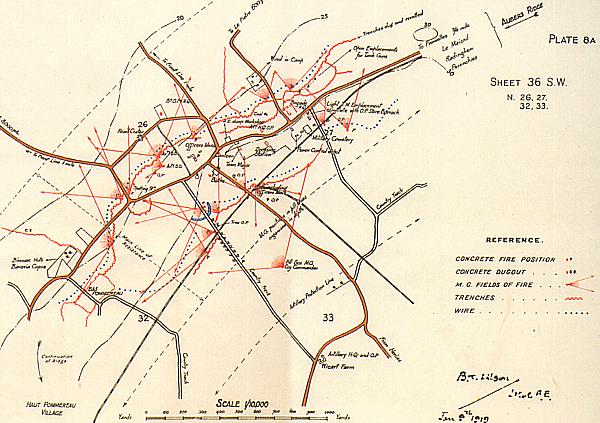
A large part of these machine-guns were captured and modified British, French, Russian and Serbian weapons. Not all of these weapons were deployed at the front line. As a precaution against enemy artillery damage no battalion would deploy more than 4 machine-guns at the same time in the front line. Some were kept behind, safely stored in support positions, ready to assist in case of a breakthrough, or, if needed, to be transported forward. About 700–1,000 m. behind the first line of breastworks the Bavarians built a line of concrete machine-gun posts, known as “ Stützpunkte “.
Because of their combat experience and their two years of familiarity with the terrain of the battlefield of Aubers Ridge, Scanzoni von Lichtenfeld’s troops were simply superior to the recently arrived Australian units, who lacked the battle experience and the same familiarity with the terrain.
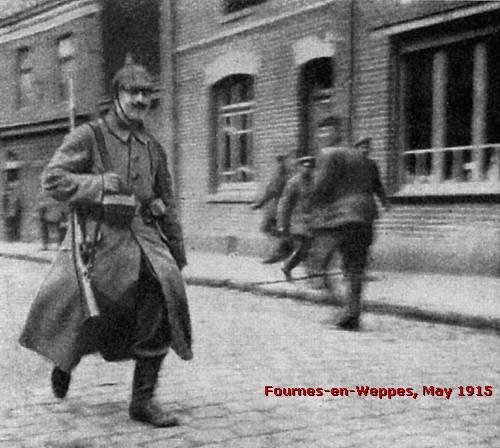
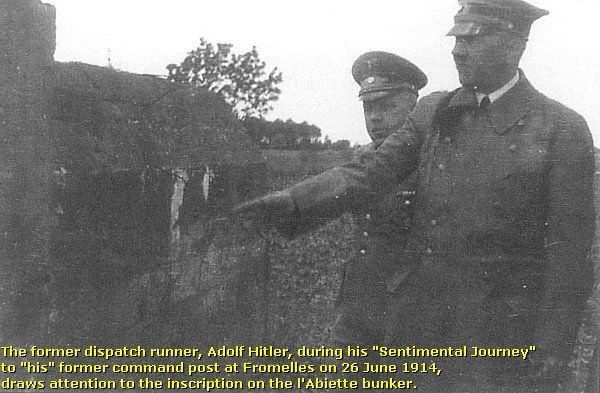
| One of those Bavarian soldiers, active on the Fromelles front, was dispatch runner or " Meldeganger ", " Gefreiter " Adolf Hitler, a Corporal of the Bavarian Reserve Infanterie Regiment 16. On our route we will visit later three sites, which the dictator himself showed on the spot during his "Sentimental Journey" to the Western Front in June 1940. |
From the Tommy Bridge we continue 200 m. to stop at the VC Corner Australian Cemetery, which is located on the former barbed wire entanglements in front of the Australian first line. The first Australian line was behind the cemetery.
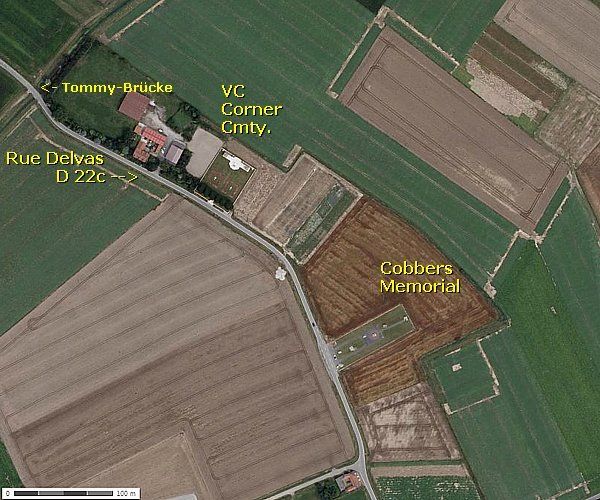

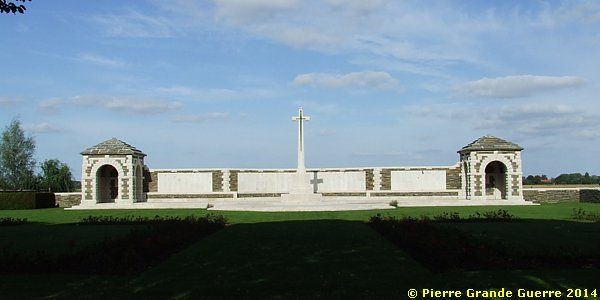
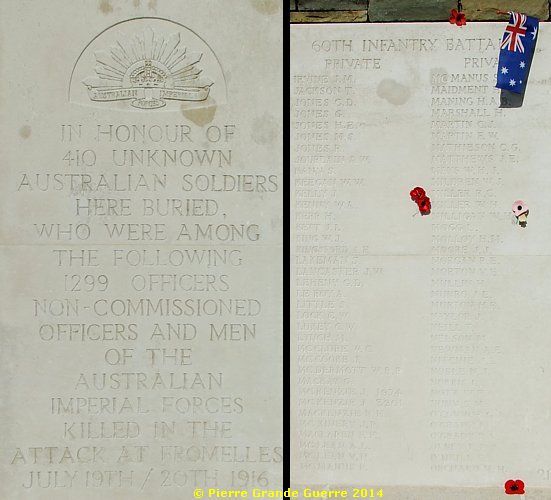
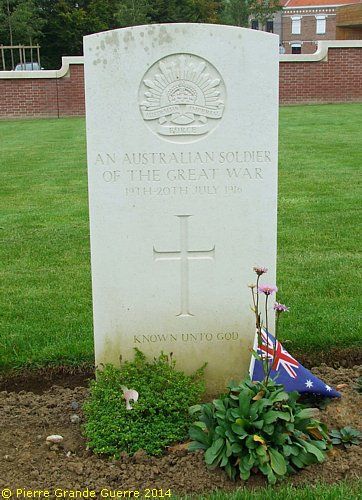
We pay a visit to the VC Corner Australian Cemetery and Memorial , close to the German first line, where 410 Australians soldiers are buried, fallen during the Battle of Fromelles.
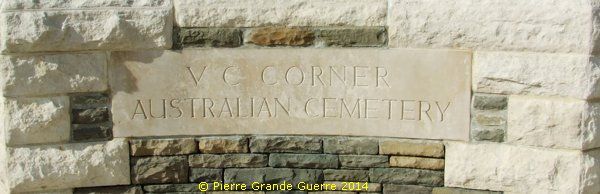
V.C. Corner Australian Cemetery and Memorial was formed after the Armistice. The cemetery contains two mass graves of 410 Australian soldiers, who were killed during the Battle of Fromelles of 19-20 July 1916 and whose bodies were found on the battlefield. As none of the bodies could be identified, it was decided not to mark the individual graves, but to record on a memorial wall the names of all the Australian soldiers, who were killed in the engagement and whose graves are not known. Many of those originally listed on the memorial were subsequently identified and re-interred at the Australian Fromelles Pheasant Wood Cemetery. The memorial, designed by Sir Herbert Baker, commemorates over 1,100 Australian casualties.
A view from the VC Corner Memorial south-eastward ...
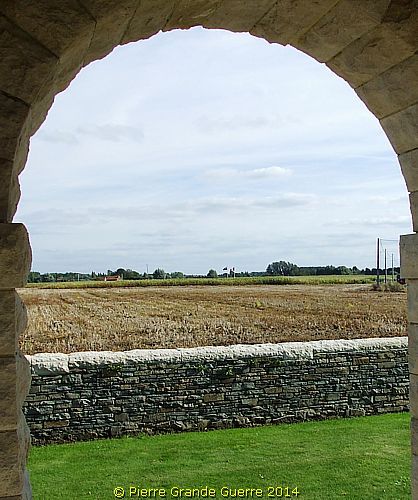
... to the Cobbers Memorial, less than 200 m. away, which stands on a bunker complex in the first Bavarian defence line.
We cross the No Man´s Land to visit the interesting ....
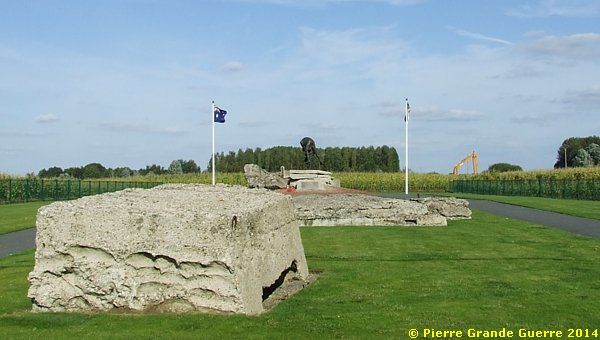
... Fromelles Memorial Park and the Cobbers Memorial .
The Memorial Park has been created on the relics of the original German first line bunkers on this site.
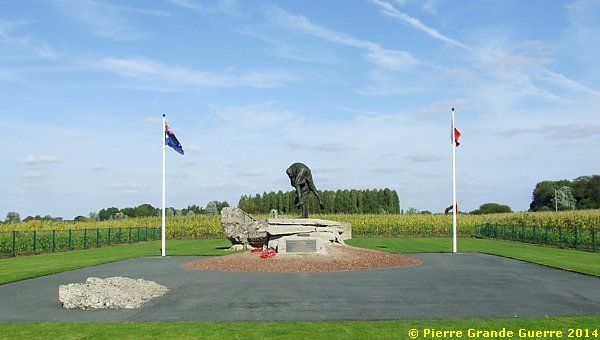
The Memorial Park was designed to commemorate the Australians who fought and died during the attack at the Battle of Fromelles on 19th to 20th July 1916. The Memorial Park was opened at a ceremony on 5th July 1998.
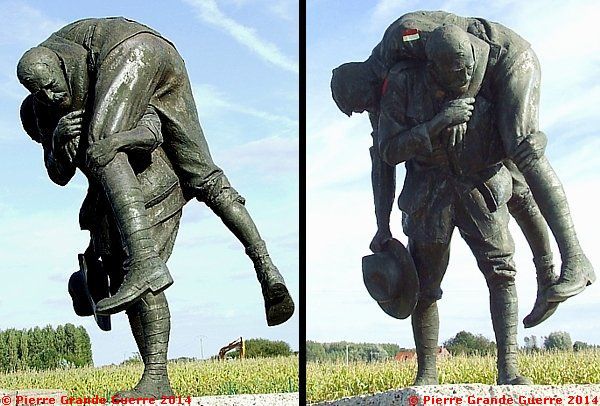
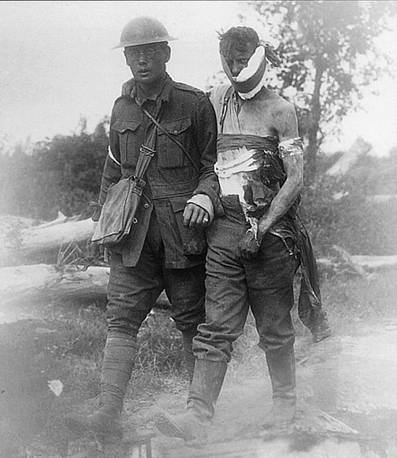
The sculpture of two figures is by Peter Corlett from Melbourne, Australia. The sculpture is dedicated to the men, who fought and fell in the Battle of Fromelles.
Before we continue to explore this interesting site, I shall briefly explain in the frame below the Battle of Fromelles of 1916.
The Battle of Fromelles - 19-20 July 1916

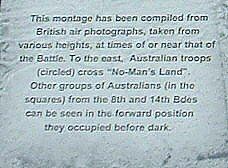
Air Operations
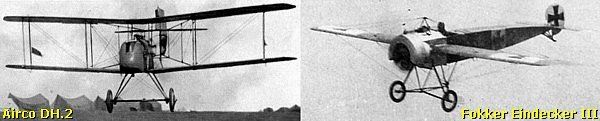
On 16 July 1916 16 Squadron joined 10 Squadron of the Royal Flying Corps (RFC). The aircraft photographed and reconnoitred the area before the attack. During the battle the RFC flew artillery-observation missions. The squadrons flew further afield and denied German reconnaissance aircraft a view of British troop movements behind the XI Corps front. On 19 July aircraft from two squadrons patrolled the area towards Lille and had numerous air fights, in which two German Fokker Eindeckers III and a British Airco D.H.2 were shot down. The RFC deployed bombing raids on German army billets, supply dumps and railways from Lille to Lens.
Preliminary Artillery Bombardment
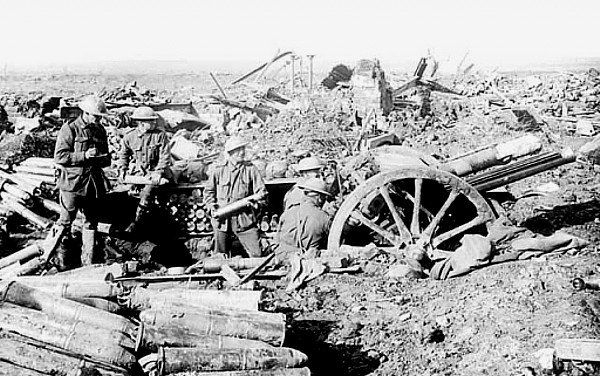
The preliminary bombardment started on 19 July at 11.00 am and it lasted seven hours. Over the final three hours the artillery was to lift, and the infantry showed several times bayonets and dummy figures with helmets to simulate an infantry advance. From then the artillery resumed the bombardment of the front line to catch the German infantry out of cover.
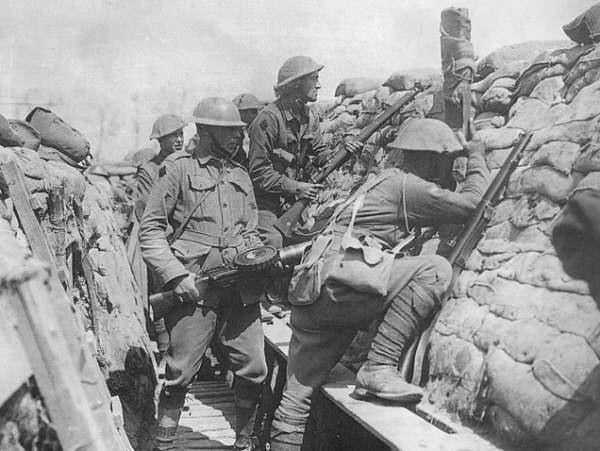
Before the artillery fire was lifted from the front line, the infantry was to assemble as close to the German lines as possible, the No Man's Land being 100–400 m. wide.
Mine Explosion
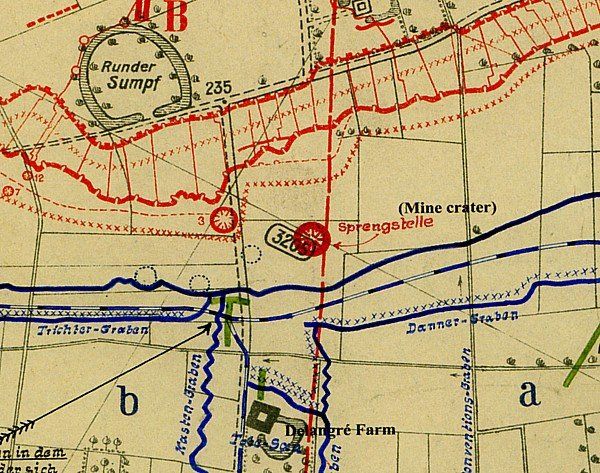
At Zero hour, 6.00 p.m., the bombardment stopped. Shortly after the sappers of the 2nd Australian Tunnelling Company blew a 1,200-pound mine in the attack sector of the 5th Division north of the Delangré Farm / Tote Sau Hof, about two-thirds into No Man’s Land.
On this position in No Man’s Land the mine did not to destroy any trenches. The intention of the explosion was to create a crater lip that would screen the attacking infantry. After the mine explosion the Australian infantry assault started.
Infantry Attack
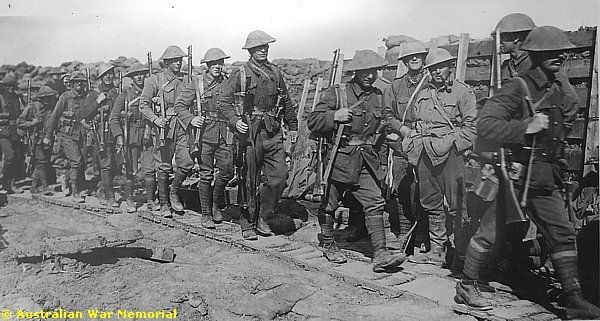
As I have said, neither division was well-prepared for the attack. Each division was to attack with its three brigades in line, with two battalions from each brigade in the attack and the other two in reserve, ready to take over captured ground or to advance further.
The 61st Division attacked the right flank and the Wick Salient from the north-west.
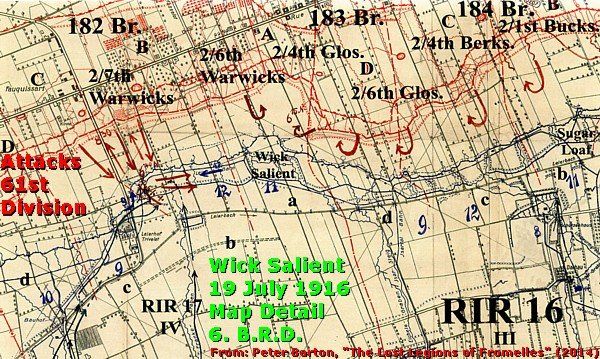
The Australian 5th Division was to attack the left flank of the salient by advancing south.
With all due respect to the actions of the 61st Division my story continues now focusing on the battlefield of Fromelles and the fate of the 5th Australian Division.
(For a virtual tour in the attack sector of the 61st Division, I refer to my previous photo impression, prior to this, about Aubers and the Wick Salient.)
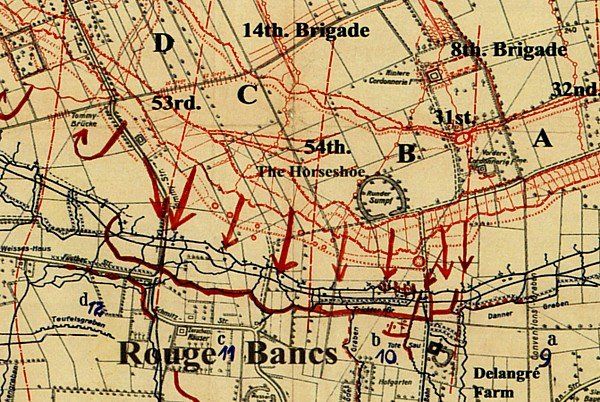
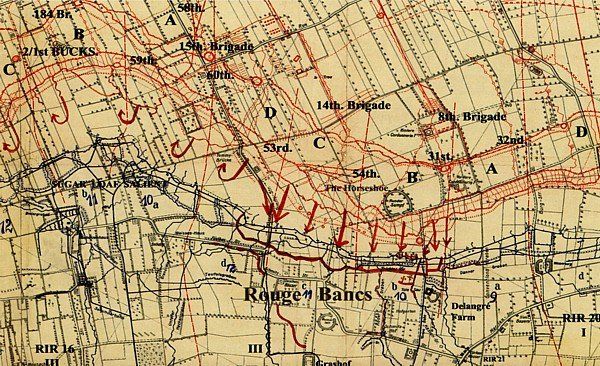
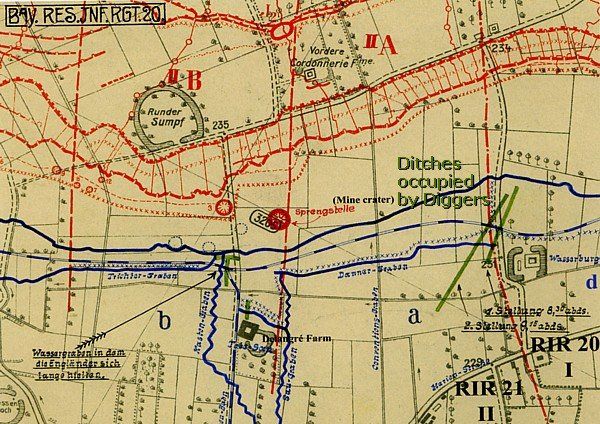
Partly because of the confusion, caused by the mine explosion, and caused by the following Bavarian retirement to the right and left, the 14th and 8th Brigade captured the German first and second lines and three communication trenches, one at les Rouges Bancs, and two west of Delangré Farm / Tote Sau Hof.
They also occupied some ditches north-east of Delangré farm. The III. Bataillon of the Bayerische Reserve Infanterie Regiment 21 (III. / B.R.I.R. 21) was pushed back in the centre and on its right, forming a defensive flank at the “ Kastenweg ” and in front of Delangré Farm.
Consolidation of the captured German lines was slow, as the Diggers lacked experience.
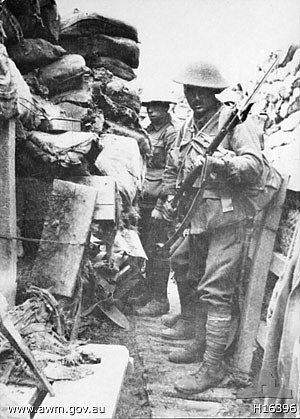
There was no dry soil to fill sandbags; mud had to be used. Soldiers lacked clear orders, as many officers were already casualties.
In the Sugar Load Salient the right flank of the III. / B.R.I.R. 16 repelled the 15th Australian Brigade, mainly with enfilading machine-gun fire and artillery fire. Later it was reinforced by the II. Battalion from Rue de Leval, which joined with the left flank of the III. / B.R.I.R. 21.
German counter-attacks
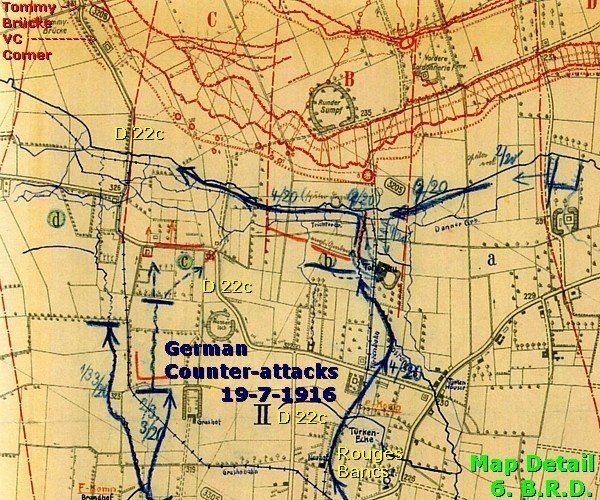
A counter-attack of the I. / B.R.I.R. 21 at 8:00 p.m. in the Rouges Bancs and Delangré Farm sector fell into confusion under British artillery-fire. It was stopped by small-arms fire of the 8th Australian Brigade.
20 July
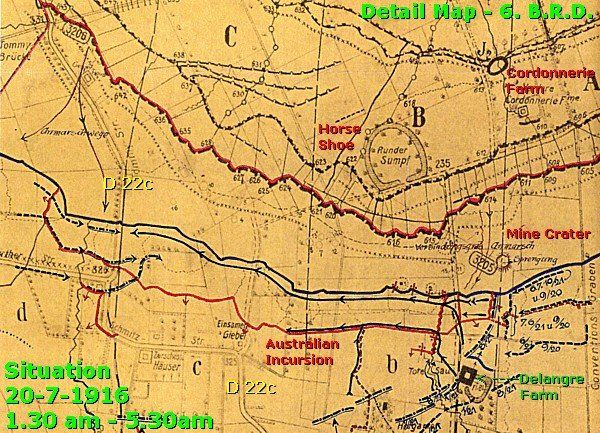
The Bavarians counter-attacked in the night of 20 July at 1:30 a.m. with flanking machine-gun fire forcing the Australians to retire to the German first line.
Later on, at 6:00 a.m., I. / B.R.I.R. 21 and half of B.R.I.R. 20 attacked the “ Kastenweg ”-sector from the flank, reaching their own, old first line. From there the Diggers were forced to withdraw next to their original jump-off lines. During the withdrawals some soldiers managed to fight their way out, but many men were cut off and captured.
The right flank of the 14th Australian Brigade was counter-attacked at Rouges Bancs by most of I. / B.R.I.R. 16, which joined the II. Battalion, and recaptured the front line step-by-step, until dawn, when a pause was ordered because of exhaustion and lack of ammunition and grenades.
At 5:40 a.m McCay ordered the 14th Brigade to be withdrawn. At 7:50 a.m. the order to retire arrived, although it was not received by some parties. Bavarian troops fired at every sign of movement, forcing the Australians to withdraw. By 9:00 a.m. the remnants of the battalions had returned; many wounded were rescued. Artillery-fire from both sides diminished. Work began on either side of No Man's Land to repair defences. The Battle of Fromelles was over. A short truce was arranged by the Bavarians and Australians to recover their wounded.
Casualties
The outcome of the battle, again a Bavarian victory on Aubers Ridge, was a complete disaster for Haking’s XI Corps, and in particular for the 5th Australian Division.
The British 61st Division was already under strength before the battle. It engaged half as many men as the 5th Australian Division did and it lost 1,547 casualties.
But the Australian 5th Division lost 5 times more casualties: 5,513 casualties! Australian soldiers killed in the area re-taken by the Germans, were buried shortly after the battle. On 22 July 1916 the bodies were transported via a 60 cm. railway to a wood north of Fromelles. The Bavarians buried these Australian soldiers in eight pits on the edge of Pheasant Wood.
The German casualties of the 6th Bavarian Reserve Division were limited to 1,600–2,000 men. Some of the fallen soldiers are buried in the Illies Deutscher Soldatenfriedhof .
Aftermath
A German assessment of 16 December 1916 called the attack "operationally and tactically senseless" and prisoner interrogations revealed that the Australian troops were physically imposing but had "virtually no military discipline".
McCay's order not to consolidate the initial gains, poor planning, ineffective artillery support, and the Australian lack of experience of the conditions at the Western Front, all contributed to this impressive defeat. A number of senior Australian officers were removed after this debacle, but it had no negative influence on the careers of the ambitious generals, Haking and McCay. The 5th Australian Division remained incapable of any offensive action until late summer, when it began trench-raiding.
In September 1916 the 6th Bavarian Reserve Division was sent to the Somme front.
Sources
a.o.: Australian War Memorial
, Peter Barton
’s
very recommendable book, “ The Lost
Legions Of Fromelles
– The Mysteries Behind One Of The
Most Devastating Battles Of The Great War”
(2014).
The impressive statue of the Fromelles Memorial Park refers to the many rescue actions of wounded comrades by Sergeant Simon Fraser.
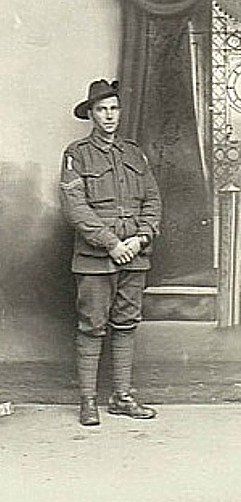
Sergeant Simon Fraser
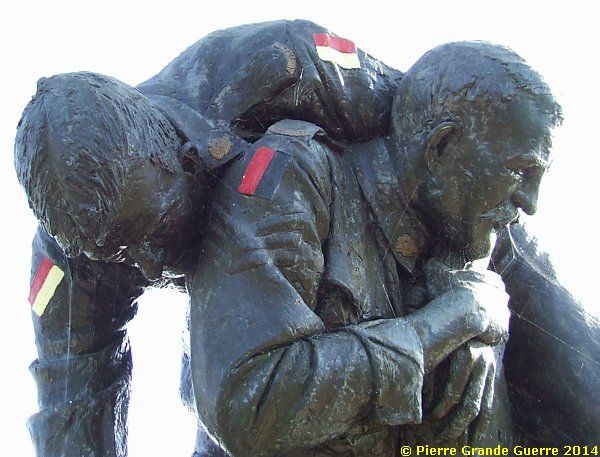
| The figure carrying his comrade is based on the Australian soldier Sergeant, later Second Lieutenant, Simon Fraser. He was known as being one of the many Australian soldiers who bravely went out over three days and nights to bring in their wounded comrades from the field of battle after the Battle of Fromelles. The sculpted figure being carried by Fraser is based on a man from the 60th Battalion, a battalion which suffered very heavy casualties by the end of the battle. The dedication panel at the foot of the sculpture provides words by Sergeant Simon Fraser, No. 3101 of the 57th Battalion A.I.F., written on 31st July 1916: “... for the next three days we did great work in getting in the wounded from the front and I must say the Germans treated us very fairly ... we must have brought in over 250 men by our company alone.” Simon Fraser was killed in action during the attack on Bullecourt, east of Arras, on 11th May into the early hours of 12th May 1917. According to the statement by his commanding officer in his Service Record, Fraser was badly hit by a shell and buried by his unit in the trenches at Bullecourt. Source: The Great War 1914-1918 |
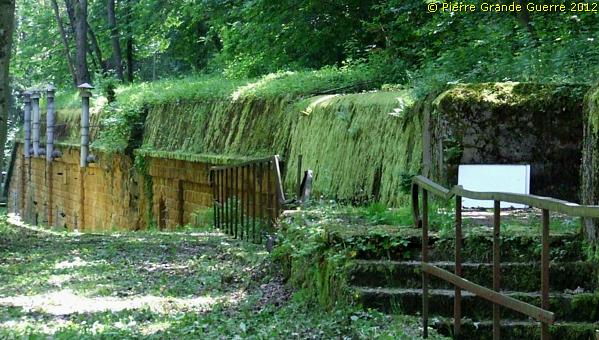
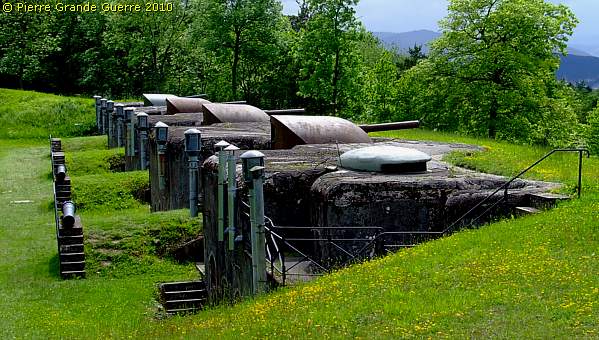
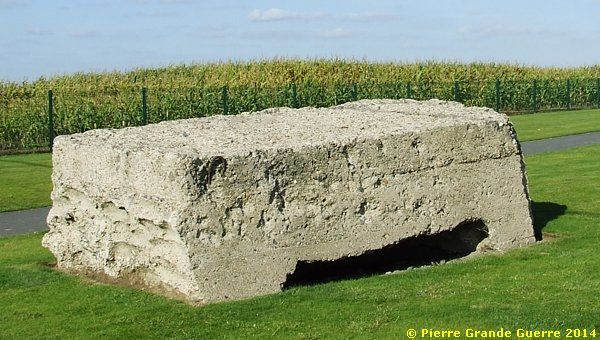
After so much information it is time to look at the concrete relics of the German bunker complex in the Memorial Park.
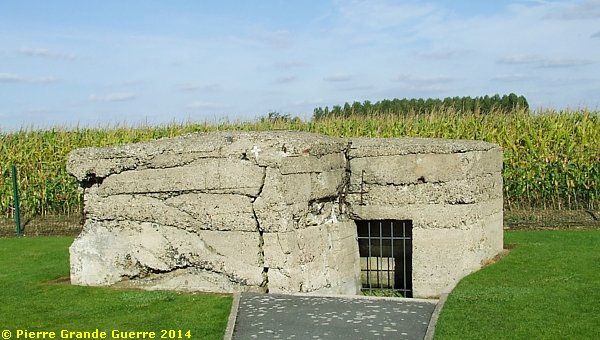
This bunker stronghold was connected by a 60 cm. trench railway, a “ Forderbahn ”, to the village of Fromelles.
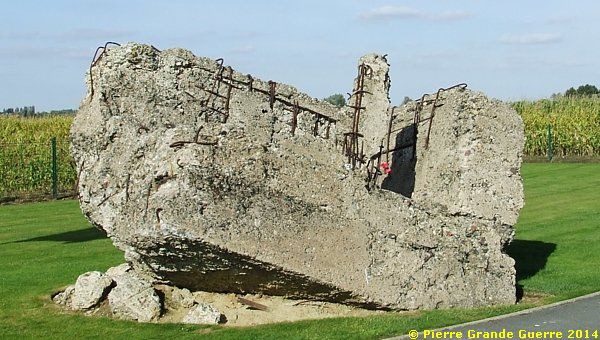
The complex of the stronghold was supplied with electricity.
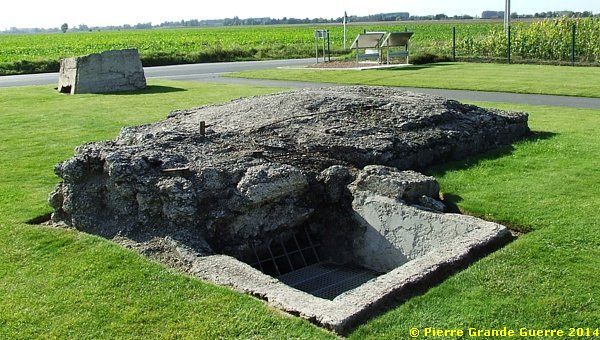
It possessed a barbed wire entanglement in front of a breastwork with concrete artillery shelters, mortar pits and machine-gun positions.
We continue southward into the direction of Fromelles, passing this landmark crucifix, which we will pass later on our route again.
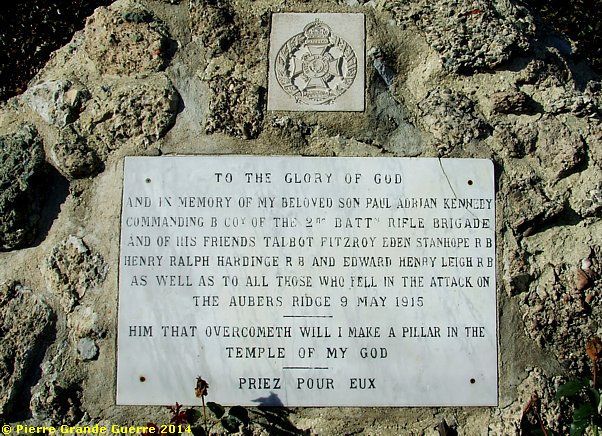
The crucifix is a private memorial for Captain P.A. Kennedy and three other officers of the 2nd Rifle Brigade, who were buried near this spot during the Battle of Aubers Ridge of 9 May 1915.
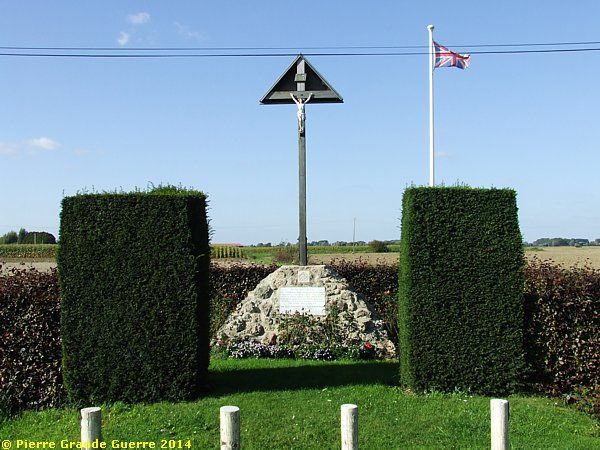
Captain Kennedy was shot by a sniper. Although his men buried Kennedy’s body, later it was never found. His mother, Lady Kennedy, purchased this small plot of land, where Kennedy´s men told her that they buried her son.
We continue southward along the D 22c to the Rue de la Basse Ville.
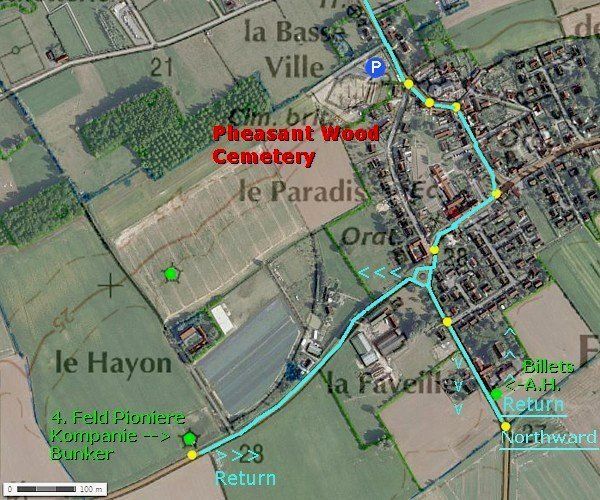
Just before entering the village of Fromelles we turn right and park our car at the parking of the Pheasant Wood Military Cemetery.
Before we visit the Fromelles Pheasant Wood Military Cemetery, we will pass it and save it for later on this route. We will first visit on foot the nearby site of the Pheasant Wood Mass Graves.
Pheasant Wood Mass Graves
Introduction
On request of the Australian Government a team of archaeologists of the University of Glasgow searched in 2008 for human relics of Australian soldiers on the edge of Pheasant Wood, Fromelles. This fact came late to my notice; I learned of it at the beginning of 2009 and also of the activity of a team of identification scientists of the University of Oxford. My curiosity was aroused, and I decided to inspect the site on 28 May 2010. Before we make a short walk along this interesting location, some concise words about its background.
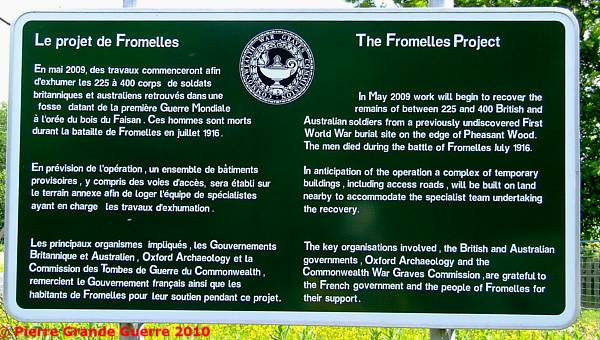
“Für die gefallenen Feinde werden Massengräber hinter dem Fasanen-Wäldchen angelegt.”

The story of the recovering of the missing soldiers starts with the Australian, Lambis Englezos. From a reference in a regimental history of the Bavarian Reserve Infanterie Regiment 21, dated 20 July 1916, “Für die gefallenen Feinde werden Massengräber hinter dem Fasanen-Wäldchen angelegt.”, Englezos detected this then still undiscovered mass grave. Period air photographs, trench maps, and a declaration of a witness of an Australian Prisoner of War, William Barry of the 29th Battalion, supported the Englezos´ theories about the mass graves, which were still undetected by the Recovery Units and still left along the edge of Pheasant Wood.
After test excavations in 2006 and the start of the digging in 2008, it took the team of battlefield archaeologists only 4 days to deliver the proof of an existing mass grave of soldiers, who had been buried by the Germans following the disastrous battle of Fromelles on 19 and 20 July 1916.
In the end the team found 8 pits, each 10 m. x 2.20 m. and 5 m. deep. The estimates of human relics during that time of the excavations were between 250 and 400 soldiers.
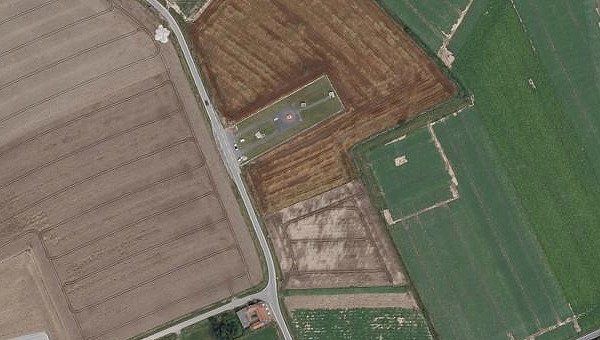
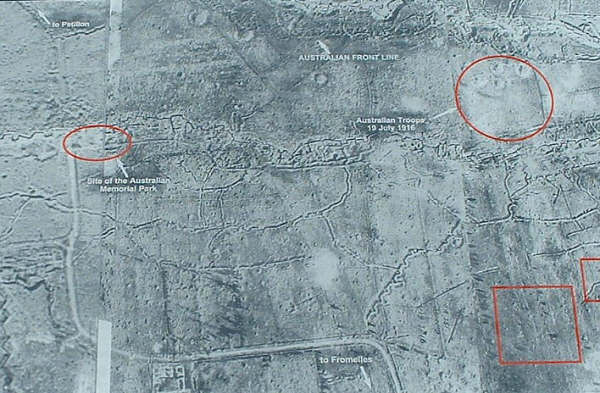
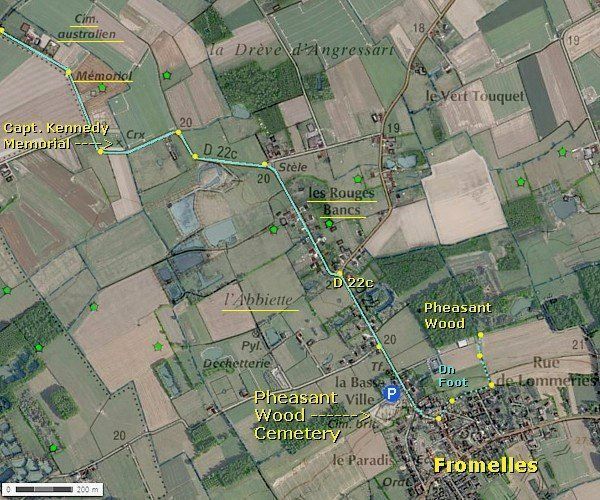
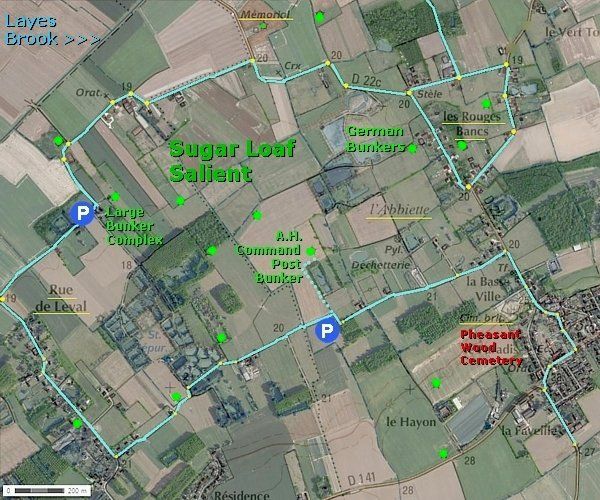
The satellite photo shows the
route of the walk from the parking to the Pheasant Wood site.
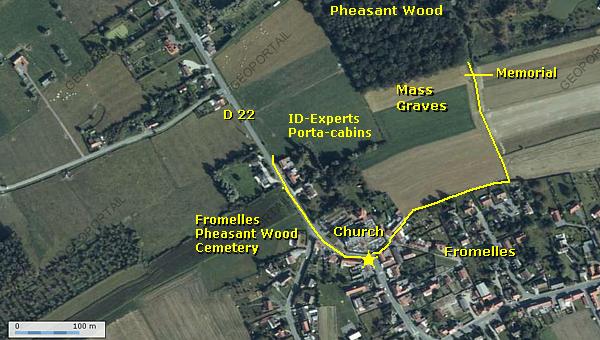
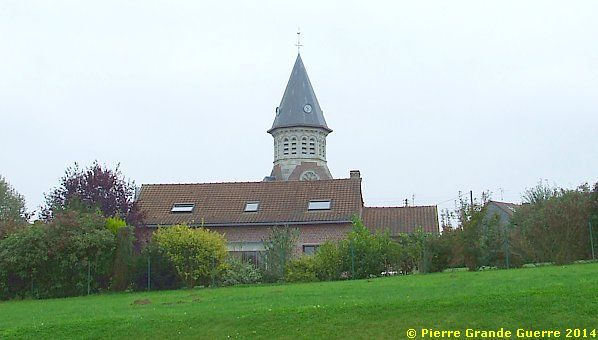
We pass the church along the front, and continue in a narrow street, which ends in a footpath on the northern edge of the village.
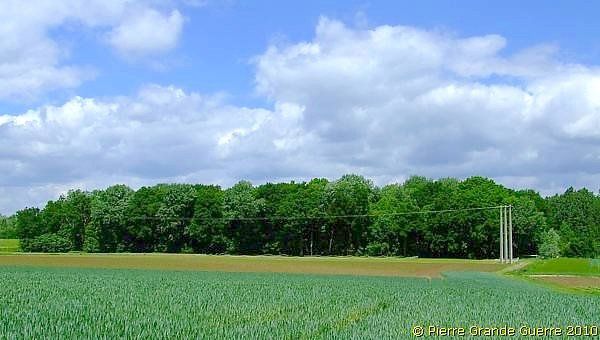
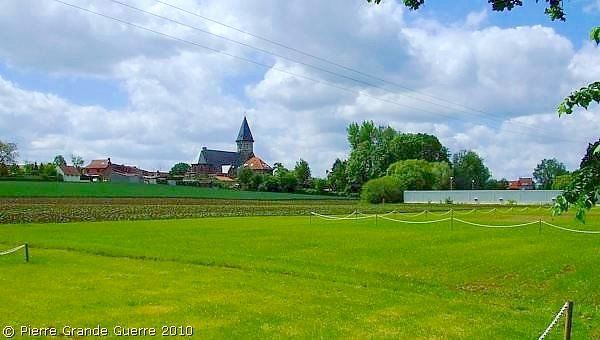
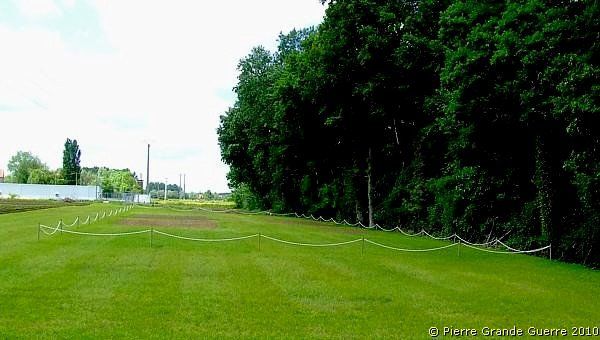
The mass graves on the edge of Pheasant Wood were marked in 2010 with a white chain.
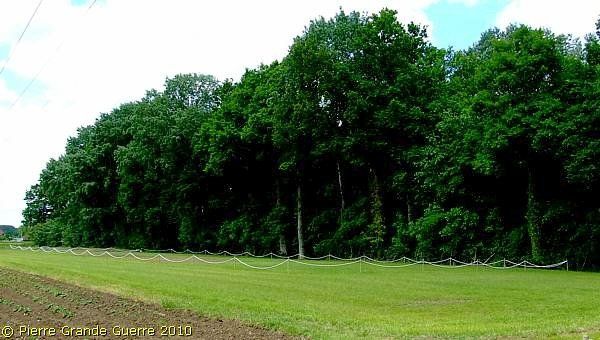
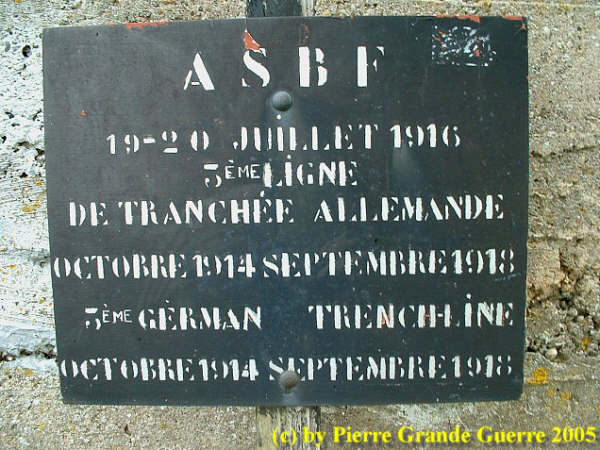
At the east end of the site lies a memorial tile.

The Portland stone tile bears no inscription.

View westward from the position of the memorial tile.

In 2014 the porta-cabins of the ID-experts, the Portland stone tile and the chains were removed! Only an illustrated information panel refers now to the history of the site.
We return along the same path to visit ...
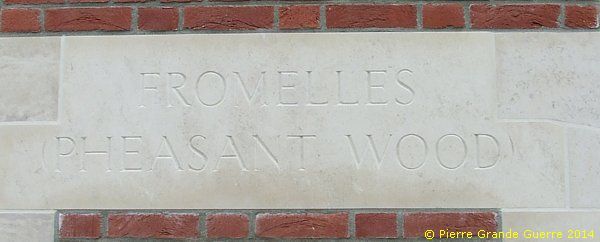
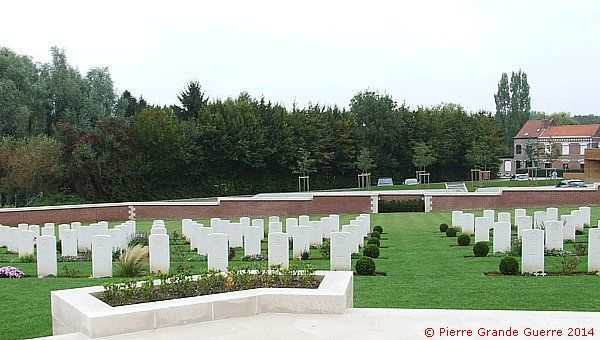
... the Fromelles Pheasant Wood Military Cemetery.
Fromelles Pheasant Wood Military Cemetery
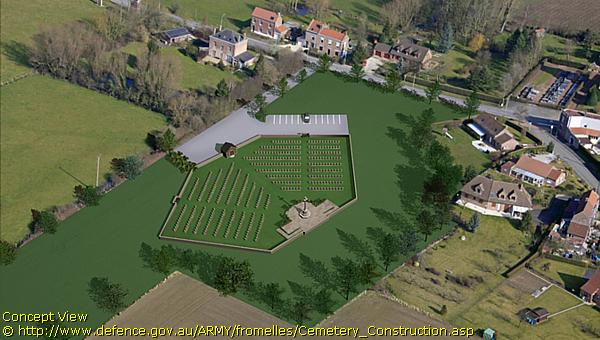
All exhumed remains of the soldiers, which were recovered in 2009 from the mass graves at the edge of Pheasant Wood, would have to be buried in a war cemetery. On 31 July 2008 the Commonwealth War Graves Commission declared that all exhumed bodies would be interred in a new cemetery at no more than 120 m. away from the mass graves, at the Fromelles Pheasant Wood Military Cemetery.
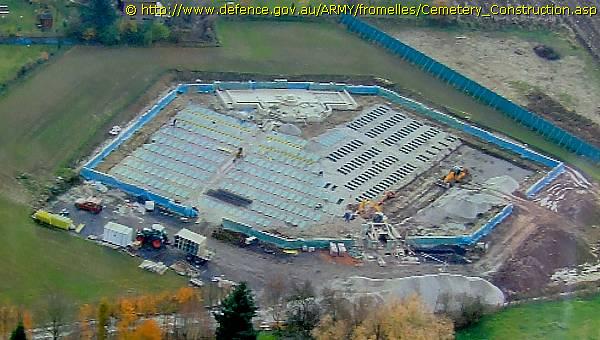
Due for completion in July 2010, Fromelles Pheasant Wood Military Cemetery was the first new war cemetery to be built by the Commonwealth War Graves Commission in fifty years. In February 2009 the CWGC completed the reburials of 249 soldiers.
Barry Edwards designed the cemetery.
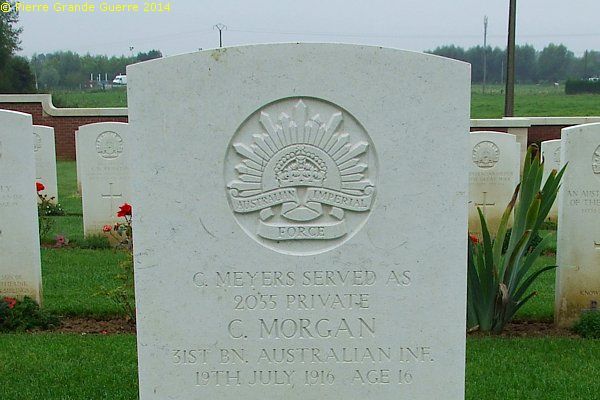
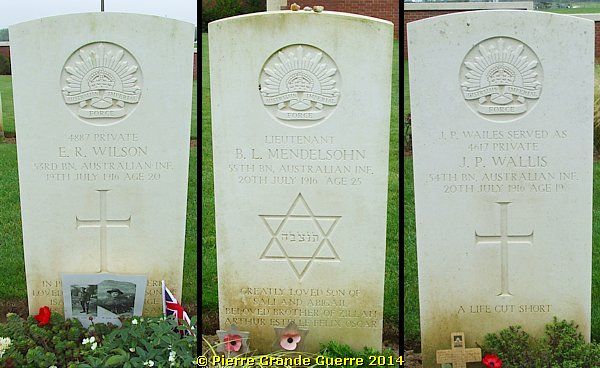
All reasonable steps were taken to identify as many soldiers recovered from Pheasant Wood as possible. Detailed analysis of the remains with use of additional evidence had begun and by May 2010 94 soldiers were already identified.

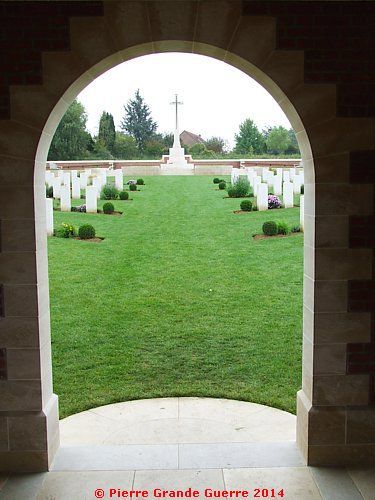
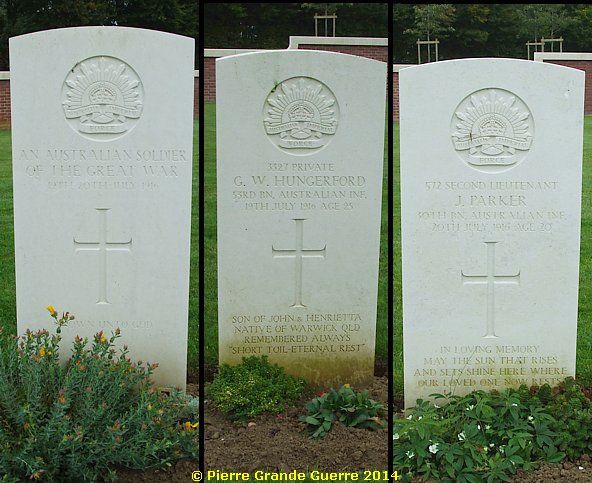
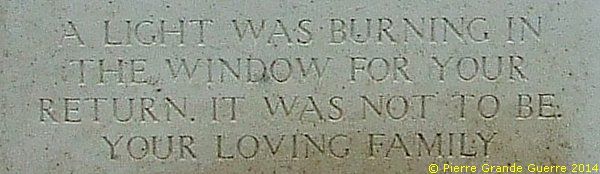
The families of identified soldiers have been carefully composing their personal inscriptions for their soldiers' headstones. The headstones are made from Portland stone and engraved by the CWGC at their France headquarters in Arras. The cemetery now contains 250 Australian soldiers. On 19 July 2010 the cemetery was officially inaugurated. During the dedication ceremony an un-named soldier has been buried. He is the last of the 250 Australian soldiers found at the Pheasant Wood site to be laid to rest.
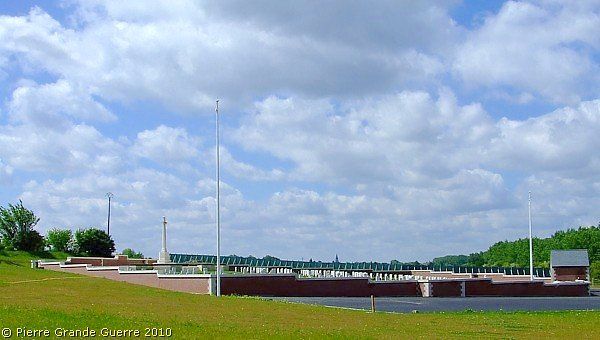
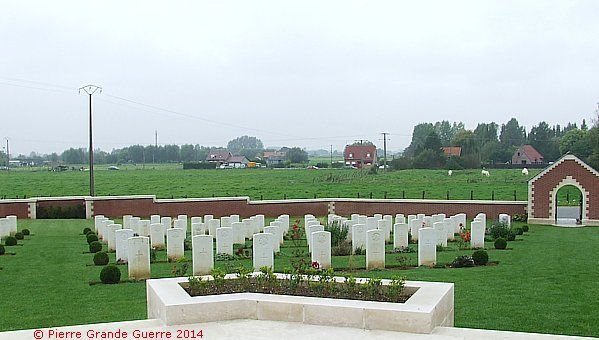
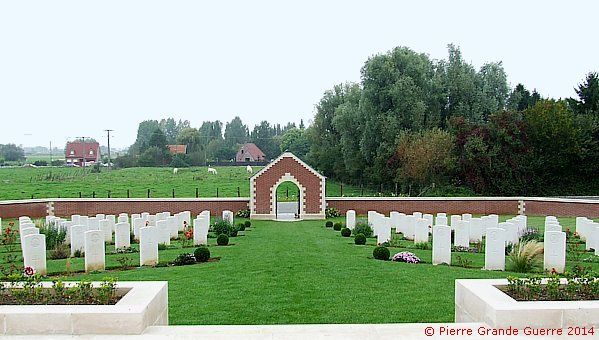
After so many words I show you now in silence some photos of our 2014 visit to the Pheasant Wood Military Cemetery.
We finish our visit to the cemetery with a panorama north-westward from the Cross of Sacrifice, showing the former battlefield of l'Abiette and the Sugar Loaf Salient.

The same panorama from left to right in 4 overlapping steps.

View at the building of the Museum of the Battle of Fromelles .
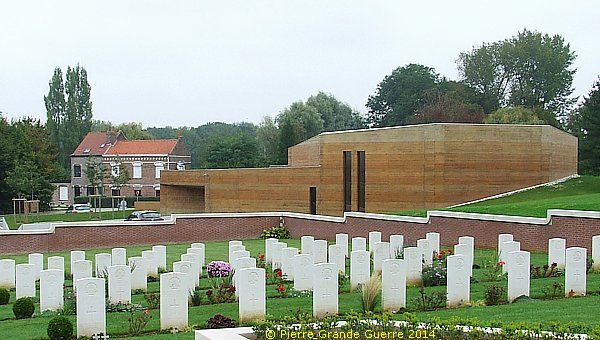
| The museum opened its doors recently in June 2014. The exhibition of the small but beautiful museum is a mix of traditional dioramas and modern multimedia presentations. The museum also has an interesting bookshop. I recommend a visit! |
From the Fromelles museum we begin the second stage of our route , exploring important sites mentioned in the background frames above and some German bunkers in the Fromelles front sector, constructed during the period of 1916-1918. We continue through the village southward and on the roundabout we turn right on the D 141, direction Aubers.
| From now on we will explore the significant sites, mentioned in the frames above, several German bunkers of 1916-1918 and three sites, which Adolf Hitler frequented daily during his service on the Fromelles front in 1915 and 1916. Later on this page I will show you sometimes a detail of a trench map to help you to imagine the situation of the site. As you will conclude from the green dots on the satellite maps, I will show only some of the many bunkers , still present in this front sector. Most of these bunkers are hidden in a field far away, not visible under dense vegetation, or they are hidden in private properties of farmers. |
Along the north side of the D 141 stands a German 3rd line Command Post Bunker.

This bunker is not the original Command Post of "Meldeganger" ( messenger ) Hitler, as many battlefield guide books do believe. In a few moments we will visit the real Command Post of Meldeganger Hitler in the Sugar Loaf Salient in a field of Fromelles - l'Abiette. It is most likely that Hitler frequented this 3rd line bunker too, since it is so close to his billets and his "real" 2nd line command post in the Sugar Loaf Salient.
For now: back to the Command Post Bunker along the D 141.
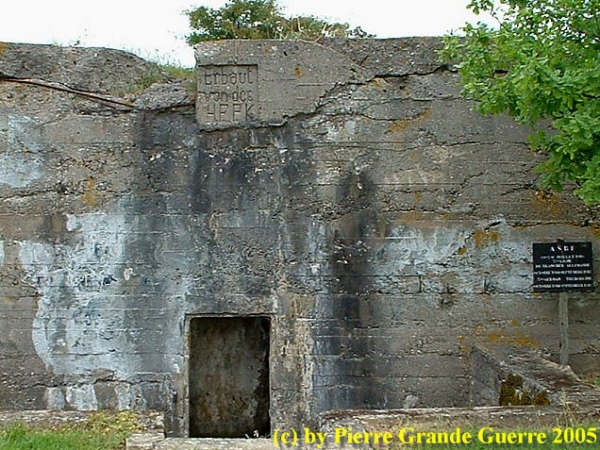
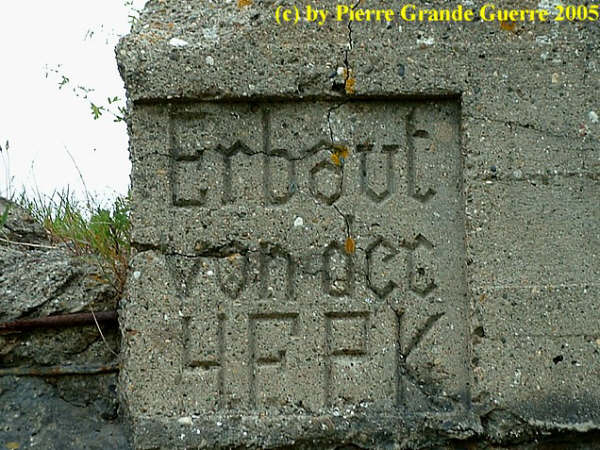
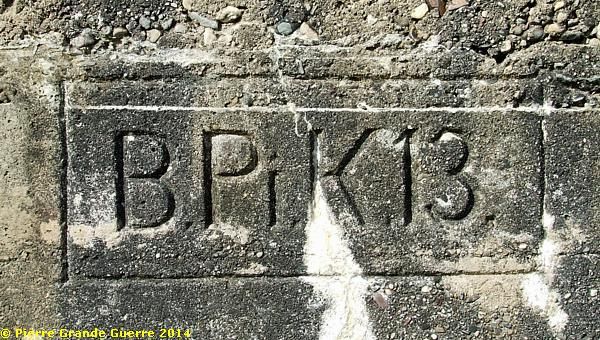
The inscription tells the name of the constructors of this bunker:
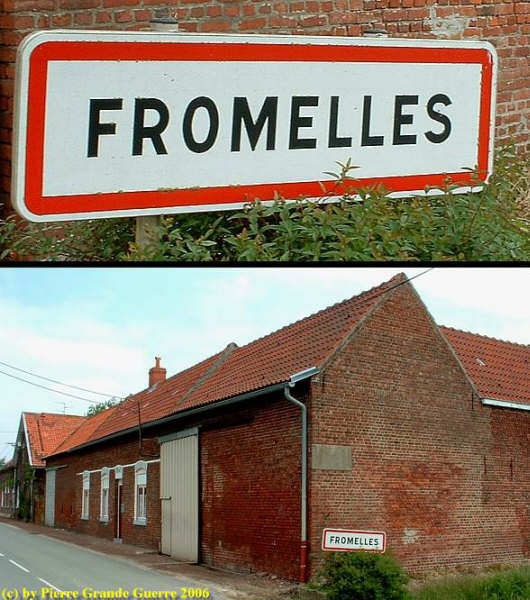
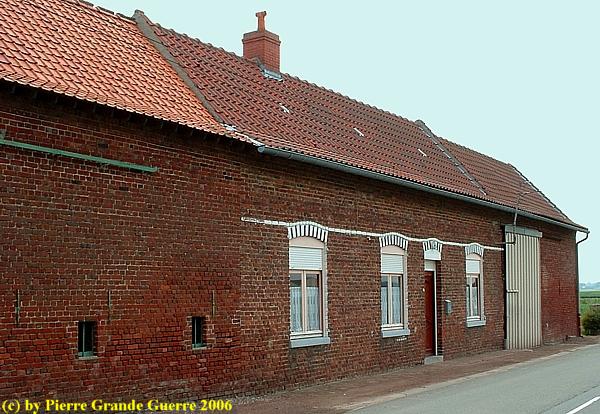
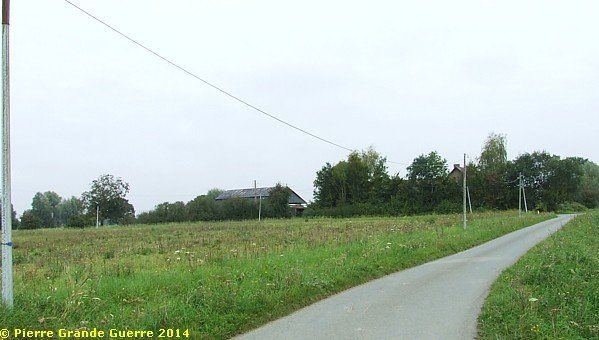
From the bunker we return to the roundabout of Fromelles and turn right to the southern edge of the village of Fromelles. At the southern entrance we find this farmhouse, which served in July 1916 as “Hintergelände” billets for Adolf Hitler.
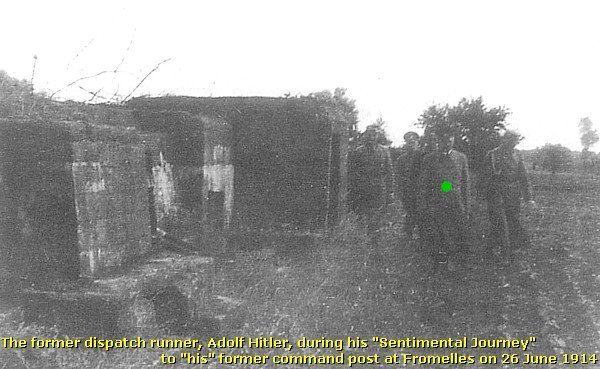
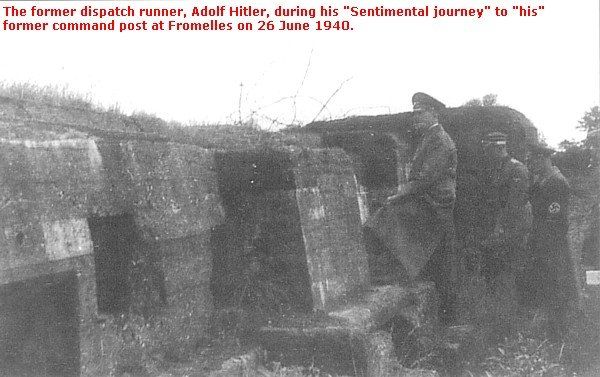
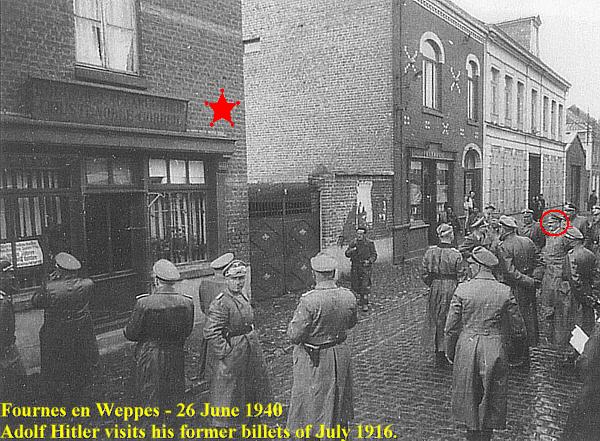
On 26 June 1940, Hitler made a "Sentimental Journey" to visit his whereabouts along the Western Front during the Great War.
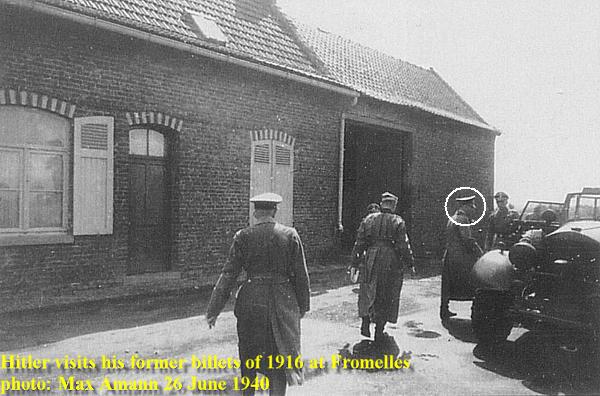
During this trip Hitler showed his Nazi comrades the sites, where he served as " Meldeganger " (dispatch runner). His friend, Max Amann, photographed these "holiday pictures".
From Hitler's billets we return to the village of Fromelles, passing the museum and the cemetery, to turn left into the Rue de l´Abiette, where we arrive in the former Sugar Loaf Salient .
In fact we are following Hitler´s footsteps of his daily walks from his billets to his Command Post.
Near a private fishpond in the Rue de l´Abiette we park our car and continue on foot over the field northward.
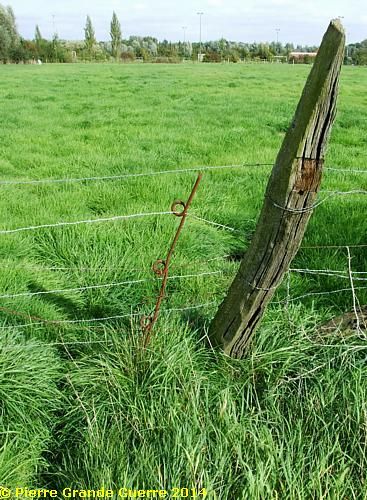
We pass a meadow lined with modern barbed wire, but here and there supported by wartime poles in the form of a pigtail.
During the wartime nights while repairing the barbed wire, hitting the poles into the ground would make too much noise and could alert the enemy. Instead, without noise, the Germans screwed these pigtail shaped poles in the ground.
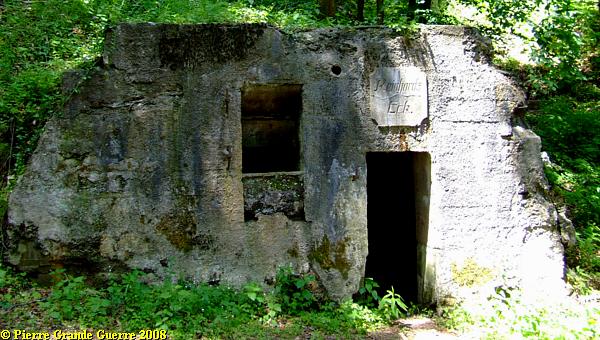
This Command Post bunker in the fields of l’Abiette, in the Sugar Loaf Salient, is marked on German period maps as the “Brandhof”.
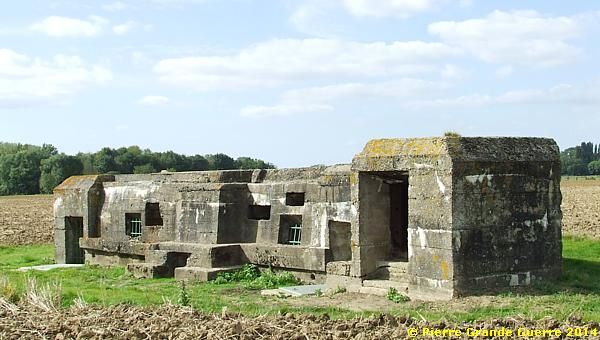
Being a simple corporal during the “ Urkatastrophe ” and later being the omnipotent dictator, responsible for the “ Untergang ” of Germany in 1945, Hitler claimed in June 1940 this bunker to be “his” Command Post during his service in Fromelles.
(For more details about Hitler's service at the Western Front, read my bilingual book review on Thomas Weber's recommendable book, " Hitler's First War ".)
I hold in my hand the rusted time fuse of a grenade.
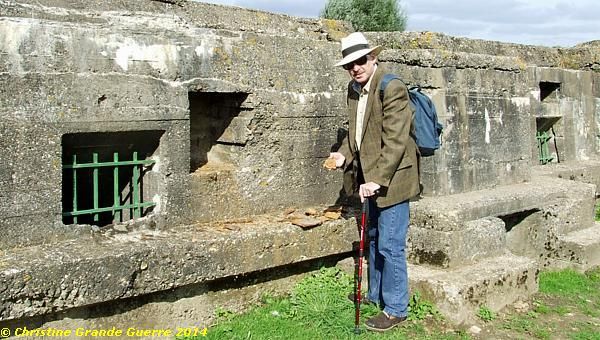
On the fire-step of the bunker lies more shrapnel
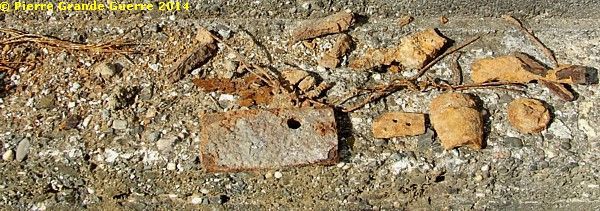
Leave the shrapnel on the bunker, please, for the next visitor.
The inscription tells the name of the constructors of this bunker:
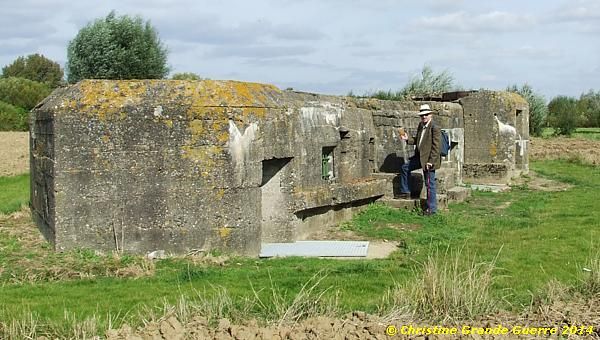
The entrance to the observation post of the bunker.
Bobby the Trenchdog shows the blind side of the bunker, always directed to the enemy.
The observation post is on the left side of the bunker.
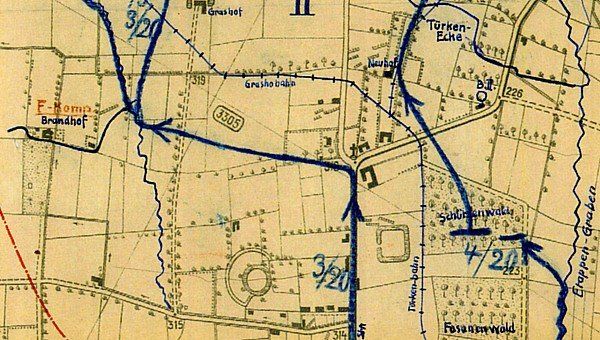
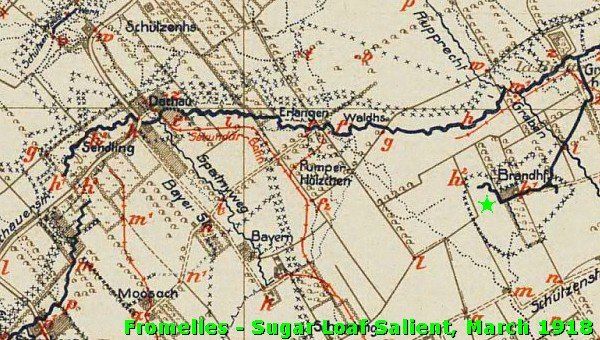
These details of a German trench map of March 1918 show the position of the Brandhof in the Sugar Loaf Salient.
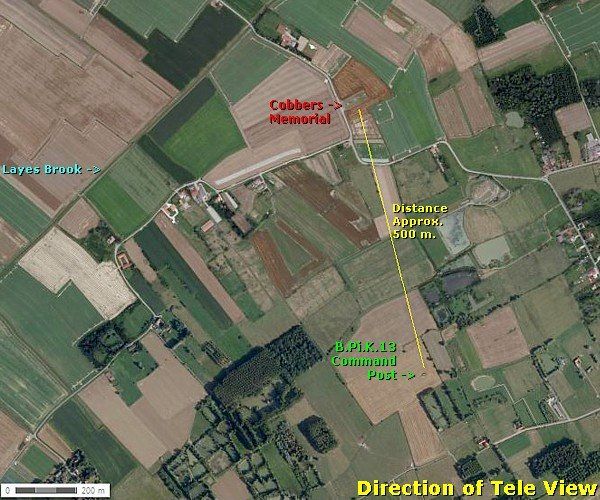
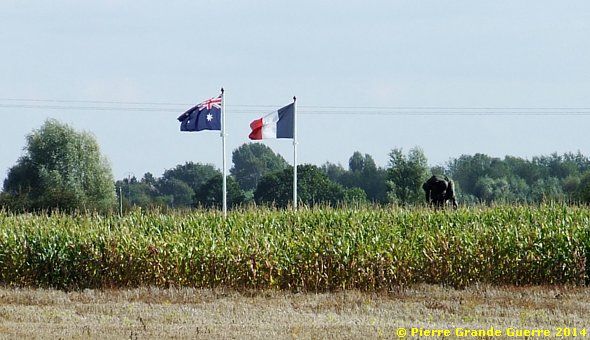
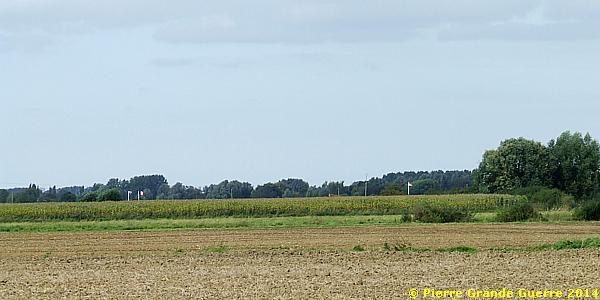
The satellite photo above shows the direction of this tele view below, which I made from the Brandhof bunker to the flags at the Cobbers Memorial, some 500 m. from here.
After this last view of the open side of the bunker ...
... we continue our route via the Rue de l'Abiette westward.

On the north side of the road stands this double "Kaserne" bunker.

At the T-junction we turn right and continue northward in the Rue de Leval.
On the left side of the street, in the yard of a “ horticulteur ” at number 81, we find this shelter bunker.
At the next T-junction we turn right.
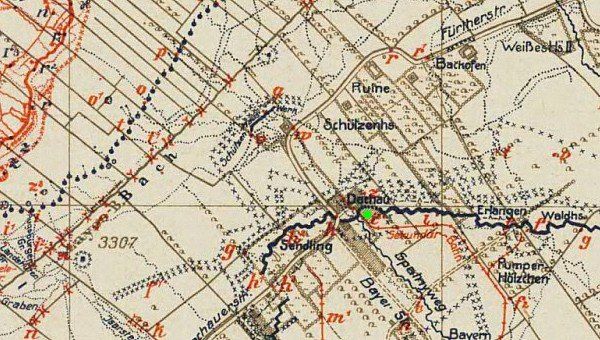
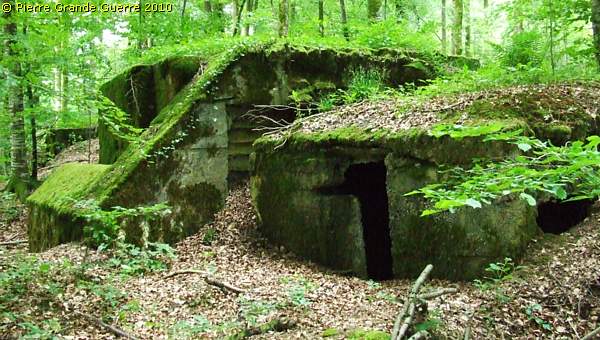
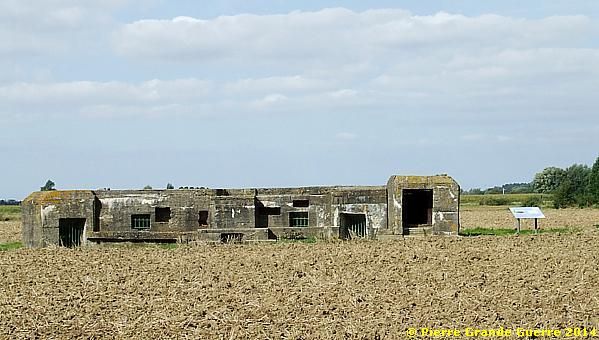
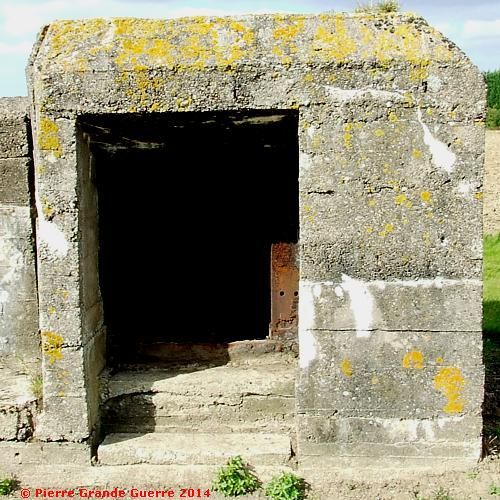
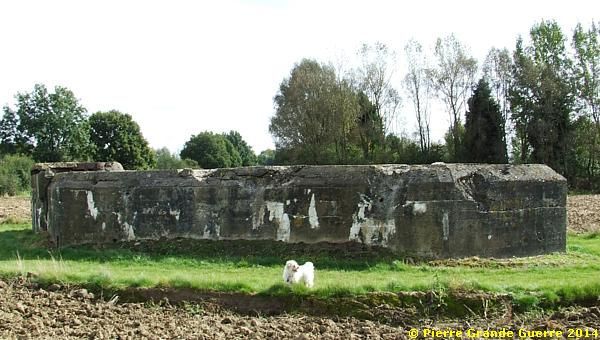
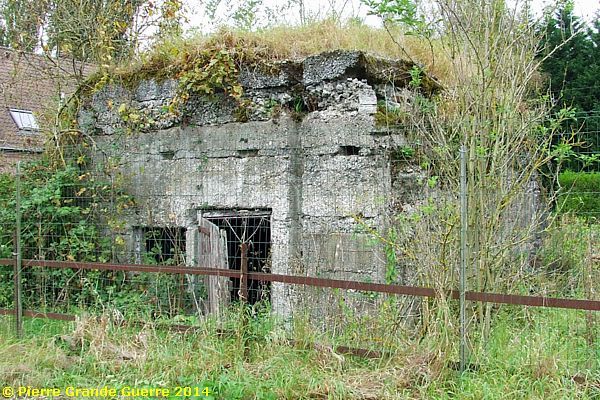
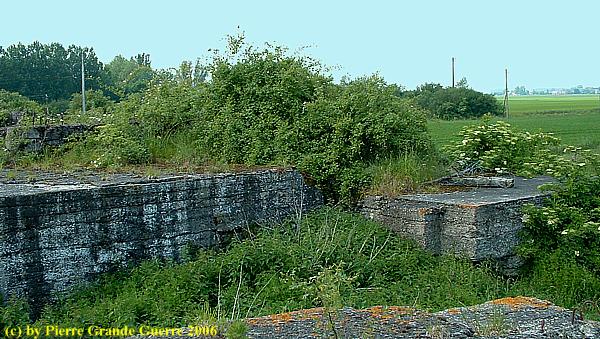
Respecting the privacy of the residents we park our car to visit on foot a huge multipurpose bunker, " Stützpunkt Dachau ". View from south-east north-westward.
Considering the weather circumstances for photography and the increased vegetation on the bunker in 2014 I prefer to show you my photos, made in 2006.
Probably the Dachau stronghold was a forward command post combined with "Kaserne" shelter bunkers.
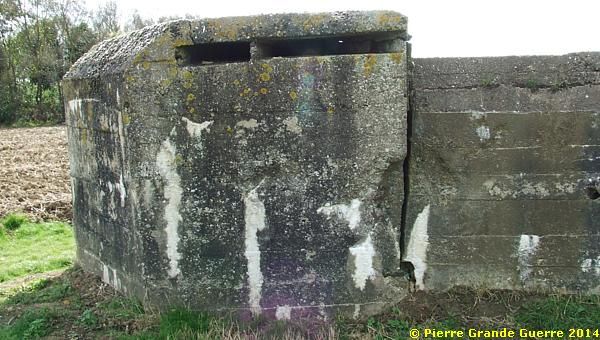
The staircase leads to a construction on the top, fit for mounting an anti-aircraft machine-gun ...
... and possibly for use as an observation post too.
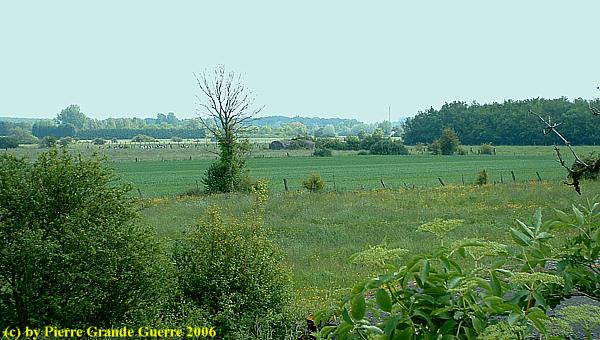
The view from the top construction of the bunker is north-westward.
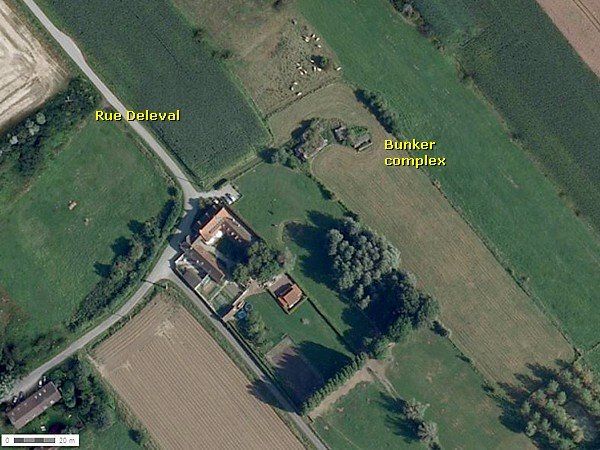
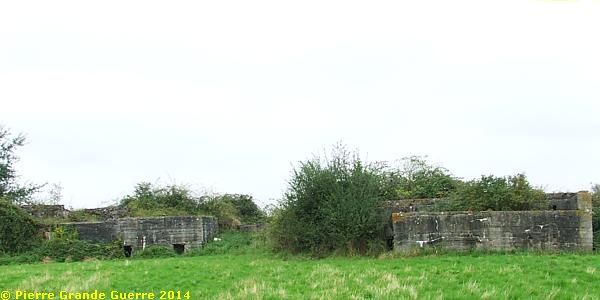
View from the same bunker westward in the direction of Aubers. Notice the bunker next to the tree.
From Stützpunkt Dachau we continue eastward, passing a concrete relic of the “ Schützenhaus ” stronghold, …
… to turn right at the T-Junction on the D 22c, passing the Capt. Kennedy Memorial, and next southward into the direction of Fromelles.
We make a short detour around the location of les Rouges Bancs , which the Germans called the “ Türckenecke ” (Turks Corner).

On the roundabout we turn left to the Rue des Rouges Bancs and we follow the D 22 east and northward.
At the first junction we turn left to the Rue Delval.
The next junction we turn right to the Rue de la Cardonnerie, which the Bavarians called the “ Kastenweg ”.
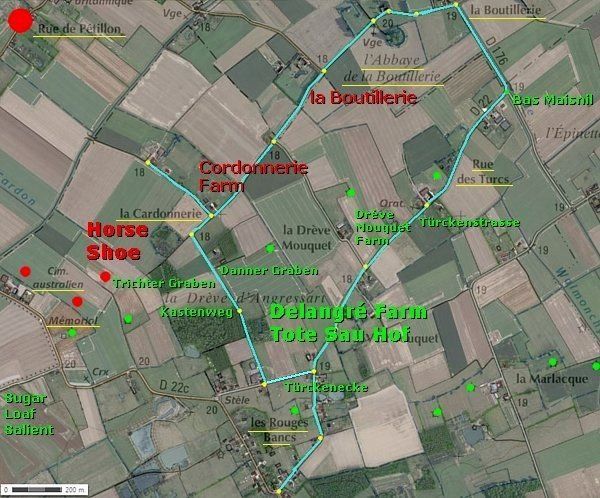
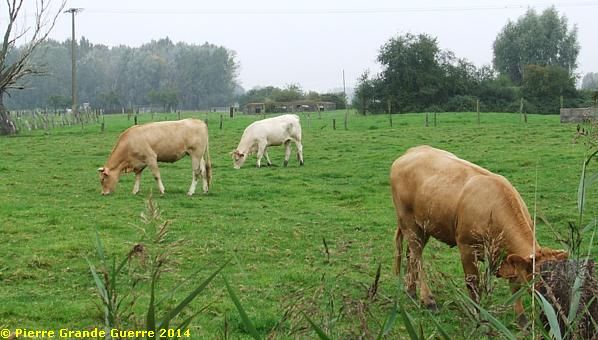
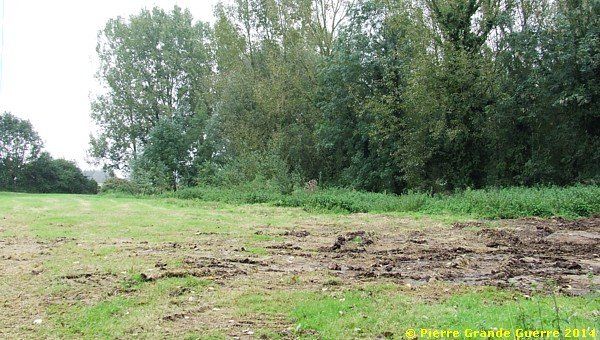
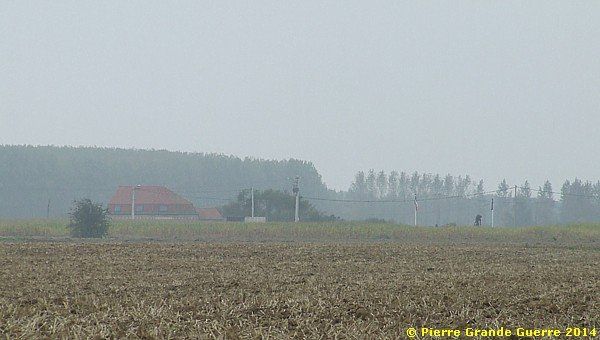
One of the disadvantages of my passion is that I feel sometimes obliged to photograph a rather dull landscape like this meadow and an uninteresting copse , on the right side of the “Kastenweg”. The meadow was the location of Delangré Farm , which the Bavarians called the “ Tote Sau Hof ” (Dead Pig Farm).
We continue northward, crossing the No Man’s Land, passing on the left side of the next turn right the copse of the Horse Shoe, to arrive at the Australian lines of la Cardonnerie Farm, also often spelled as la CordOnnerie Farm.
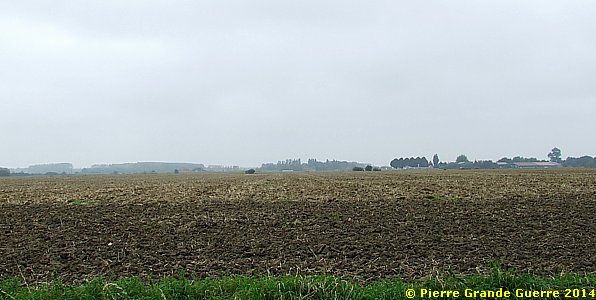
Just before we arrive at the farm, a view northward over the former Australian lines.
La Cardonnerie Farm
At Cardonnerie Farm we enter an unpaved dead-end road left or northward.
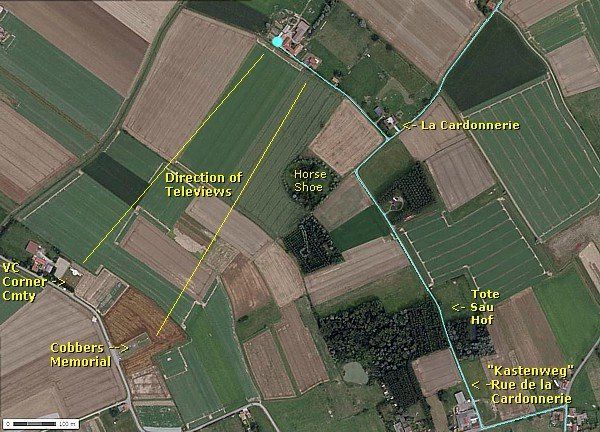
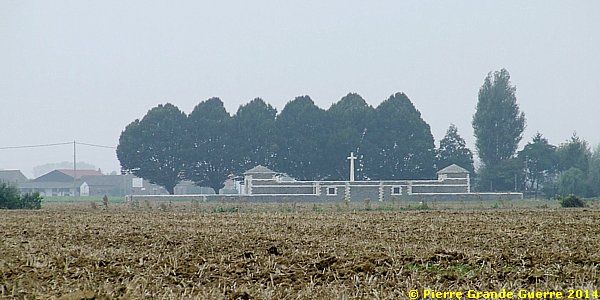
Halfway, during some rain, a tele-view over the fields south-westward to the Cobbers memorial (right).
At the dead-end of the road, under better weather circumstances, I made this tele-view westward of the rear-side of the VC Corner Cemetery.
We return to the Rue de la Cardonnerie – D 175 to continue our route north-eastward to the hamlet of la Boutillerie.
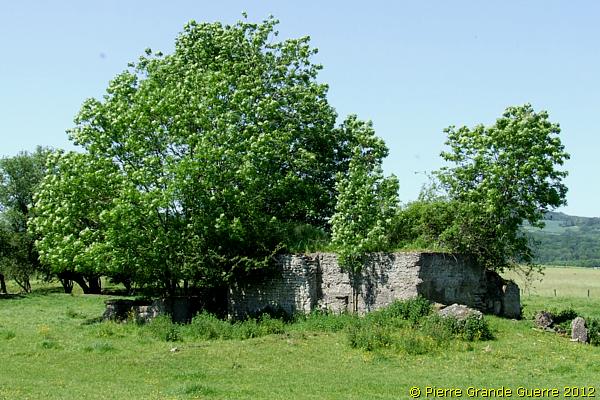
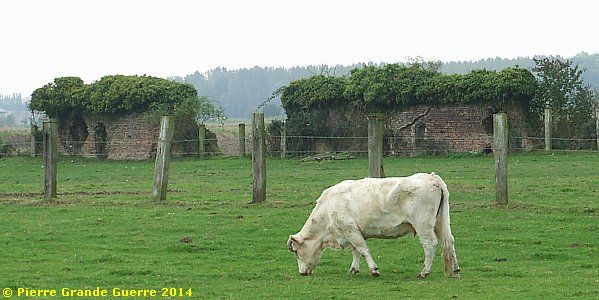
At la Boutillerie, passing the ruins of the walls of the medieval la Boutillerie Abbey, we turn right to follow the D 176 and next the D 22 - Rue des Turcs southward.
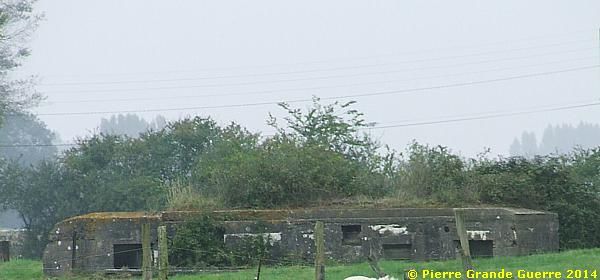
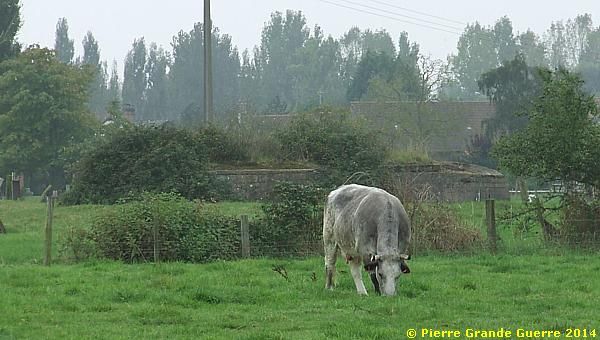
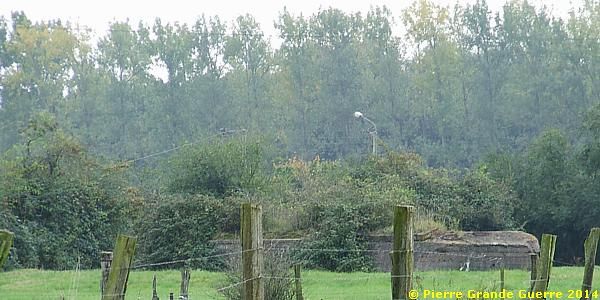
A shelter bunker on the right side of the road.

When we arrive again at the roundabout of les Rouges Bancs, we return to Fromelles for a relatively large jump of 5.5 km. to the centre of Fournes-en-Weppes .
Via the D 22, the D 141 eastward and the D 141a southward, we enter the Rue Faidherbe.
We stop at 966 Rue Faidherbe to visit shortly the front of the safe billets, where Adolf Hitler spent his rest periods. Behind the sealed window used to be Hitler's room.
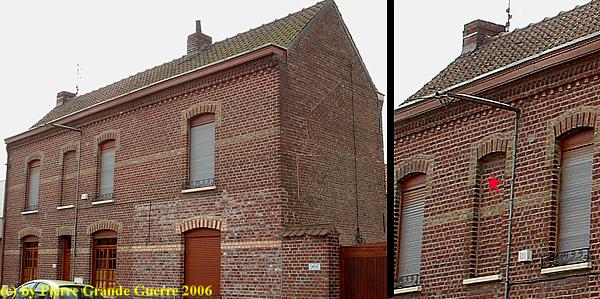
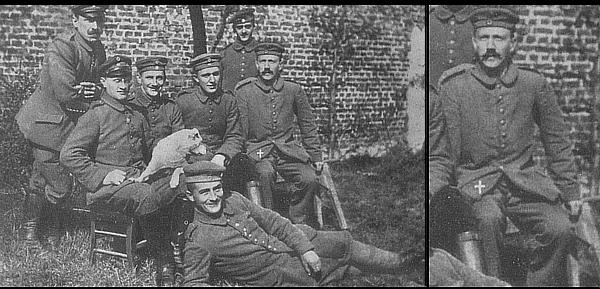
This photograph of Hitler in 1916 has been taken in the back-yard of this house of billets.
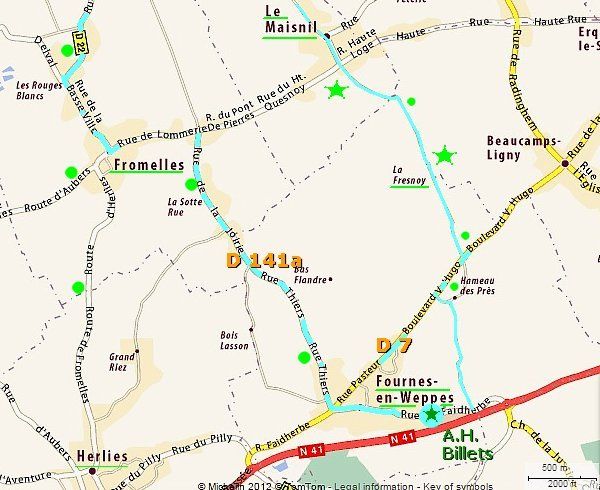
From Fournes-en-Weppes we continue north-eastward via the Rue Pasteur, searching for other still existing German bunkers in the landscape.
At Hameau Desprez we turn left to the Chemin de la Fresnoy to return to the German lines.
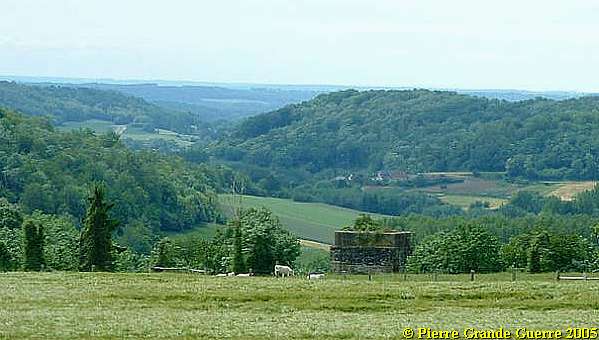
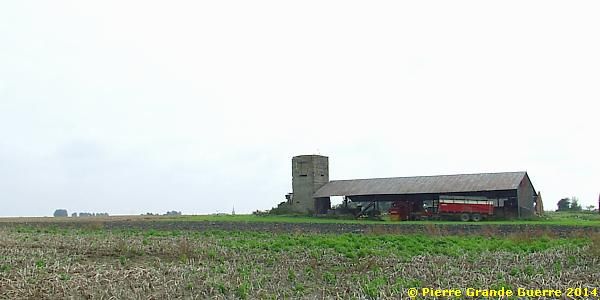
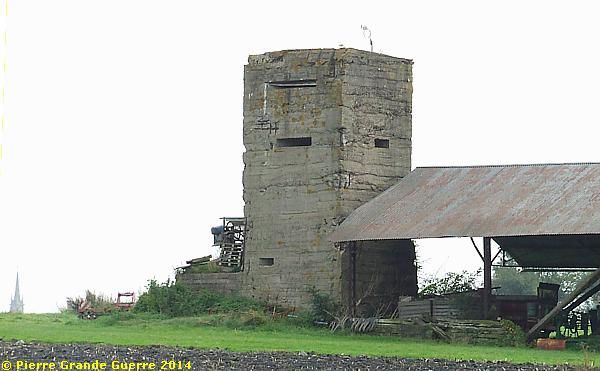
Just beyond the hamlet of la Fresnoy stands on the east side of the road an impressive observation tower, almost supporting a modern agricultural shed.
Passing some other bunkers along the Chemin de la Fresnoy, ….

... we drive through the centre of le Maisnil northward to le Bas-Maisnil .
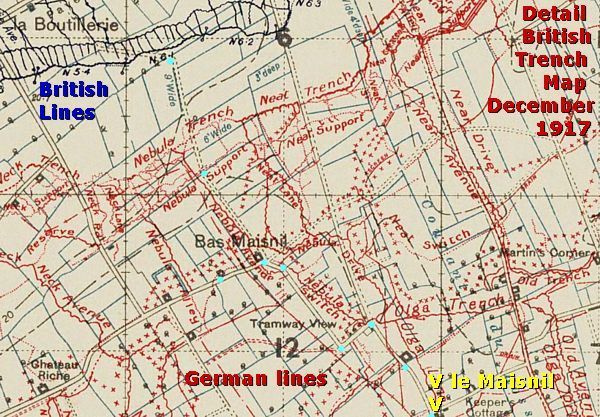
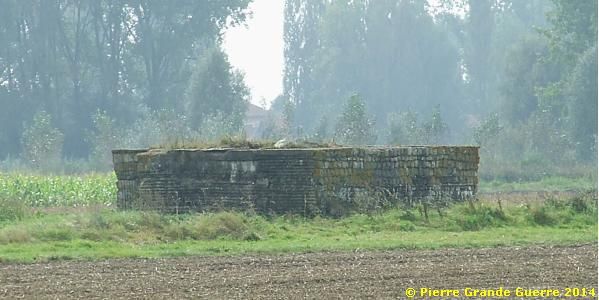
At the junction we follow left the Rue du Bas for this bunker.
We return to the junction to continue northward via the Rue des Breux.
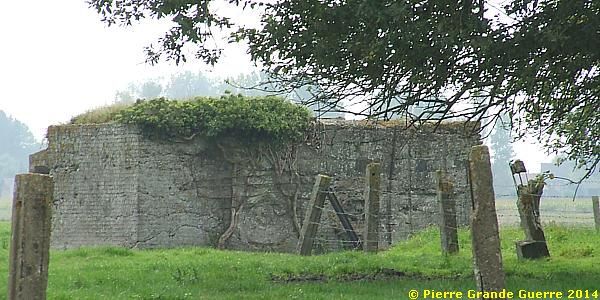
On both sides of the road we see different bunkers. On the east side of the road:
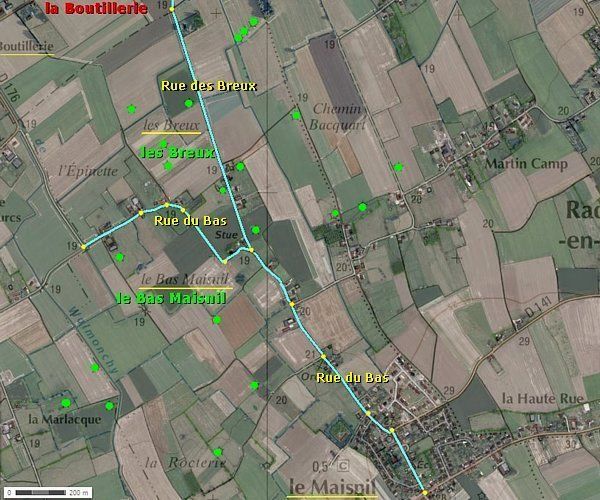
Farther on, at the west side of the road:
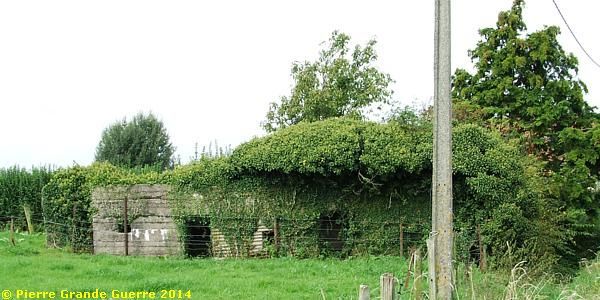
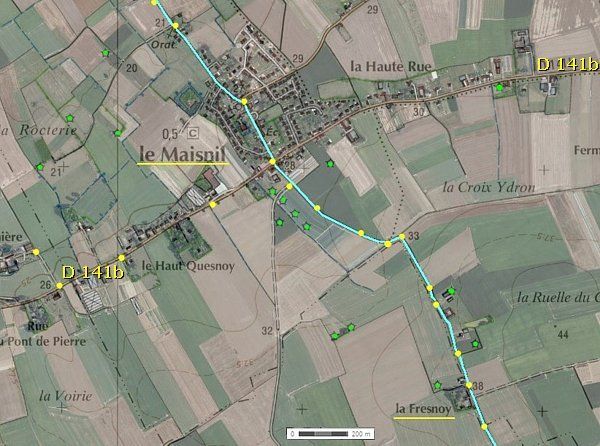
Many of these bunkers are too far away to make an acceptable photo. Instead I show you a satellite view of the other bunkers at les Breux.
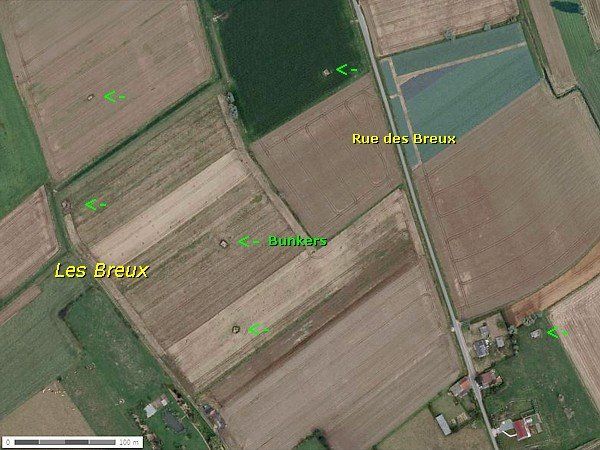
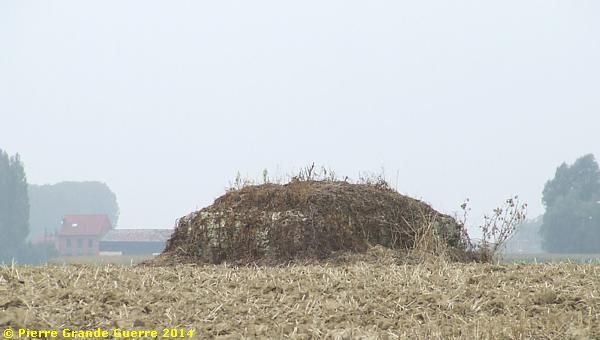
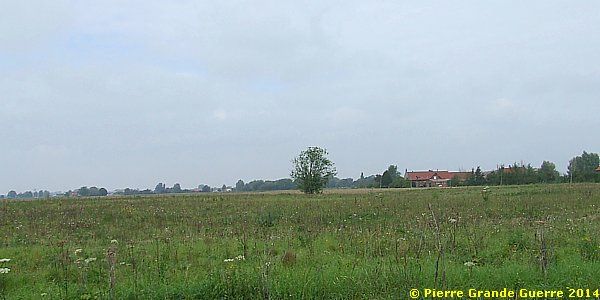
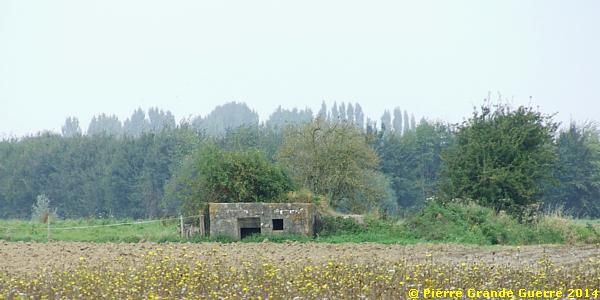
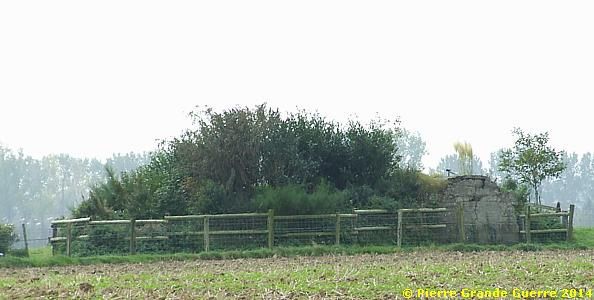
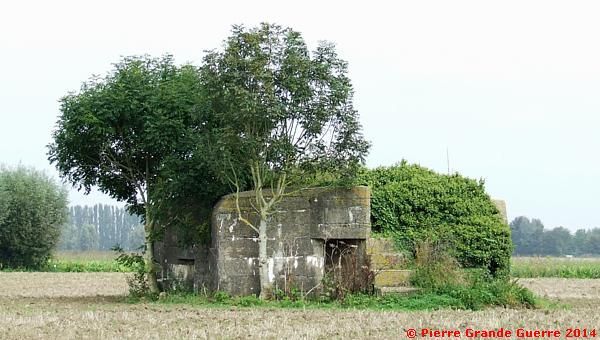
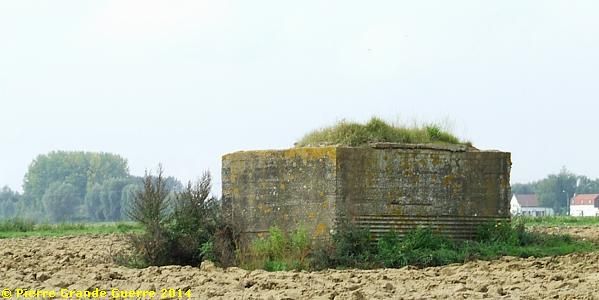
Farther on north stands this bunker in a field on the west side of the road.

The white houses on the horizon, on the right, form the hamlet of la Boutillerie.
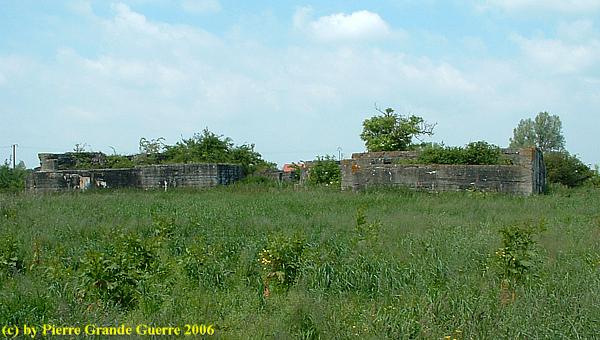
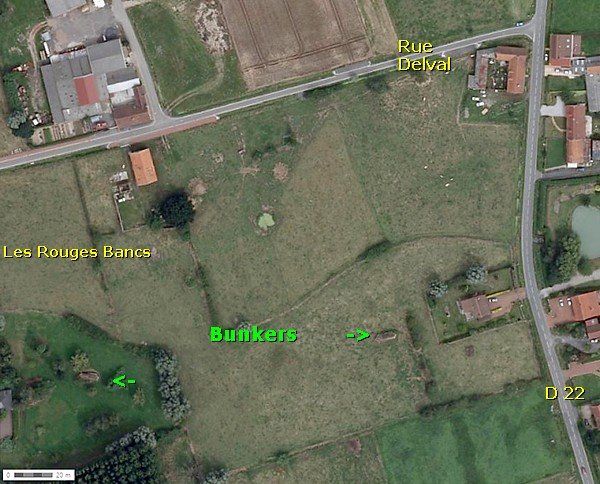
Just before the T-junction with the D175 - D 22 stands a set of three bunkers on the west side, hardly visible from the road, but visible by satellite.

We turn right to the D 22 and next we turn right to the D62 - Rue du Bas southward into the direction of Radinghem-en-Weppes.
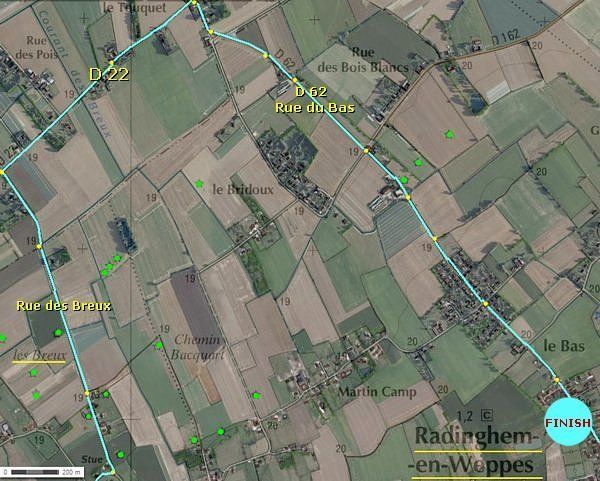
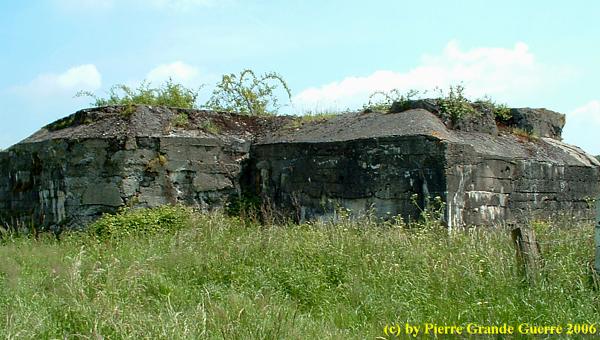
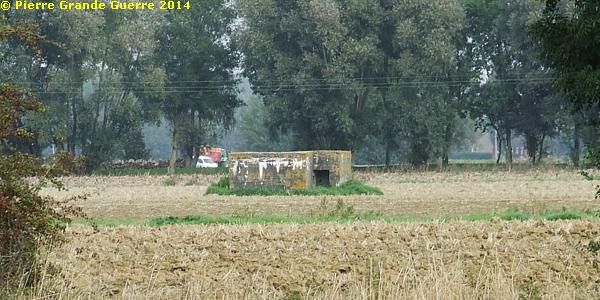
On the east side of the road we detect three bunkers, 100 - 200 m. away from each other. This site is also the last stop of our route.
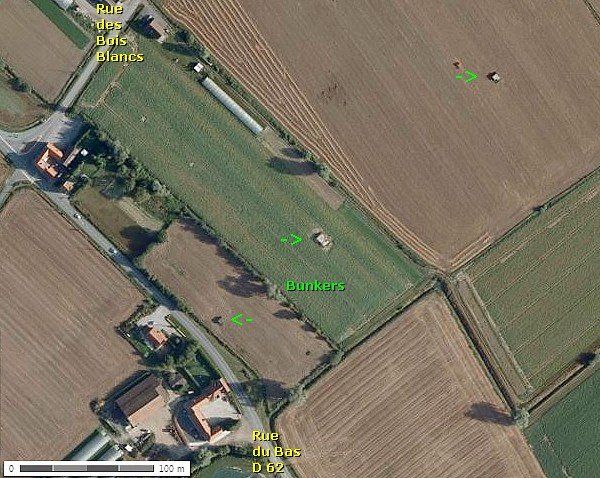
The northernmost bunker.
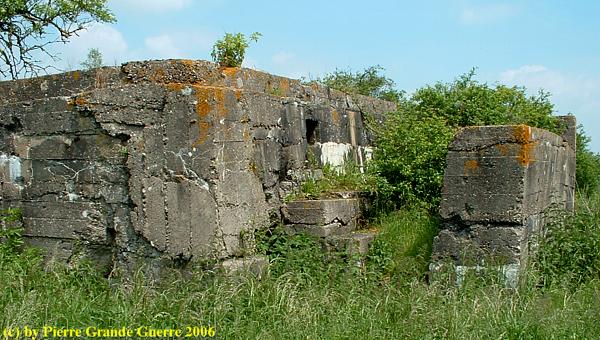
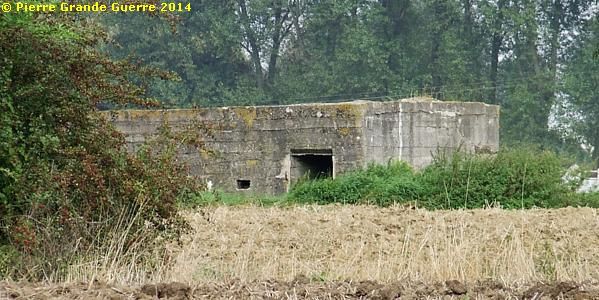
The second bunker.
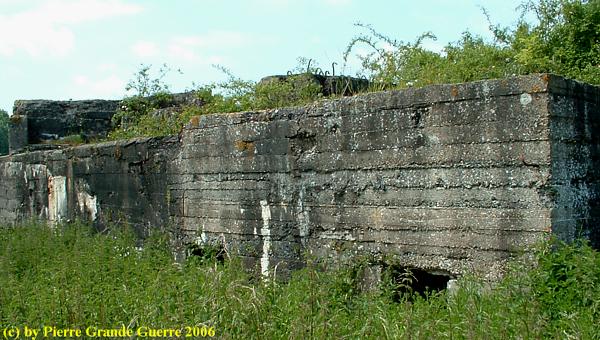
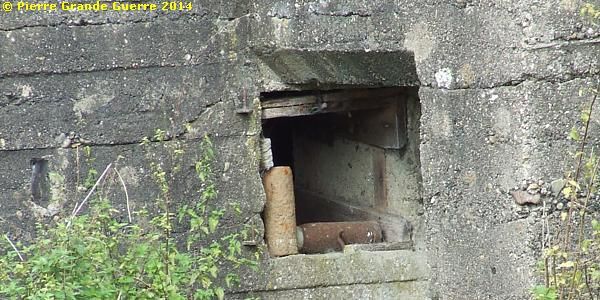
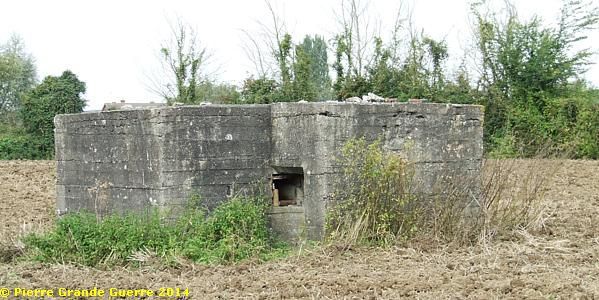
An "Iron Harvest" of grenade relics rest in a window of the southern bunker, close to the road.
We finish our route with this last view at the southern bunker along the Rue du Bas.
Continue to the next chapter: " Neuville-St. Vaast - Souchez "